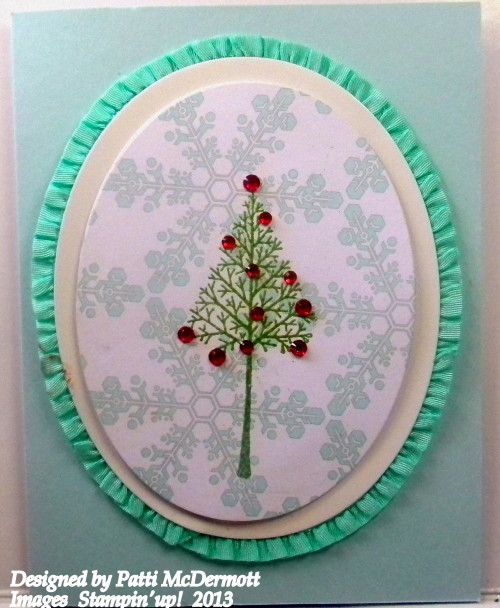
I haven’t used these beautiful Frosted Finishes Embellishments very much because I forgot I had them. That means I have to start cleaning out my craft room….SOON! They are so pretty and sparkly which you can’t tell from the picture so much, but take my word for it. It dazzles! You can find them on page 28 of the Holiday catalog.

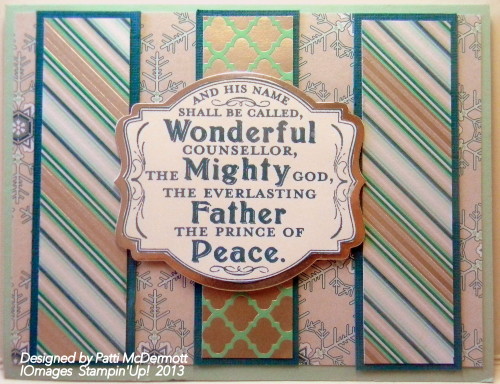
We have new Holiday stamps that are sold separately and this sentiment is one of them. I used the beautiful DSP, Winter Frost Specialty (page 29 in the Holiday Catalog). It is hard to see in this photo but both designs have that silvery background. I also use our new Silver Foil sheets (page 28) to back the sentiment. I think that, along with Island Indigo ink, sets off the entire card.
What awesome cards you can make with the EVERYDAY OCCASIONS kit. I made these two cards, yeah, I didn’t follow the rules. Although, all the directions are indicated on all 20 cards for you to make them as the samples that they have posted in the kit, you can also go outside the box and do your own thing. That is what I meant by not following the rules..LOL There is over $50 worth of card making joy for just $29.95. See below or contact ME to find out more and to get the flyer.

Thank You Thursday
My, I can’t believe how fast a week flies by! It seems like just yesterday I was saying thank you for making our blog such a great place to hang out. And now I see it’s time again to say thank you with another discount on a fabulous Stampin’ Up! product! This week I wanted to say thanks with a little bit of Designer Series Paper, or “DSP” as we like to call it! So head over to the online store and grab this paper before the deal runs out!
As always, the discount will be applied at check-out!
 |
This And That Epic Day DSP: 130814 Regular Price: $10.95 US/$13.50 CAN Discounted Price: $8.21 US/$10.12 CAN |
 |
Soho Subway DSP: 130140 Regular Price: $10.95 US/$13.50 CAN Discounted Price: $8.21 US/$10.12 CAN |
 |
I Am Me DSP: 130138 Regular Price: $10.95 US/$13.50 CAN Discounted Price: $8.21 US/$10.12 CAN |
 |
Etcetera DSP: 130129 Regular Price: $10.95 US/$13.50 CAN Discounted Price: $8.21 US/$10.12 CAN |
Let us know in the comments below which DSP is your favorite!
This is MPP with a new twist! I added some other elements to change around the design. Had fun playing with this.
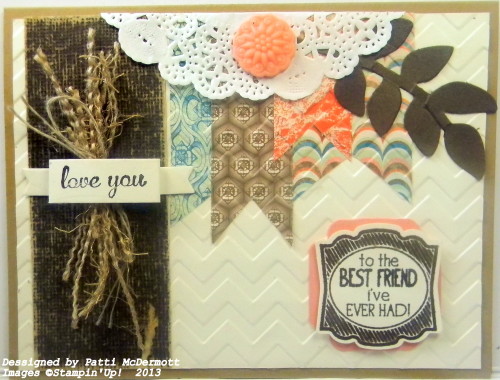
We making this card in my Friday night Hostess Club. It is made with the Truly Grateful found on page 19 in the Holiday catalog. In addition, I used the Stamp set Wonderfall found in the big catalog on page 84. I used Tangerine Tango, crushed curry and Soft Suede. I shredded the burlap ribbon for my focal point and tied it with Linen Thread.

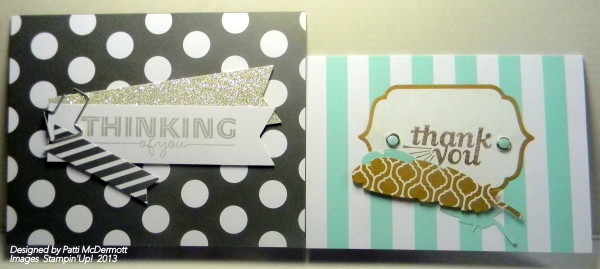
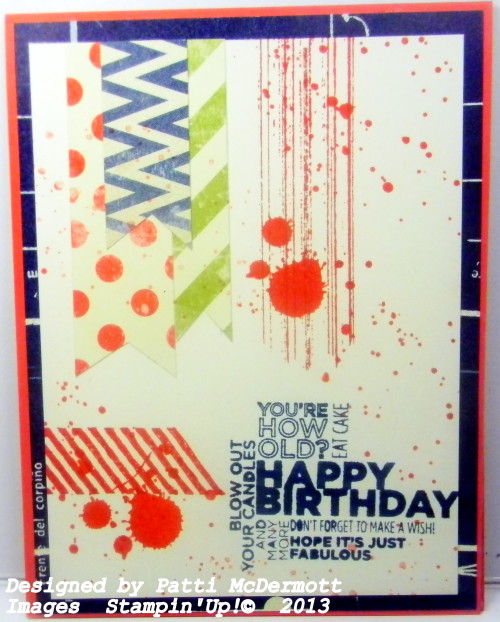
This is not your Mama’s Paper Pumpkin! I went outside the box with these two cards. While the card that is designed to make with MPP is cool, I just thought I would change it around a bit. You get a Midnight Muse ink spot with the kit but I also incorporated Gumball Green with it. I also used our new Chevron punch.
Hey all, Sarah Webb here! I have been a product designer at Stampin’ Up! for a little over six months, now. When I started working here back in March, my first assignments were for the annual catalog 2014.


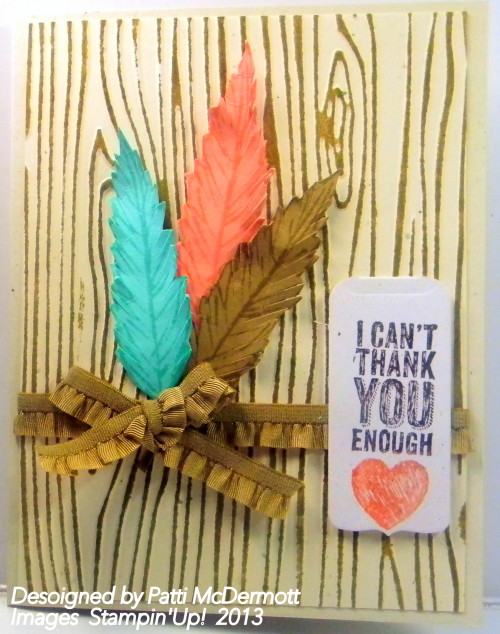
The sentiment on this card is from the awesome set “Chalktalk”! I used the feathers from the stamp set “Gently Falling” on page 65 in the big catalog and trimmed to give them that feathered look. Easy peasey! Feathers are very popular this year and I love how they look with our new incolors, don’t you? Would love if you left me your comment at the bottom of this post. I love hearing from y’all on what you think of my creations.
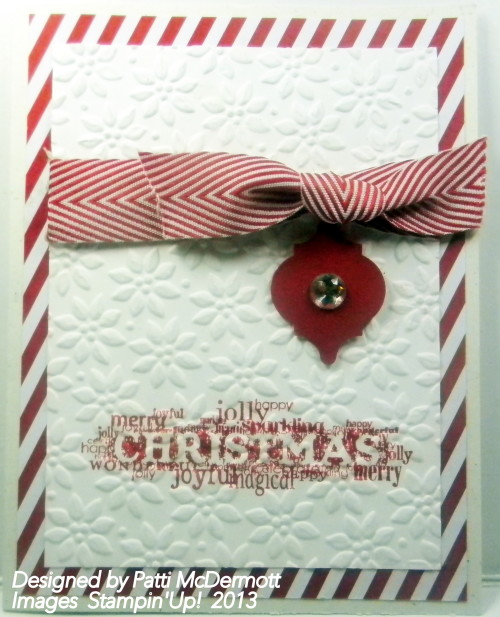
Have you seen our new 6X6 DSP card packs in the Holiday catalog? We have 2 different ones this year filled with beautiful Christmas designed paper. The one I used today on this card is found on page 22, called Season of Style. I also used our beautiful Chevron ribbon. I made the ornament with the Mosaic punch found on page 80 of the big catalog and the embossing folder is Petals a Plenty. The sentiment is from Seasonal Sayings.
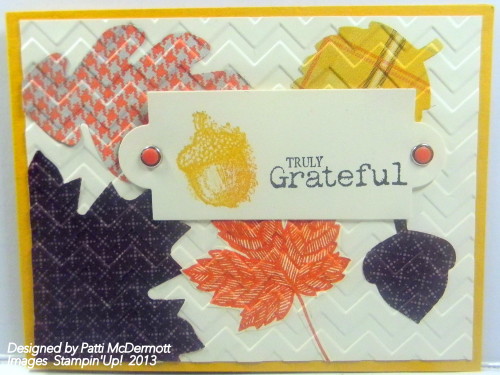
This card was made by cutting out our DSP Sweater Weather with the Big shot Autumn Accents Bigz Die found on page 192 in the big catalog. I then glued them on a 5 1/4″ X 4″ piece of Very Vanilla card stock and ran it through the big shot with the Fancy Fan embossing folder. I used the stamps for the sentiment from the Truly Grateful set in the Holiday catalog on page 19, and finished off the sentiment with our absolutely COOL CANDY DOTS and brads found on page 171. Don’t you love how it just sets off the entire card?
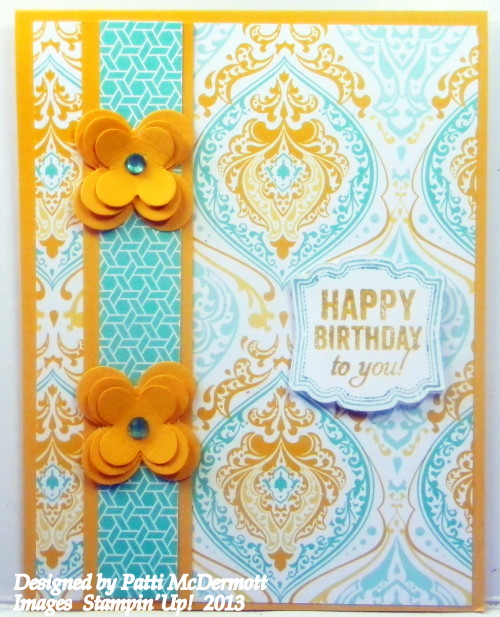
I made my own washi tape with our cool gingham wheel found on page 82 of the big catalog. I used colors strawberry slush and coastal cabana. The flowers are from the set Flower Shop found on page 94. I punched the flowers out with the coordinating punch found on page 183. You can get this as a bundle and save 15%. I made the washi tape with our crepe paper and our Big Shot multipurpose Adhesive sheets (120805). I will show a video on how to make your own washi tape. Coming soon. 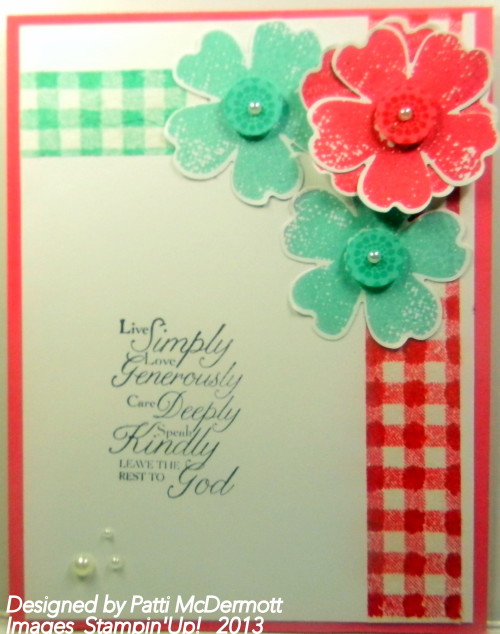
We’ve been trying to think outside the box-well, the rectangle that is. And we’ve found a great alternative to the plain postcard-shaped postcards! We are happy to introduce you to some new 5″ x 7″ and 7″ x 5″ professional print options: the Scallop and Artisan Postcards*.


Gorgeous, right? Just update your software, and you’ll have access to these new shape options-perfect for wedding invitations, birth announcements, holiday cards, or every day greetings.
Don’t forget, our postcards are double-sided, so we’ll print on the back for you too. You’ll also notice a new bleed area in your menu so that you can design your card with the end result in mind. Then, when you’re ready to order, just select the shape you want in the ordering options.
Cards start at $2.25 US/$2.75 CAN and regular bulk discounts apply. Click here (US/CAN) for more information.
So go on, shape up those postcards.
*Available in the United States and Canada only.
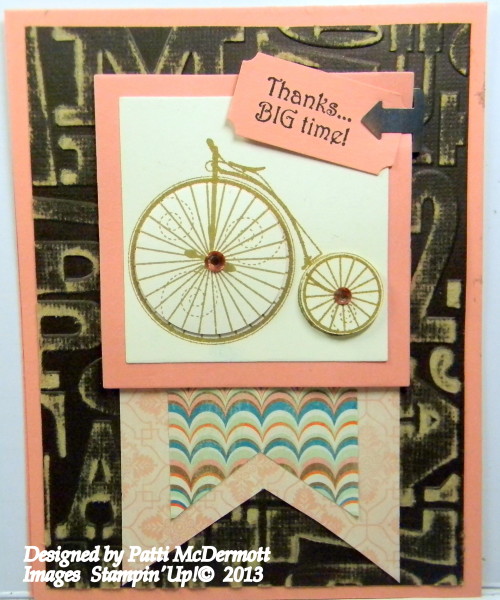
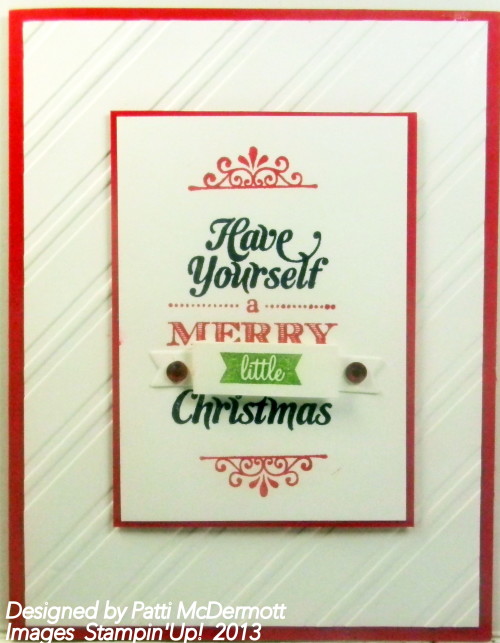
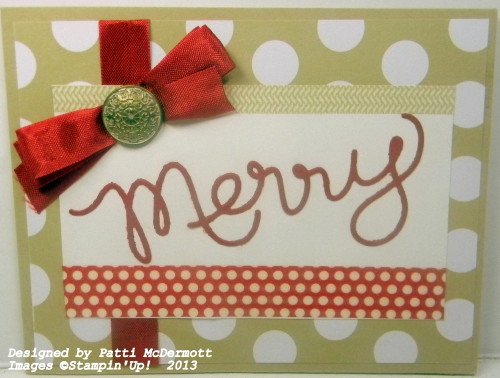
I love the sentiment on this stamp set. It is on page 27 in the Holiday catalog. I used the marker technique on this and used Real Red,Black Stazon and Gumball Green. I used the new embossing folder, Stylish Stripes, page 22 in the Holiday catalog. In addition, I used the little banner in the thinlets collection for “little”.
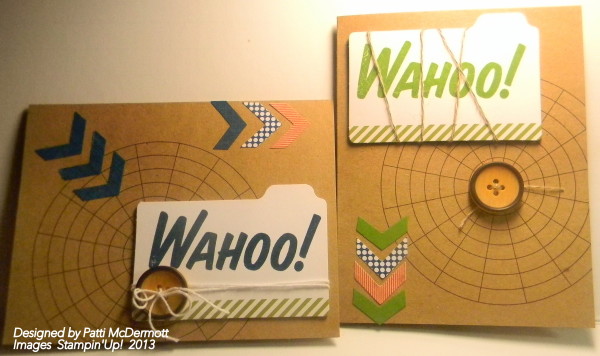
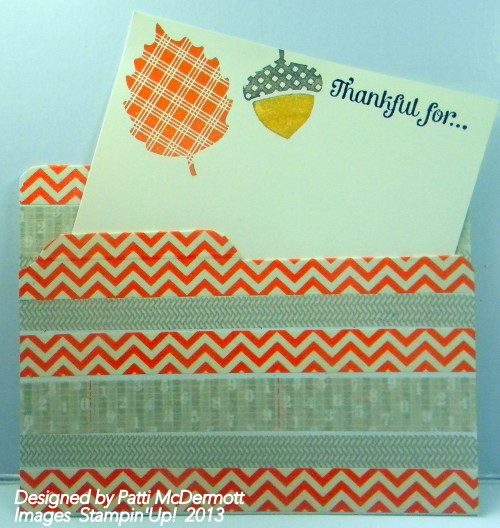
Can you believe I made this file folder pocket card with our new Envelope punch board? You can do more with this board than make envelopes. I will also be featuring some boxes made with this item. Just in time for Christmas. You can even round corners with it. How awesome is that? I used a ton of washi tape on this card. Love it!

These are some of the cards that were created for our Downline/ Sideline Shoe box Swap this past weekend. These cards were created by Patty Biggerstaff, Maureen Leeper and Chelle Naron. So much talent! Don’t you just love them? There were several others that I will post another day. It was a pot luck and the food was outstanding. Not only can these ladies create works of art but they can cook too! Patty Biggerstaff offered her house to hold this event with 15 ladies all taking part in the swap.
It is such awesome fun to get together, stamp and share ideas with a bunch of ladies who all love what we do. If this sounds like the perfect job, believe me, it is. You can join my team and start your own business. Contact me here to learn more.

I consider myself something of a football widow. I know many of you out there know just what I mean. Football season starts, and our hubbies set up camp in front of the TV. Honestly, I don’t mind. He’s doing what he wants, and that frees up time for me to do more of what I want. What do I want to do? Really? You have to ask? I want to CRAFT! The average football game is 2–3 hours long. With the premium sports channels, watching all of the games together can take an entire afternoon. That gives me lots of time to work on my projects!
The new Envelope Punch Board is one of my favorite new tools. If I don’t have my Undefined Stamp Carving Kit carving tools in my hand, it’s because I’m punching out the cutest envelopes on the planet. Check out the advent calendar I made using the Season of Style Designer Series Paper! As I said, the cutest envelopes on the planet!


The Envelope Punch Board was so easy to use as I sat on the couch next to my football fanatic and made all of my envelopes. I went with the 3″ x 4″ envelope size because it requires a 6″ x 6″ piece of paper—which is an awfully convenient size when working with 12″ x 12″ Designer Series Paper! I also used two sheets of 12″ x 12″ Crumb Cake Cardstock to break up the pattern and get a little stamping onto the banner.
I want this advent calendar to be reusable, so I used some scraps of Cherry Cobbler and Old Olive Cardstock to punch out 1/2″ circles (with the 1/2″ Circle Punch) to make my closures.

I used a pencil to mark where the closures should be adhered, then pierced holes for the Silver 1/8″ Mini Brads using my Paper-Piercing Tool. I used a small amount of Multipurpose Glue to glue the envelope together, then wrapped 6″ of Cherry Cobbler Baker’s Twine between the circle closures to close it.

The steps up to this point took me about an hour and a half. I didn’t really want to spend the rest of the afternoon stamping the numbers for my advent calendar, so I used MDS to create the little numbered flags. (I’ve included the flags PDF here.)
After printing my flags, I joined my hubby back on the couch and went to town cutting out the flags and curling them a bit with my Bone Folder before attaching them to the envelopes with more Multipurpose Adhesive.

The final step was stringing all of the envelopes together with more Cherry Cobbler Baker’s Twine to make two banners. I chose to string them into two separate banners so they didn’t take up an entire wall!
I’m a fan of advent calendars that come with sweet treats inside. These envelopes don’t allow for much to be stuffed inside, so I’m going to think of fun activities that we can do together all month long and put a notecard inside each envelope.
What fun activities do you do when your significant other is watching football?
Melody H.
Concept Artist
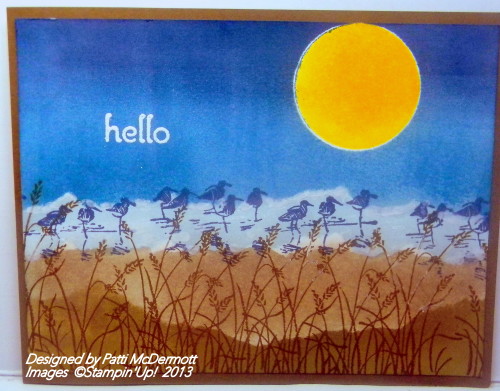
I love this stamp set because it reminds me of where I live and the marshes and beaches. It also has very good sentiments for birthday, thank you and thinking of you. See this on page 69 of the big catalog.
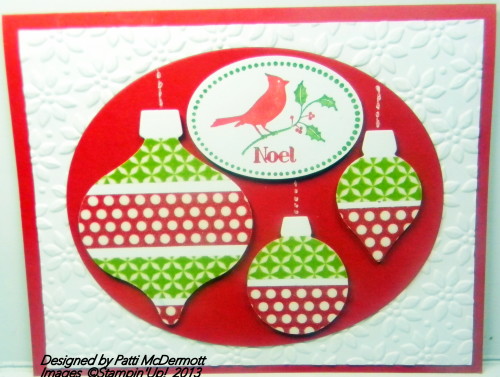
I love this little cardinal from the Hostess set “Warmth and Wonder” in the Holiday catalog. These ornaments are made from the framelits released last Christmas. I covered them with washi tape. You can do so much with that tape. I love, love, love it! Our Holiday catalog has both Halloween/Fall and Christmas Washi Tape. Call me you get yours.
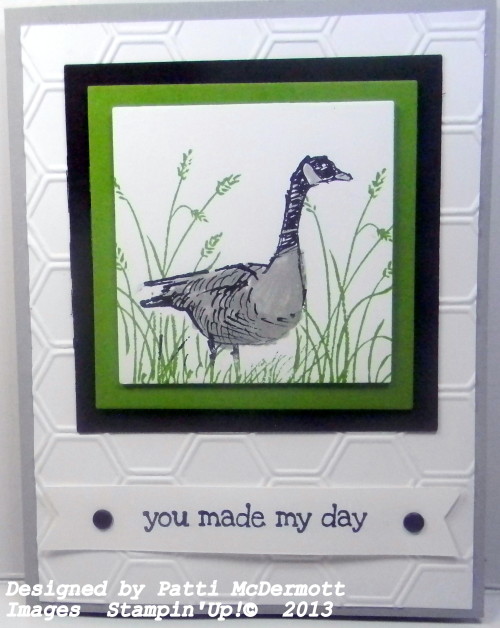
I used the stamp set Wetlands again to create this card. I took a class in Savannah a couple of years ago with the famous Michelle Zindorf for brayering and now I hardly ever use my brayer. So, I thought it was time to get it out. I love this technique and should use it more often.
I used the Expressions Thinlits to make this card. You can find them on page 36 of the Holiday catalog. This set has three different sentiments. A little tip on how to use these: Place the cutting plate on the magnetic platform (or tab 2 of the regular platform) and then add your card stock or paper. Add two (2) pieces of wax paper and then the thinlit. Cover with the cutting pad and run through the machine. Easy peasy! If you do have a problem removing the fine little letters you can use your paper piercer through the little holes in the thinlit. If you need more information contact me HERE.
This card was created with the set gorgeous grunge and the designer paper Etcetera. The sentiment is from Delightful dozen. All of these products can be found in the Big Catalog.
Map It Out
Hey, everyone! Here are the latest and greatest photopolymer sets from Stampin’ Up!
I had a major travel bug at the beginning of the summer and it manifested itself in these two new sets: Map It Out & Greetings From. They’re great by themselves, but when used together they can help you create customized maps for so many things: save-the-dates, moving postcards, travel keepsake containers, and just-saying-hello cards, to name a few.

The greetings from the Greetings From Stamp Set fit perfectly around the state abbreviation icons from the Map It Out set. Add a dashed line, an “x” to mark the spot—and other fun details—and you’ve got a perfect postcard to send to friends and family to let them know you’ve moved.
I stole a journal from the Try Me Paper Pumpkin kit, and embellished it with some stamping to make a travel journal. It’s the perfect size to bring on a trip and make notes along the way.
Erin T.
Catalog Designer
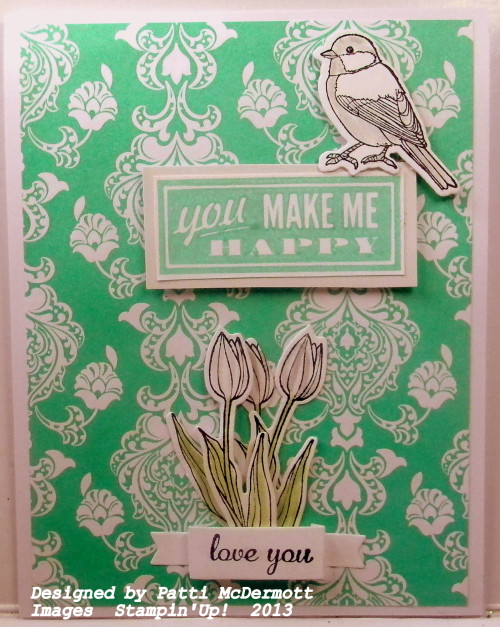
Now this stamp set is only available to hostesses that have a total party of at least $150. Easy to accomplish when you offer supplies from Stampin’Up!©. You can see the rest of the stamps from this set on page 39 of the Holiday catalog.
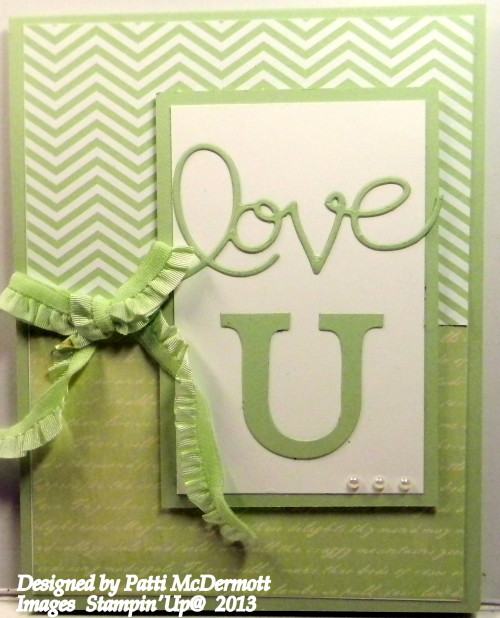
I combined this card with both stamp sets and used the framelits to cut out the bird and the flowers. So easy when you have the right tools. At the last minute I added the “Love you” and used the new Thinlits to punch it out. Love these!
This stamp set found on page 33 of the new catalog, is comprised of wonderful sentiments that can all be punched out with the Artisan punch. I created this cards, believe it or not, with odds and ends that I found on my desk when I decided to clear it off. You can never tell what is under all the stuff until you try to clean up. LOL
You can be so creative when you have the right materials. Our card stock, buttons, ribbons, Designer Paper, inks and embellishments, all go together because everything is color coordinated.
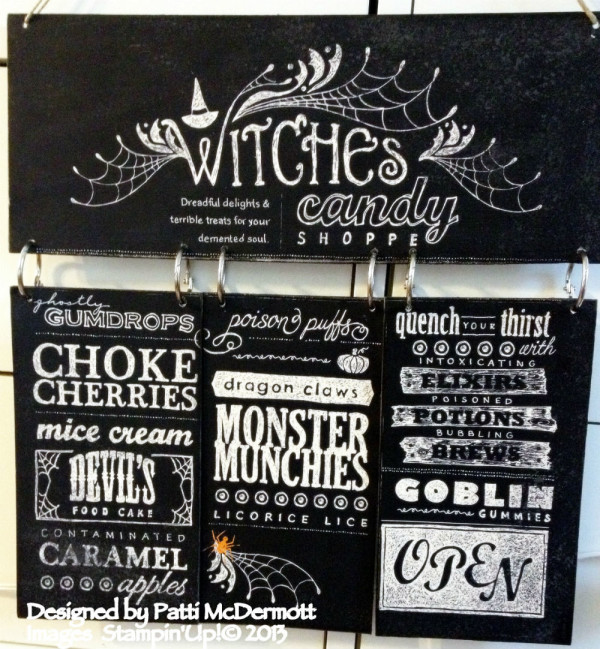
I cased this from a felllow demonstrator on Stampin Connection. It was on the leaderboard and when I went back to get her name so I could give her credit, it had dropped off the leaderboard. So unfortunately, I am unable to give her credit for her inspiration. If anyone knows who this talented demonstrator is, please drop me an email so I can add her name here.
This so easy to make. The entire wall hanging is one sheet of the Witches Brew DSP. You just cut it out in sections, adhere it to heavy chipboard (I used tombow multi purpose glue), the kind that comes with our specialty DSP. Sand down the sides and cover the exposed sides with basic black ink. Punch holes in it with a cropadile, add the silver rings and hemp twine to hang it with and viola! you are good to go.
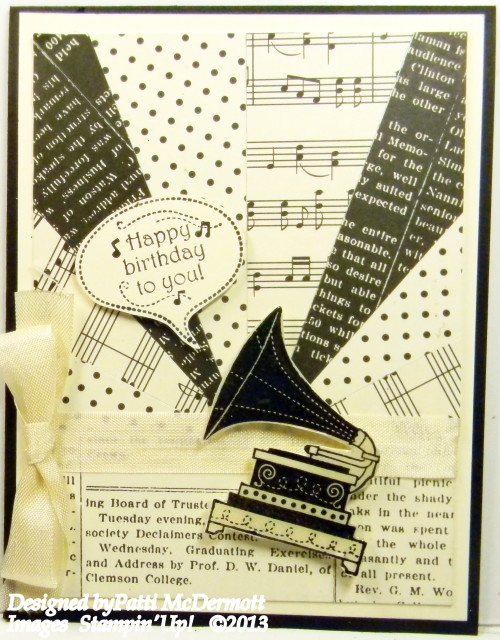
Here I am showing off the fabulous Modern Medley DSP and Timeless Talk stamp set. I used Crystal Effects on the stamped image. I cracked up when I read the printing on the DSP. Can you see on the very bottom, Clemson College? That has to be our Clemson here in SC. I understand that Clemson University, in the beginning, started off as Clemson College and was also a military school. My oldest daughter graduated from CU and I need to send this card out to her on her BD. She will get a kick out of it.
I like to use a monochromatic themes when I make my cards because we have the best colors. Here I used one of our new in colors Pistachio Pudding. WOW, saying that color makes me wish I had a big bowl of Eddy’s Pistachio ice cream in front of me right now. I may have to run out to the store…..
I saw this is technique on a Stampin’ Connection video by a fellow Demonstrator Dawn Olchefske. This can really be addictive. Looks complicated but very simple. This particular card we did at one of my clubs. The stamps are from Everything Eleanor and the sentiment if from the hostess set Express Yourself.
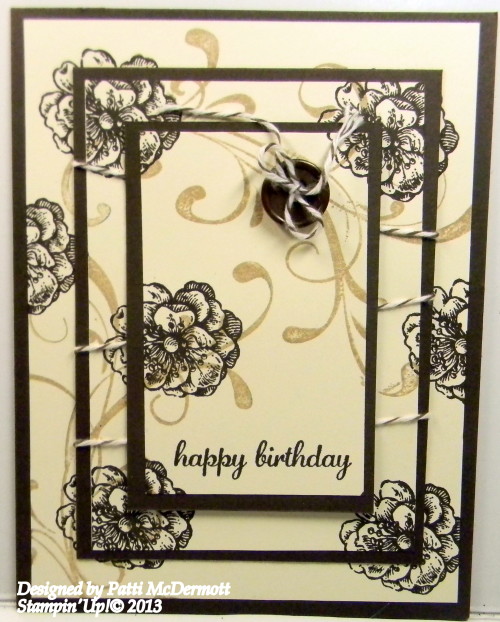
I love these colors together, don’t you? I used the stamp set Timeless Talk and the Alphabet Press embossing folder, with early espresso Cordination card stock. In addition, I used Venetian Romance DSP. I don’t know how long these banners are going to hang around but I sure like using them to show off our gorgeous papers. I am having so much fun using the new hardware clips to embellish my cards.