
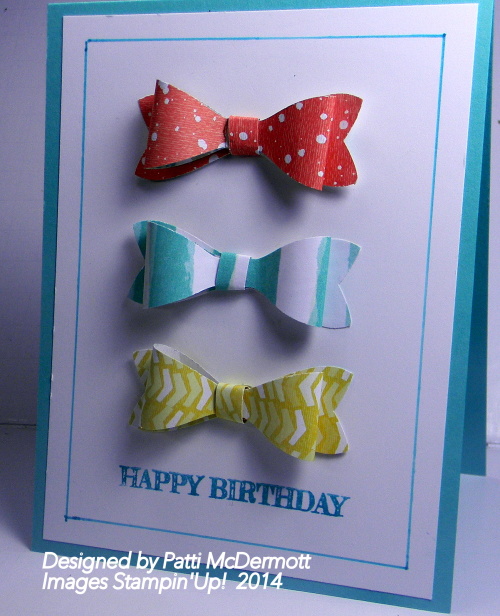
This is pretty much cased from the new catalog. If you have your new catalog already it is on page 12. The bows were made with our new bow punch. So easy and so much fun! Don’t you love this gorgeous DSP?
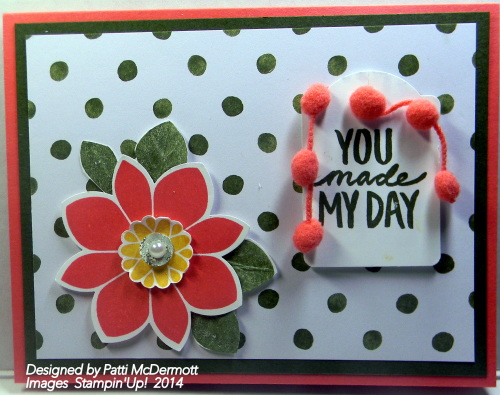
This is another card created from a stamp set from the new Spring catalog. You should have rec’d yours by now so you know how wonderful all the goodies are this catalog. It is my favorite so far. You will be able to start ordering from it on January 6th. In addition, you can start earning FREE Sale-A Bration items that day also. For every $50 you spoend you get to choose a stamp set or other item in the SAB catalog FREE! The sentiment on this card is a SAB stamp.
This may look a bit complex, but you can make it in an hour or so. Pick your leaf size (I used the 2-1/2″ Circle Punch) and get cracking!

I traced around a large bowl that fit exactly onto one of our thick 12″ x 12″ backing boards, then used a smaller bowl for the center circle. This wreath size took almost four sheets of Crisp Cantaloupe Cardstock (18–20 circles per sheet) plus 10 circles from the Gold Foil Sheets for the contrast section.

The “JOY” hexagon from the Hello December Project Life Accessory Pack was perfect for the clean “geo” feel I was wanting. After drilling a little hole for hanging (by hand—could not work out how to put the drill bit in the drill!) I sponged on a bit of Whisper White Craft ink.

Okay, so now that you’ve got the idea, why not try it another way? Here I used the Garden Green sheets from the Trim the Tree Designer Series Paper Stack and stuck them in roughly three rounds on the back of an empty roll of ribbon. Mini wreath . . . so cute!


Hope you’re enjoying decorating this Christmas. Wishing you peace and a wonderful holiday season with the ones you love.
Susan Wong
2014–2015 Artisan Design Team
2-1/2″ Circle Punch (item # 120906)
Crisp Cantaloupe Cardstock (item # 131298)
Gold Foil Sheets (item # 132622)
Hello December Project Life Accessory Pack (item # 135833)
Trim the Tree Designer Series Paper Stack (item # 135824)
Whisper White Craft Stampin’ Pad (item # 101731)
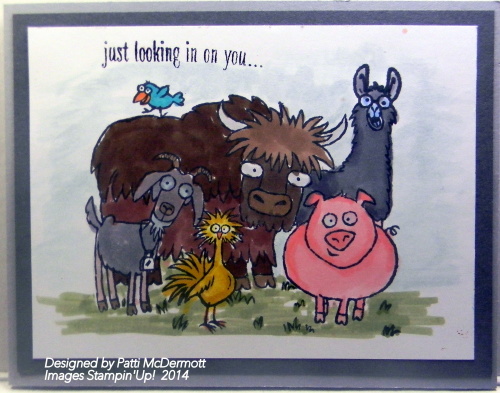
I think this stamp is the bomb! It has several sentiments that you can use from Happy birthday to a get well. It will be in the new Occasions catty coming out in January.
|


This is a bundle that will be coming out in the new Occasions catalog in the beginning of January. There are so many new items that I am wild about and can’t wait to show you. Keep posted.
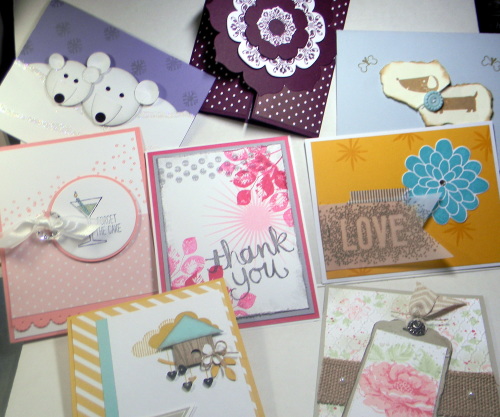
These are some of the cards that were swapped at our Demo meeting. The theme was anything but Christmas, because as you know, we are all pretty tired of demoing Christmas about this time of the year. New Spring catalog to be announced very soon, along with SAB…..Can’t wait!
Remember our 3D paper pumpkin project from a few weeks ago? Now you can create fun paper snowmen using the same technique!

One snowman takes about thirty minutes to make—and they’re super-easy to put together. Make one for Christmas . . . then change his hat and get him ready for Valentine’s Day!

You could also put these snowmen to work as cute package toppers or place card holders for table settings. Or gather together your kids or grandkids together for a fun little party making snowmen families to decorate your home.
Create the hat using a 2-1/4″ circle, a 1-1/2″ circle, and 1-1/2″ x 5″ strip of cardstock or Designer Series Paper. Make the snowman’s body using 2-3/4″, 2-1/4″, and 1-7/8″ circles (or whatever size you wish)! Use the Owl Punch for eyes and the Bird Punch to make the nose and mouth. Easy!
Cindy B.
Sr. Staff Writer
Supply List
Early Espresso Cardstock (item # 119686)
Kraft Cardstock (item # 133674)
Pumpkin Pie Cardstock (item # 105117)
Whisper White Cardstock (item # 100730)
Nordic Noel Designer Series Paper (item # 135822)
Gold Foil Sheets (item # 132622)
Red Glimmer Paper (item # 121790)
Real Red 3/8″ Satin Woven Ribbon (item # 135840)
Frosted Sequins (item # 135835)
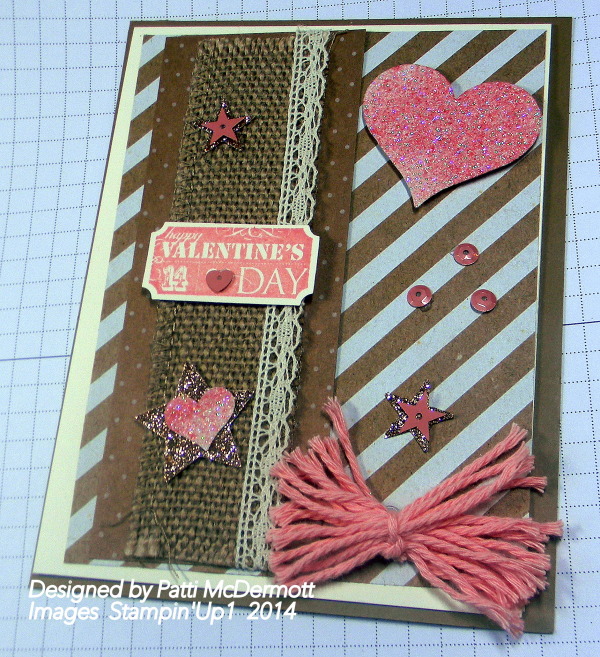
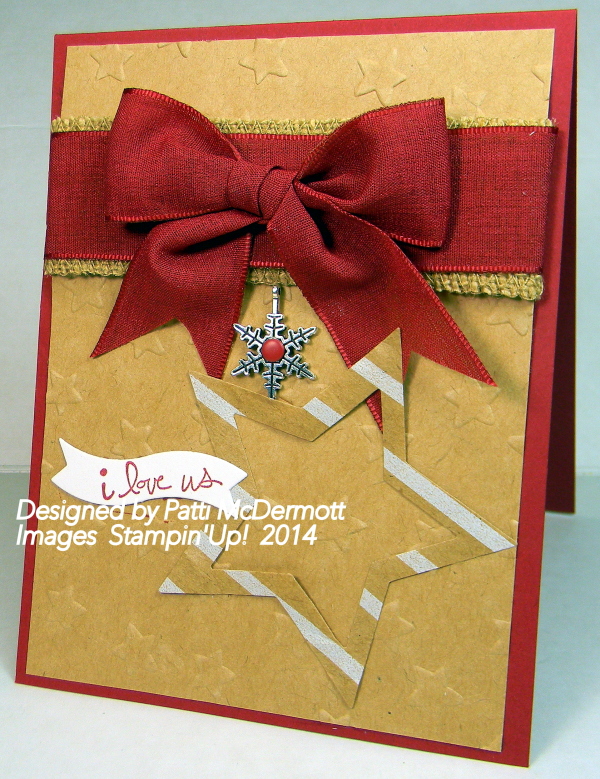
At our Christmas dinner on Monday night, we all had to bring a swap for everyone entered and this was my swap. It could be anything but Christmas, hence my Valentine card. I used the burlap ribbon, champagne glimmer paper, Dazzling Diamond glimmer paper stained with Strawberry slush ink, Crisp cantaloupe heavy bakers twine and In-color sequins. The background paper is from the bags found in our Celebration Basic Kit, page 202 in the AC. I needed more that 10 so I cut them up to use both the front and back. In addition, I used Under the Tree DSP found on page 5 of the HC. In the next couple of days I will try to post some of the swaps I rec’d from other demo’s at this event.
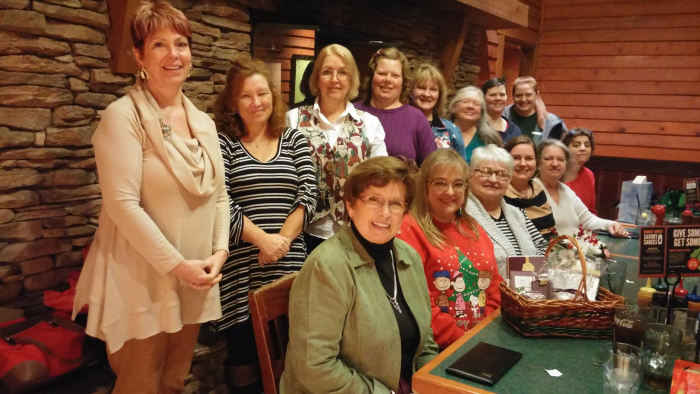
These ladies are the best! We get together about every 2 months to stamp and have fun, discuss new techniques and new business events. They are Stampin’Up! Demonstrators that love doing what we do. This was our annual Christmas dinner held every year in December at a local restaurant.
From left to right back row: Barbara Moody, Stacey Green, Lynda Grossman, Sandy Barker, Barbara Todd, Bonnie Everard, Amanda Brazzleton, and Maureen Leeper. Front row: Pamela Subjek, Chelle Naron, Patti McDermott, Melissa Thomas, Kim Humbard, and Michelle Ratliff. Missing from Picture are: Amy M Ord, Pat Nethercott, Cindy Leal, Colette Taylor, Wendy Trimble, Linda Phillips and Teresa Smith.
If you would like to join us and do what we do, contact me here.
Snuggles and Smooches. It’s a bit of a silly name, right? I think it’s a fun, new way to say “hugs and kisses.”
The sentiment was inspired by my love of snuggling my two pups, Hammond and Penny, and giving smooches to my hunky husband, Joe.
At first glance, this month’s new photopolymer release may seem like it is just for Valentine’s Day, but I think it could be used any time of the year when you want to share some affection with those you love.

Two of my favorite images in the set are the swirls. I’m sure you’ve noticed how trendy it is to wind up some Linen Thread or Baker’s Twine and use it as an element on cards and other projects. You can see on this card how the large swirl image helps accomplish a similar feel.

The swirls also create interesting background patterns that can be used with a technique like emboss resist—as shown on this adorable little card.

Or simply stamp—as I did on this tag. The “Love” sentiment works great for creating a chalkboard effect.

There are three heart images in this stamp set. They were drawn to coordinate with three of our heart punches: the Sweetheart Punch, the Hearts Border Punch, and the heart from the Itty Bitty Accents Punch Pack. The “Love” sentiment will also coordinate with either of the Tag Topper punches.
I can’t wait to see what you create with this stamp set—whether it’s a valentine for someone you love, notes of encouragement, memory keeping, or treat packaging. Leave a comment below with a link to your creations, or upload them to Pinterest and tag them #SnugglesAndSmooches. I know I have more ideas for what I want to make with this set!
Melody H.
Concept Artist
|
|
|
|
||||||||
|
|
|
|


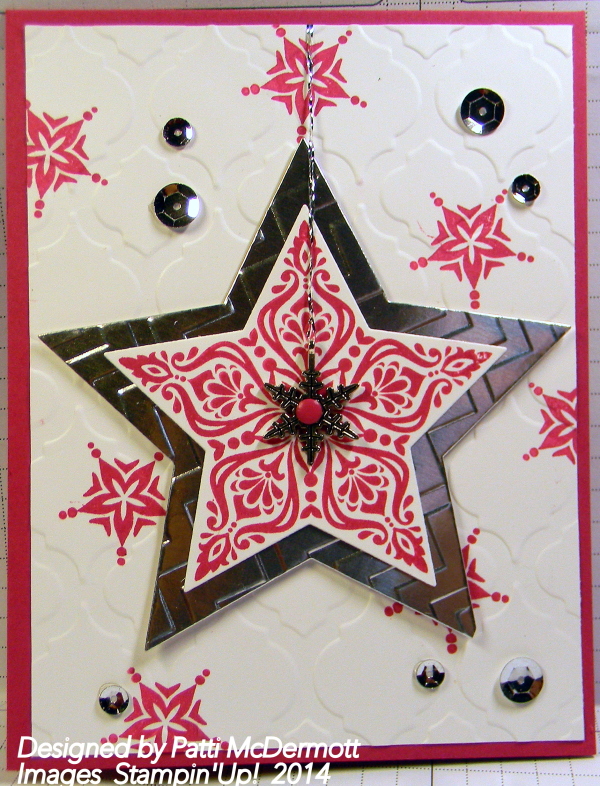
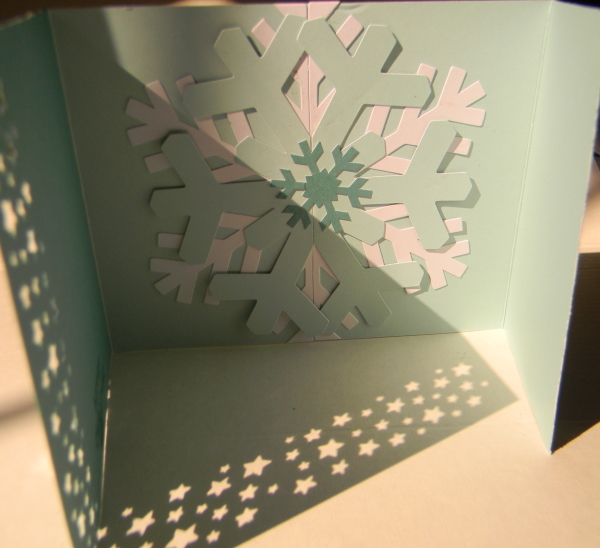
Sometimes I like to do Christmas in colors other than the normal red and green. I used Rose Red on this card, stamped the backgound and then embossed it with the Modern Mosaic Embossing Folder. I used the silver sequins and backed the image with Silver Foil paper which was also run through with the Chevron Embossing folder.
The stamp set is Bright and Beautiful found on page 25 in the HC and cut out with the matching star framelit dies found on page 231 of the AC. I finished it off with the Gorgeous All is Calm Snowflake embellishment found on page 22 of the HC. I added a Rose Red candy dot to the cent of the snowflake.
We had a great class on the Many Stars kit and these are some of the ones we did in class. However, there are 26 stars altogether but I am showing only 10 in this picture. Once I get my wreath for the front door I will put the largest Star in the middle of it. I love the kraft paper and card stock it is really very vintagety looking. Don’t you think?

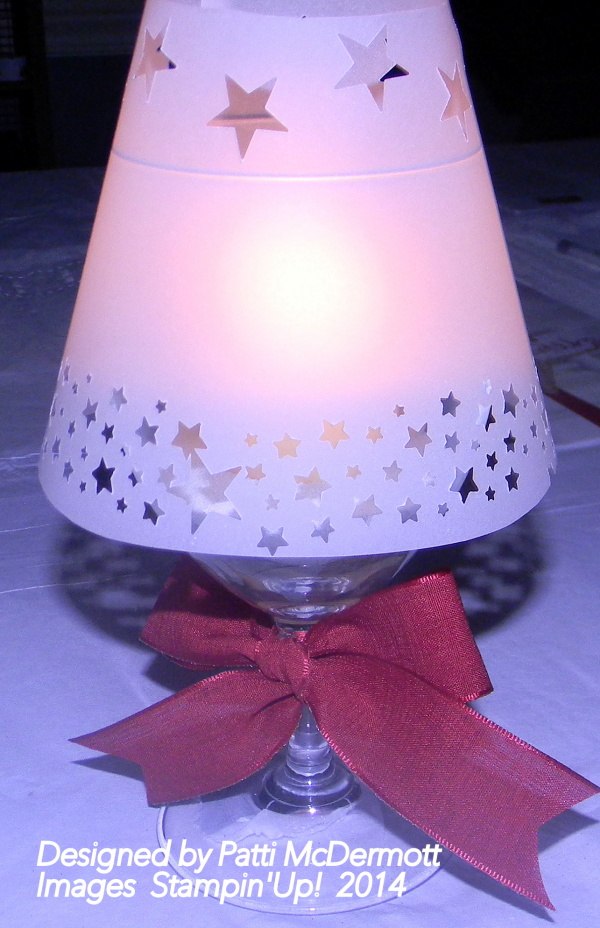
We made this beautiful luminary shade at our Wednesday morning club this week. We used vellum card stock and the Confetti Stars punch found on page 30 of the HC. In addition I used the small star punch found with the Itty bitty punch pack on page 222 of the AC.
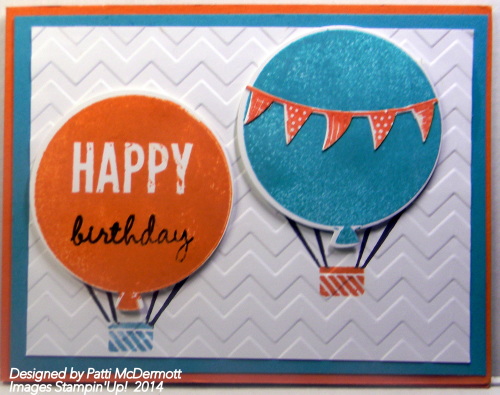
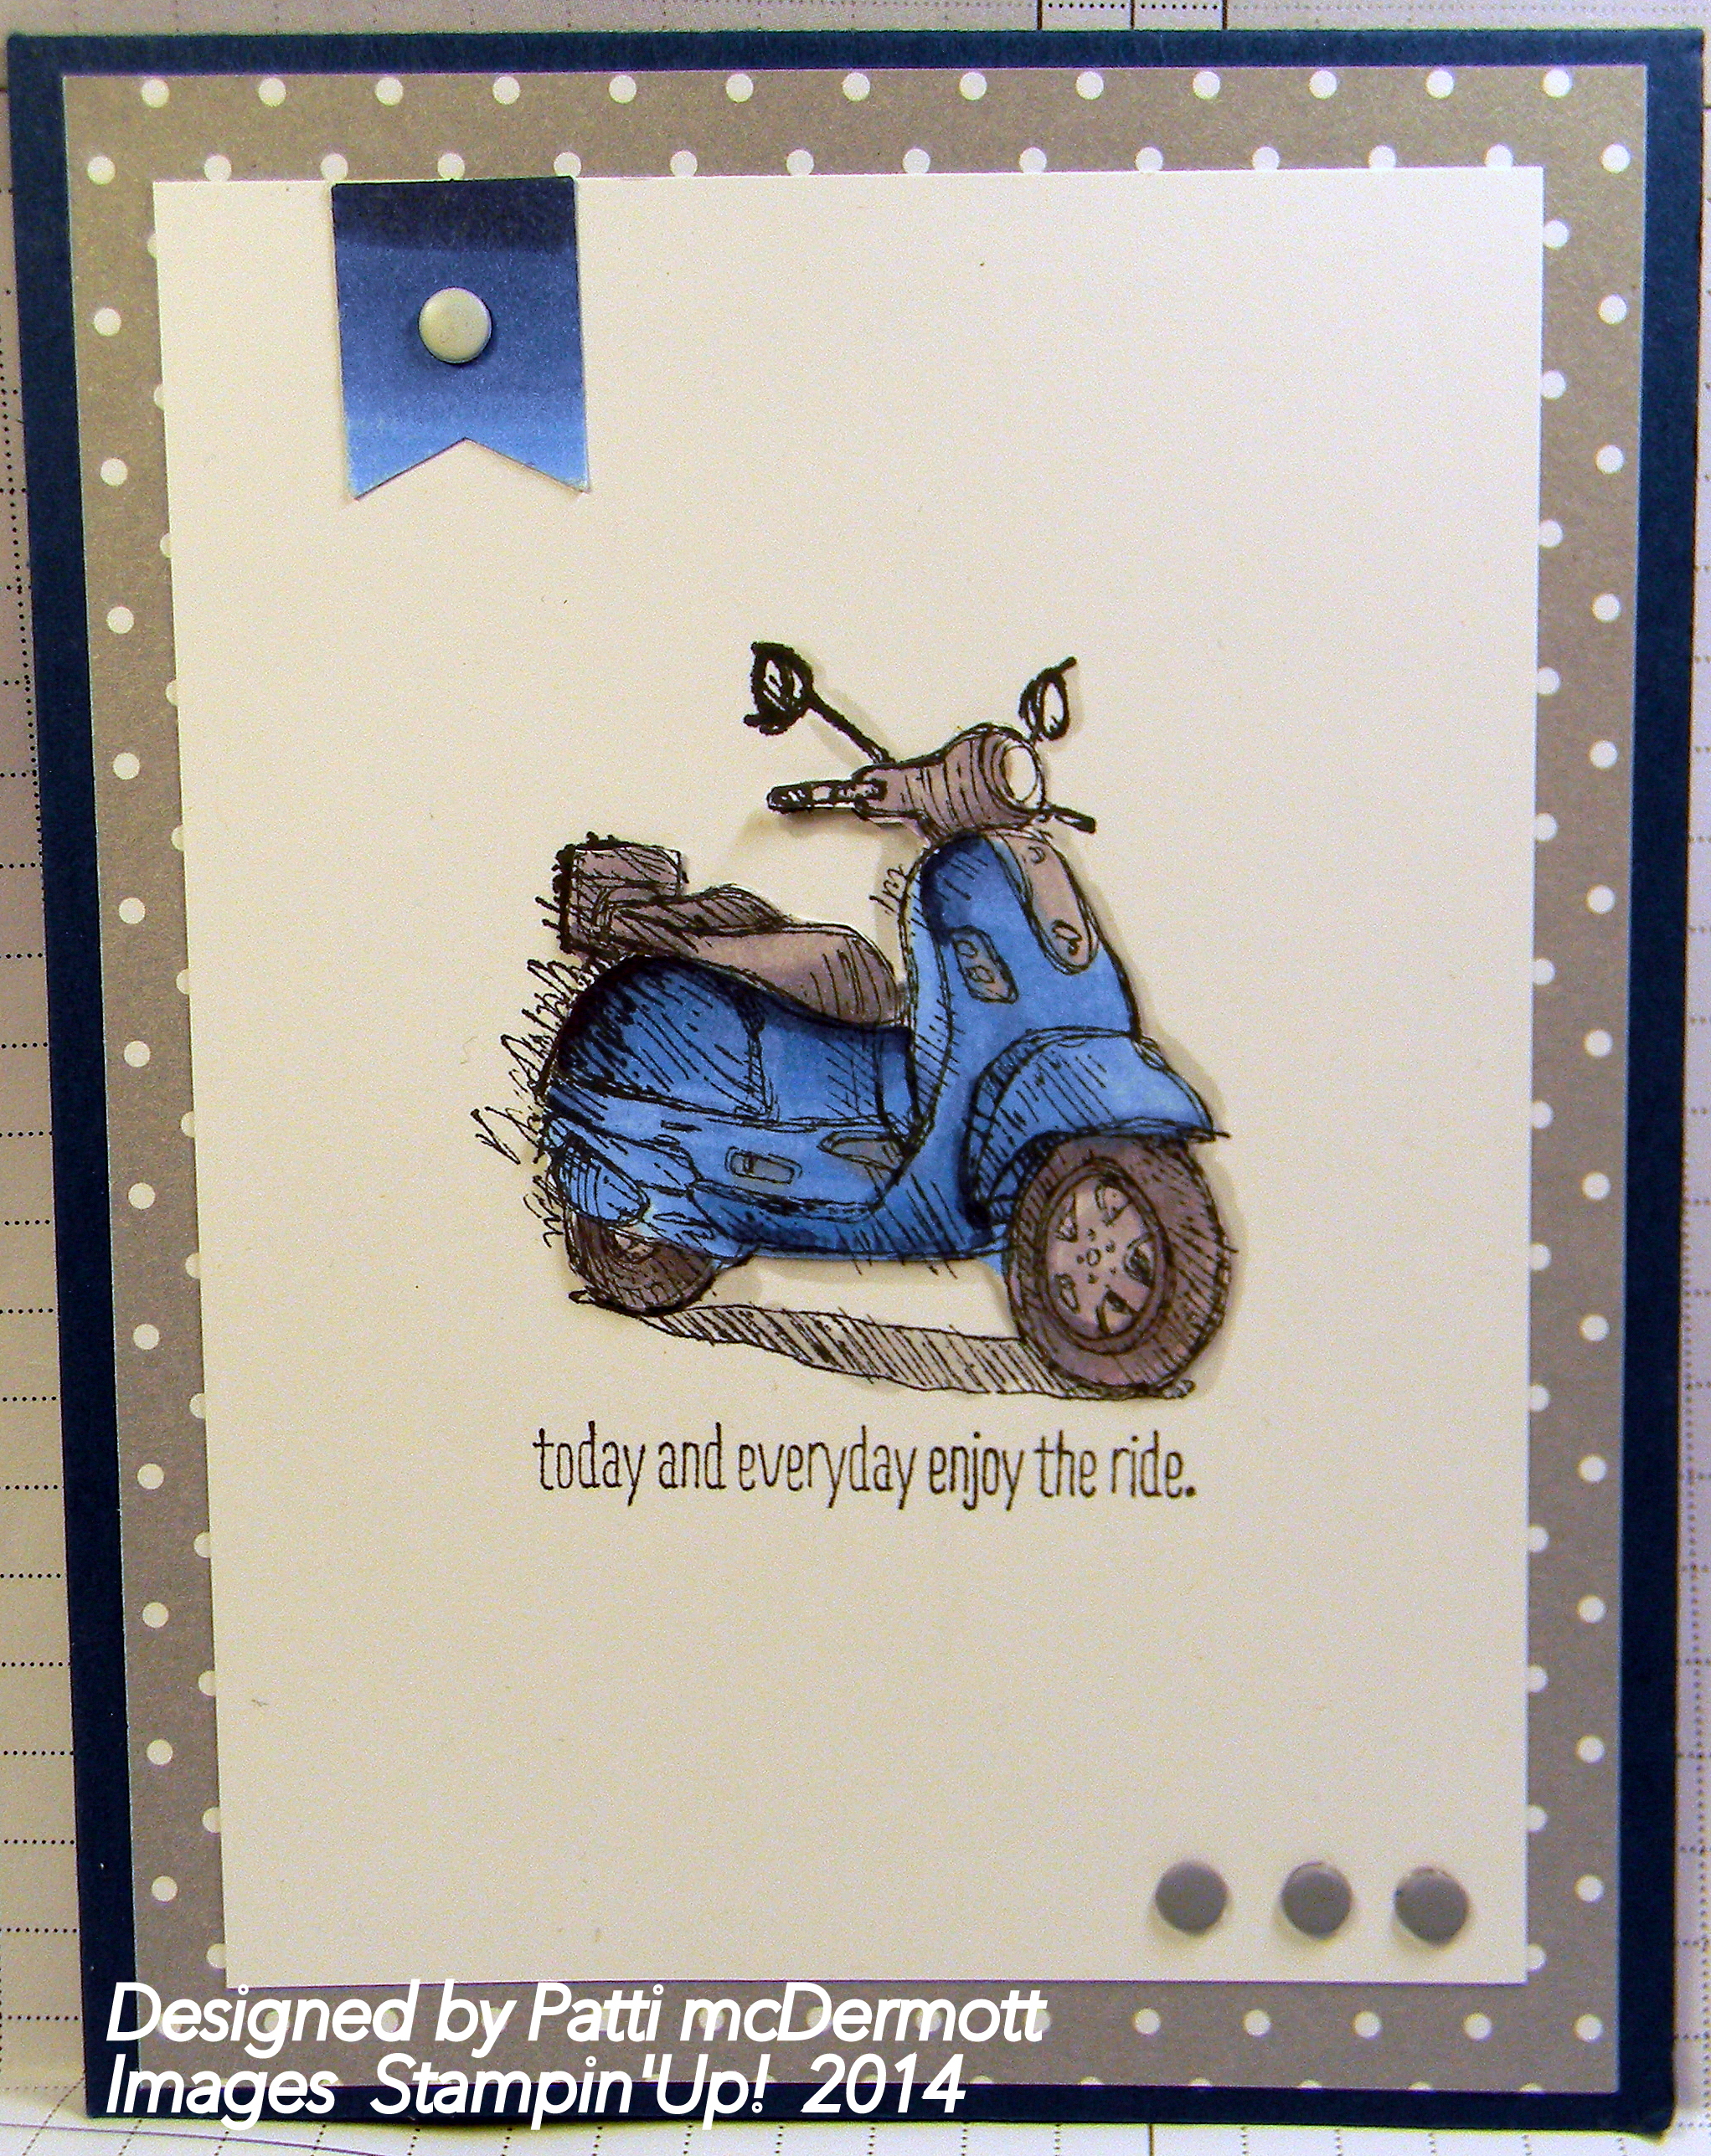
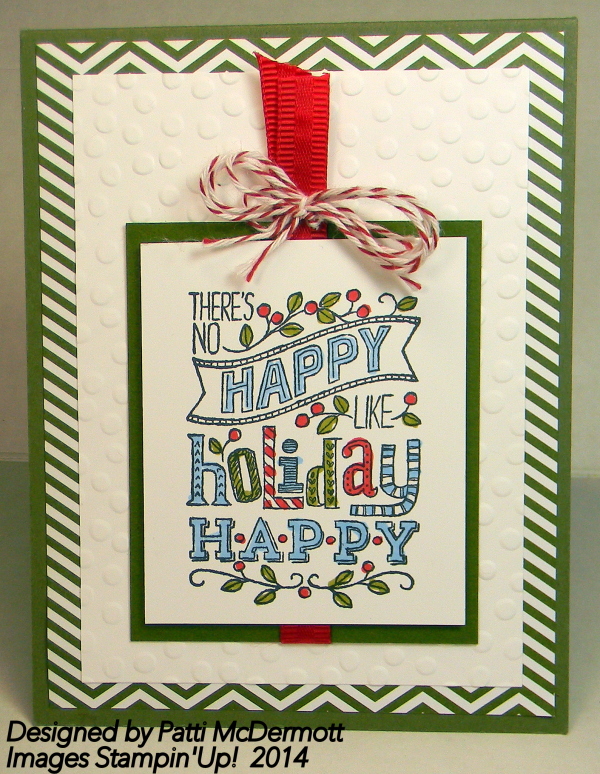
I love this set, Today and Everyday, found on page 168 in the big catalog. I used Blendabilities to color the image. In addition, I used our Banner punch and Candy dots to embellish an otherwise clean and simple card. Hope you like it!
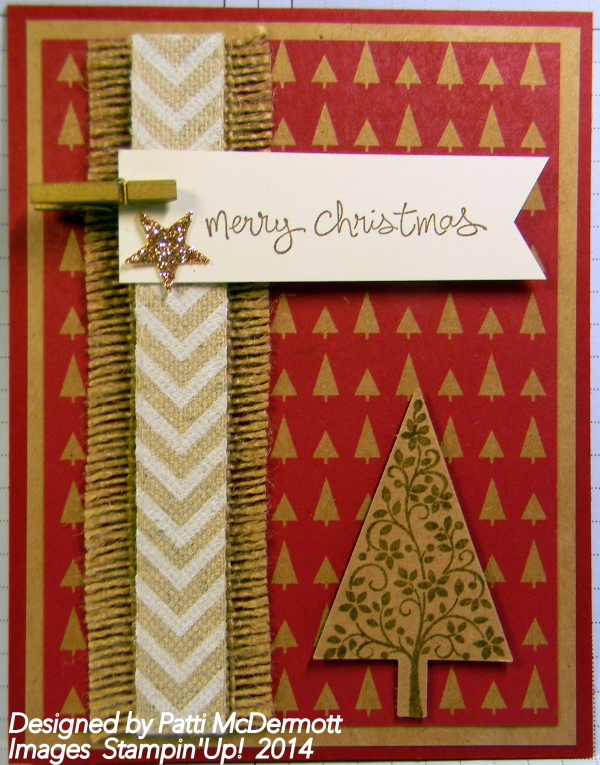
I created this card with the New craft paper and Specialty Trim the Tree DSP found on page 5 of the Holiday catalog. I used the Burlap ribbon, the Natural Chevron ribbon, and the clothes pin embellishment, found on pages 205 and 207 of the AC. The Tree is stamped with the set, Festival of Trees and punched out with the matching punch found on page 24 of the HC. We are making this card in my Wednesday morning club today.
|
|
|
|
||||||||
|
|
|
|


If you’re a papercrafter, Christmas is probably one of your busiest times of the year. And I don’t know about you, but I pretty much want everything in this year’s holiday catalog . . . so deciding what to buy has become a serious problem for me! Is anyone else in the same boat?
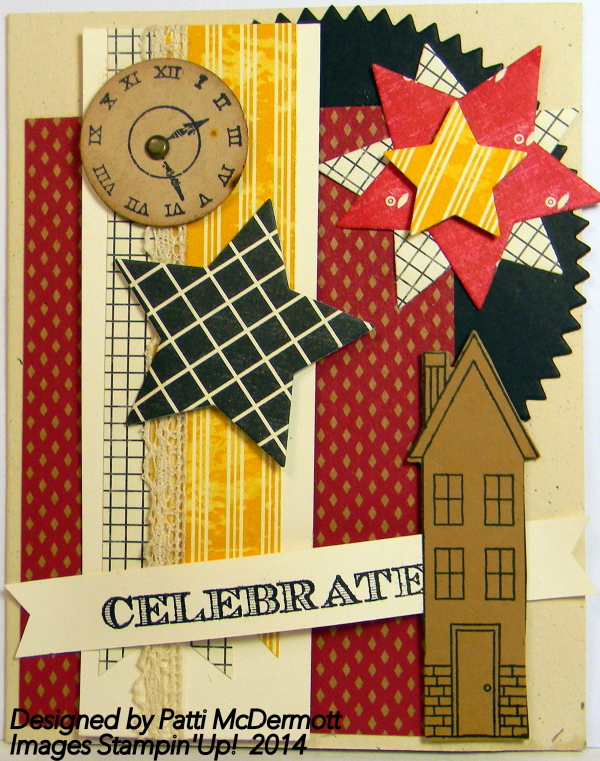
For instance, I love the Nordic Noel Designer Series Paper house design—and thought it would make a cute focal point for a card. So I cut out a row of them and adhered them to a Whisper White Note Card using Stampin’ Dimensionals. Then I added a Real Red 3/8″ Satin Woven Ribbon bow, a bit of Cherry Cobbler Baker’s Twine, and stamped the cute little “Merry Christmas” from the Holiday Home Stamp Set in Real Red ink on Whisper White Cardstock. Finally, I punched out the sentiment using the Large Oval Punch and adhered it to the card using Stampin’ Dimensionals. To me, this looks like Christmas!
Then there’s the beautiful Nature’s Peace Stamp Set . Here’s what it looks like when you emboss it using VersaMark ink, Gold Stampin’ Emboss Powder, and the Heat Tool.

Another gorgeous product from the holiday catalog is the Bright & Beautiful Stamp Set. I used it to make a fun neighbor gift package. (Tip: cut the top of a Petite Café Gift Bag using the Large Scallop Edgelits Die.)

I used the same stamp set to create a tag that doubles as a Christmas tree ornament—and put it on one of our Takeout Boxes for a cute gift.

Here’s a fast and easy card made using the adorable Cheerful Christmas Stamp Set.

Last of all, check out this idea for a treat bag—again using that awesome Bright & Beautiful Stamp Set.

If you haven’t seen the holiday catalog yet, click here (US/CA)—then tell us which products are YOUR very favorites!
Cindy B.
Sr. Staff Writer
Supply List
Nordic Noel Designer Series Paper (item # 135822)
Whisper White Note Cards & Envelopes (item # 131527)
Stampin’ Dimensionals (item # 104430)
Real Red 3/8″ Satin Woven Ribbon (item # 135840)
Cherry Cobbler Baker’s Twine (item # 123125)
Holiday Home Photopolymer Stamp Set (item # 135095)
Real Red Classic Stampin’ Pad (item # 126949)
Whisper White Cardstock (tem # 100730)
Large Oval Punch (item # 119855)
Nature’s Peace Stamp Set (item # 135119)
Gold Stampin’ Emboss Powder (item # 109129)
Bright & Beautiful Stamp Set (item # 135029)
Petite Café Gift Bags (item # 135826)
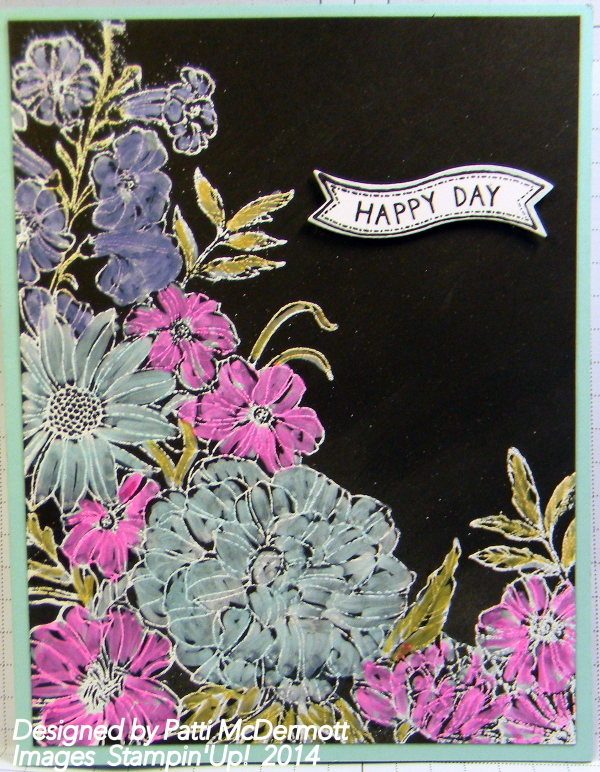
I embossed this card in white embossing powder and filled in the open areas with our White Stampin’Chalk Marker. Then I colored with Blendabilities. Very easy technique. The stamp is a background stamp, Corner Garden, and can be found on page 175 of the Big catalog.

JOIN STAMPIN’ UP! THIS WEEK TO SAVE AND EARN MORE
Save more earn more
Get a 25 percent discount on the Starter Kit when you join Stampin’ Up! between November 24 and December 2 . You’ll receive all the same great products AND get five percent cash back on all commissionable orders placed in December.
Trying to remember the last time we had a cash back offer? Here’s a tip: NEVER!
It’s a first-time-ever deal that you absolutely cannot miss!
More details on this limited-time offer are listed below. Can’t wait to get in on the fun? Get started here .
Details:
All orders must be finalized in the month of December to qualify for the five percent cash back offer.
A demonstrator must remain active to receive the five percent cash back.
The five percent cash back will be awarded in January.
Deadlines:
Mail: All Starter Kit orders must be received by the end of the business day on December 2 .
Online: All Starter Kit orders must be finalized on December 2 by 11:50 PM (MT).
When I first saw the new in-color Mossy Meadow, I was a bit turned off by it and was determined that there was no way I was ever gonna like this color. However never say never, because now that I have used it I am gaining a fondness for it. Here I used it as the base card and the DSP background paper. The image is from the stamp set Mingle all the Way, page 17 of the HC. I used the Stampin’Write Markers to color the sentiment. To finish it off I used the red satin woven ribbon and Cherry Cobbler Bakers Twine. What do you think?
Again I used the new Kraft CS and embossed it with the Lucky Stars EF, page 30 of the HC. I love our new 12X12 Under the Tree Specialty DSP, page 5. So elegant and really adds another dimension to this card. I used the Linen Thread and the Cherry Cobbler Linen Ribbon. The tree was cut out of glimmer paper with the Tree Punch found on page 24. The star was punched out with the Itty Bitty Accents punch Pack, page 222 in the Big catalog.
 ,
,
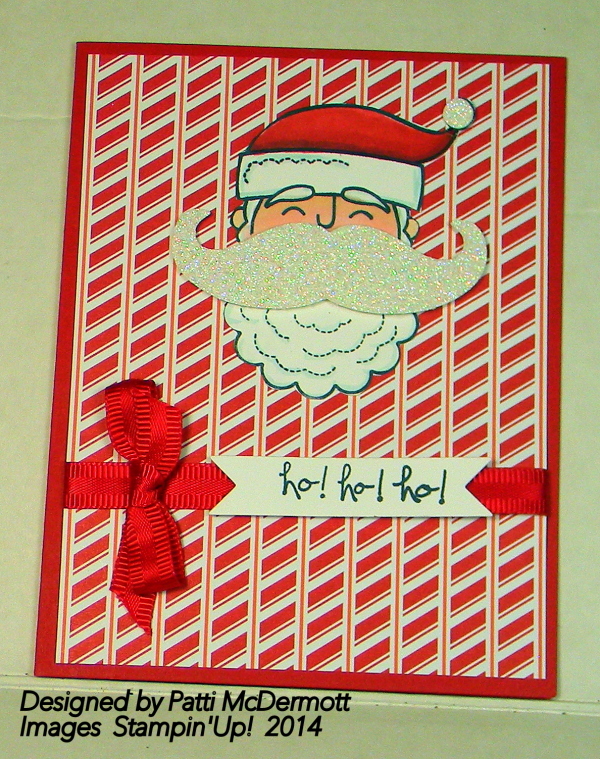
I created this card with the stamp set Santa Stache, page 18 in the HC. I colored him with the Blendabilities and use the Dazzling Diamond Glitter paper for the mustache and the hat. The satin woven ribbon is found on page 15. I used the DSP Nordic Noel also on page 15. The sentiment is from Good Greetings.
When I first rec’d this Kraft card stock I didn’t much care for the feel of it. However, as I started to use it, I fell in love with the look. It is especially nice when used with embossing folders as in this card. I used the Cherry Cobbler Sheer Linen Ribbon and the Burlap ribbon together. In addition, I used the All is Calm Snowflake Embellishments found on page 22 of the HC and the Star framelits dies (pg 231) to cut the star out from the Festive Designer Kraft Rolls found on page 10 of the HC. This paper is so beautiful, you know I will be using it for all my gift wrapping this year.
|
|
|
|
||||||||
|
|
|


Get a 25 percent discount on the Starter Kit when you join Stampin’ Up! between November 24 and December 2 . You’ll receive all the same great products AND get five percent cash back on all commissionable orders placed in December.
Trying to remember the last time we had a cash back offer? Here’s a tip: NEVER!
It’s a first-time-ever deal that you absolutely cannot miss!
More details on this limited-time offer are listed below. Can’t wait to get in on the fun? Get started here .
Details:
All orders must be finalized in the month of December to qualify for the five percent cash back offer.
A demonstrator must remain active to receive the five percent cash back.
The five percent cash back will be awarded in January.
Deadlines:
Mail: All Starter Kit orders must be received by the end of the business day on December 2 .
Online: All Starter Kit orders must be finalized on December 2 by 11:50 PM (MT).
Enjoy our Online Extravaganza with flash deals on select items and bundles at a 20%-50% discount! But quantities are limited, and this great opportunity only lasts from November 24 through December 2, so get yours before they’re gone.
As an added bonus, we’ll be bookending the beginning and end of the promotion with door busters on special products—some that have never before been paired together—that are only available for 24 hours and while supplies last! These specific deals are extremely limited, so act fast!
All embossing folders are $5 each with the exception of
Stylish Stripes (132174), Chevron (127749),
Beautifully Baroque (130917), Woodgrain (127821)
135863 Gift Box Punch Board 30% Off $19.95 $13.96 HC Page 5
Card Kit Bundle – 30% Off Page 196-197
Everyday Occasions Cardmaking Kit (134797) and Hip Hip Hooray Cardmaking Kit (134998) $49.90 $34.93
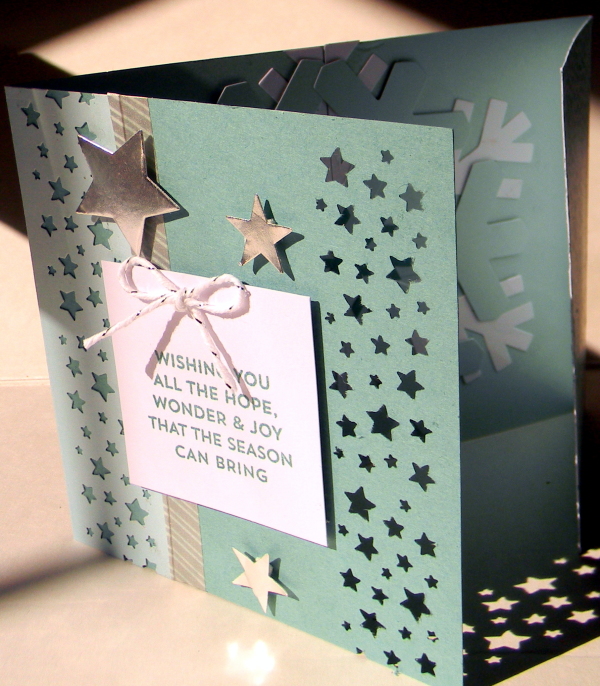
This is a card I designed from this month’s paper Pumpkin. I used the Confetti Stars punch found on page 30 of the Holiday catalog, and added more Lost Lagoon card stock. The inside I decorated with the snowflakes that came with the kit. I love the sentiments that came with this kit.
Sometimes all you need is some spectacular packaging to make even the smallest gift seem special! I love to make rocky road for Christmas. I am always thinking of ways to dress up my presentation . . . and I am looking forward to making more of these pretty pouches!

They may look a little time-consuming, but I assure you—they come together in a jiffy. I started with two banner pieces from the Build a Banner Simply Created Refill Kit. I cut the eyelets off one, then stitched them together, leaving the top open.

Next I used some of that fabulous paper from the Festive Designer Kraft Paper Rolls to die cut my stars. And don’t fret when you layer two of them! They become quite sturdy—same with the Typeset Specialty Designer Series Paper.

I love this pouch’s vintage/shabby chic vibe! Now I can’t wait to deliver my Christmas treats to my friends in these little beauties!
Mercedes Weber
2014–2015 Artisan Design Team
Supply List
Build a Banner Simply Created Refill Kit (item # 132699)
One of the pleasures of the chillier, darker days is to toast your toes by a real fire, with a book on your knee (the Stampin’ Up! catalog perhaps!) and a steaming cup of hot chocolate at your elbow. I’ve tried to capture that comforting firelight in the little gift I’m going to show you today. Come and see:
 This little decoration holds an electric tea light which flickers just like firelight. It’s made of vellum and stamped with one of the beautiful little houses from the Holiday Home Stamp Set.
 This is how it looks in the daylight when the tea light is turned off. It’s very easy to make! I cut a strip of vellum into a 6-5/8″ x 3″ (17 cm x 7 cm) piece and scored it at 1-5/8″ (4 cm), 3-1/8″ (8 cm), 4-3/4″ (12 cm), and 6-1/4″ (16 cm). I stamped the house in each scored “frame” using the Jet Black StazOn Ink Pad.
 Once I scored and stamped the vellum, I colored the reverse side using Blendabilities; then I trimmed the top and assembled it into a square shape. Tip: StazOn ink is perfect for stamping on shiny surfaces like vellum, but because it’s an alcohol-based ink (like the Blendabilities) you’ll end up with “dirty” coloring if you try to color on the same side.
 These pretty decorations would make great presents, but are you wondering how you’d gift wrap them? Well, that’s easy! In just a few minutes, you can make a perfectly-sized box using the Stampin’ Up! Gift Box Punch Board. Here are the measurements: 1-3/4″ x 1-3/4″ x 3-1/4″ (4.9 cm x 4.9 cm x 8.3 cm).
 I used rich Cherry Cobbler Cardstock for mine, and I think they look gorgeous tied up with lush Real Red 3/8″ Satin Woven Ribbon with some pretty tags. How would you decorate yours?
Vicky Hayes
2014–2015 Artisan Design Team
Supply List
Holiday Home Stamp Set (item # 135095)
Cherry Cobbler Cardstock (item # 119685)
White Vellum 8-1/2″ x 11″ Cardstock (item # 101856)
Jet Black StazOn Ink Pad (item # 101406)
I made this little box with the new Gift Box Punch Board found on page 5 of the Holiday catalog. You can amke small to very large boxes with this tool. So easy to use and you do not need any glue. Isn’t that awesome? This little box I did not use glue but on larger boxes they suggest a little snail or sticky strip. These can be used for name cards, filled with little treats, for your Thanksgiving Day table. You can also change the design and use them for the Christmas table. So versatile. SU has a video showing how to assemble the box, go here to see.

With the Holidays coming up I tend to forget about the year round DSP, this case being Flashback, found on page 186 in the Big book. I love all of the colors in this DSP, so striking! Actually the card is more about the colors than anything else and that makes this a great all occasion card. What do you think?
|
|
|
|
||||||||
|
|
|
|


