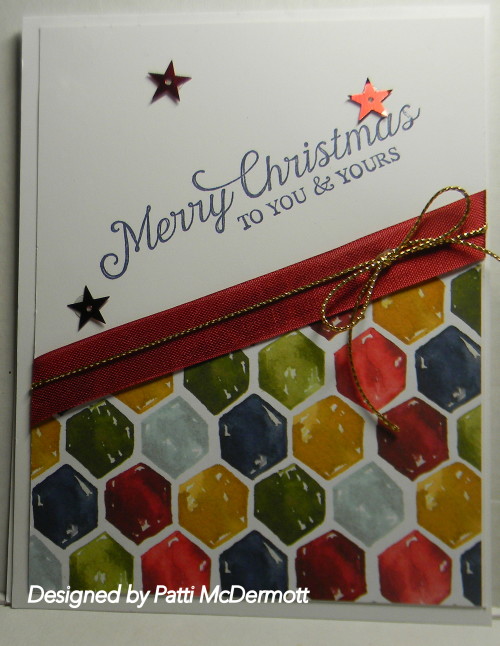
I copied this card from one of our Resources through SU, but I changed the sentiment and added embellishments. It was displayed as a birthday card sent to me in an email. The idea was that this DSP, Season of Cheer (page 29 of the HC), although, I used it as a Christmas card, it could also be used a birthday or Celebrate card. Don’t you agree?
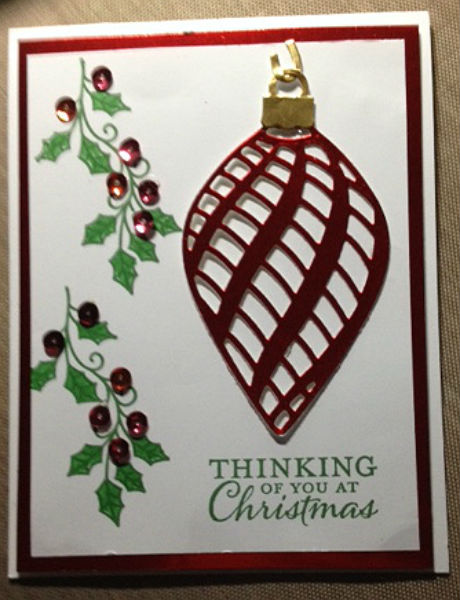
I used the stamp set, Embellished Ornaments, page 15 HC, with the matching Thinlit dies for this card. You can buy this as a bundle and save 15%. I used the red foil sheets, page 26 of the HC, and the Brights Sequins, page 160, of the AC. This is a great set complete with sentiments for both front of the card and inside.

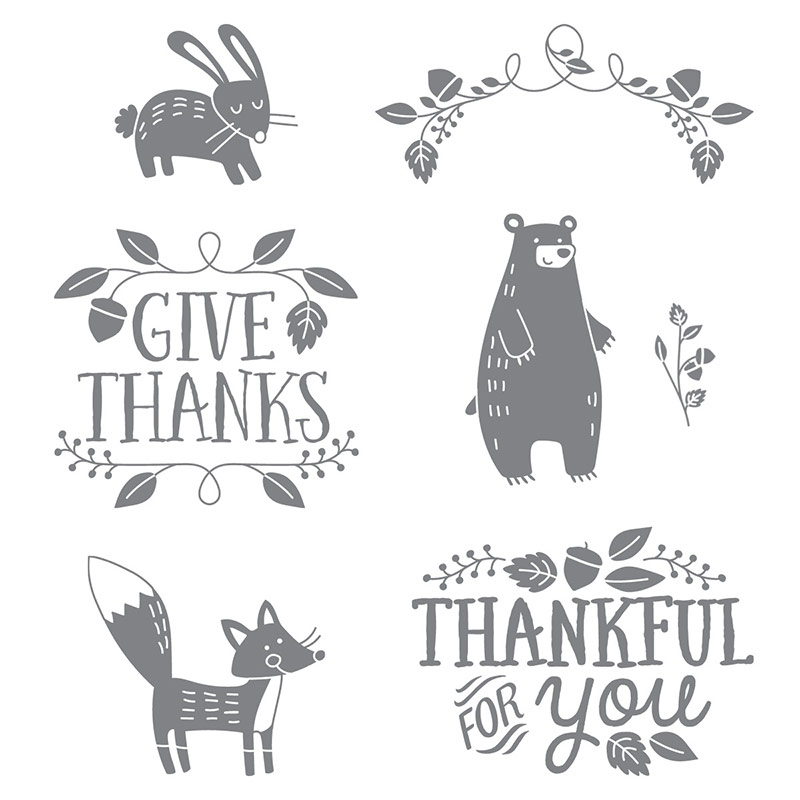
Hello and welcome to the Stampin’ Up! Artisan Design Team blog hop! Today’s hop is all about the stamp set Thankful Forest Friends! At first glance I wasn’t super excited about this set, but after some playing with it in my stamp room, I’m a superfan!
 |
| Thankful Forest Friends |
Speaking of superfans, one of my besties is a HUGE fan of bears. So as soon as I stamped that adorable little bear on a piece of cardstock, I knew I’d be making this card collection for her.

It was so fun to dress up Papa Bear (that’s my little pet name for him) for all different occasions. I used LOTS of stamp sets to create his different outfits and the sentiments, so I’ll break it down for you (and you can find links to these stamp sets and my Canadian online store at the bottom of this post).
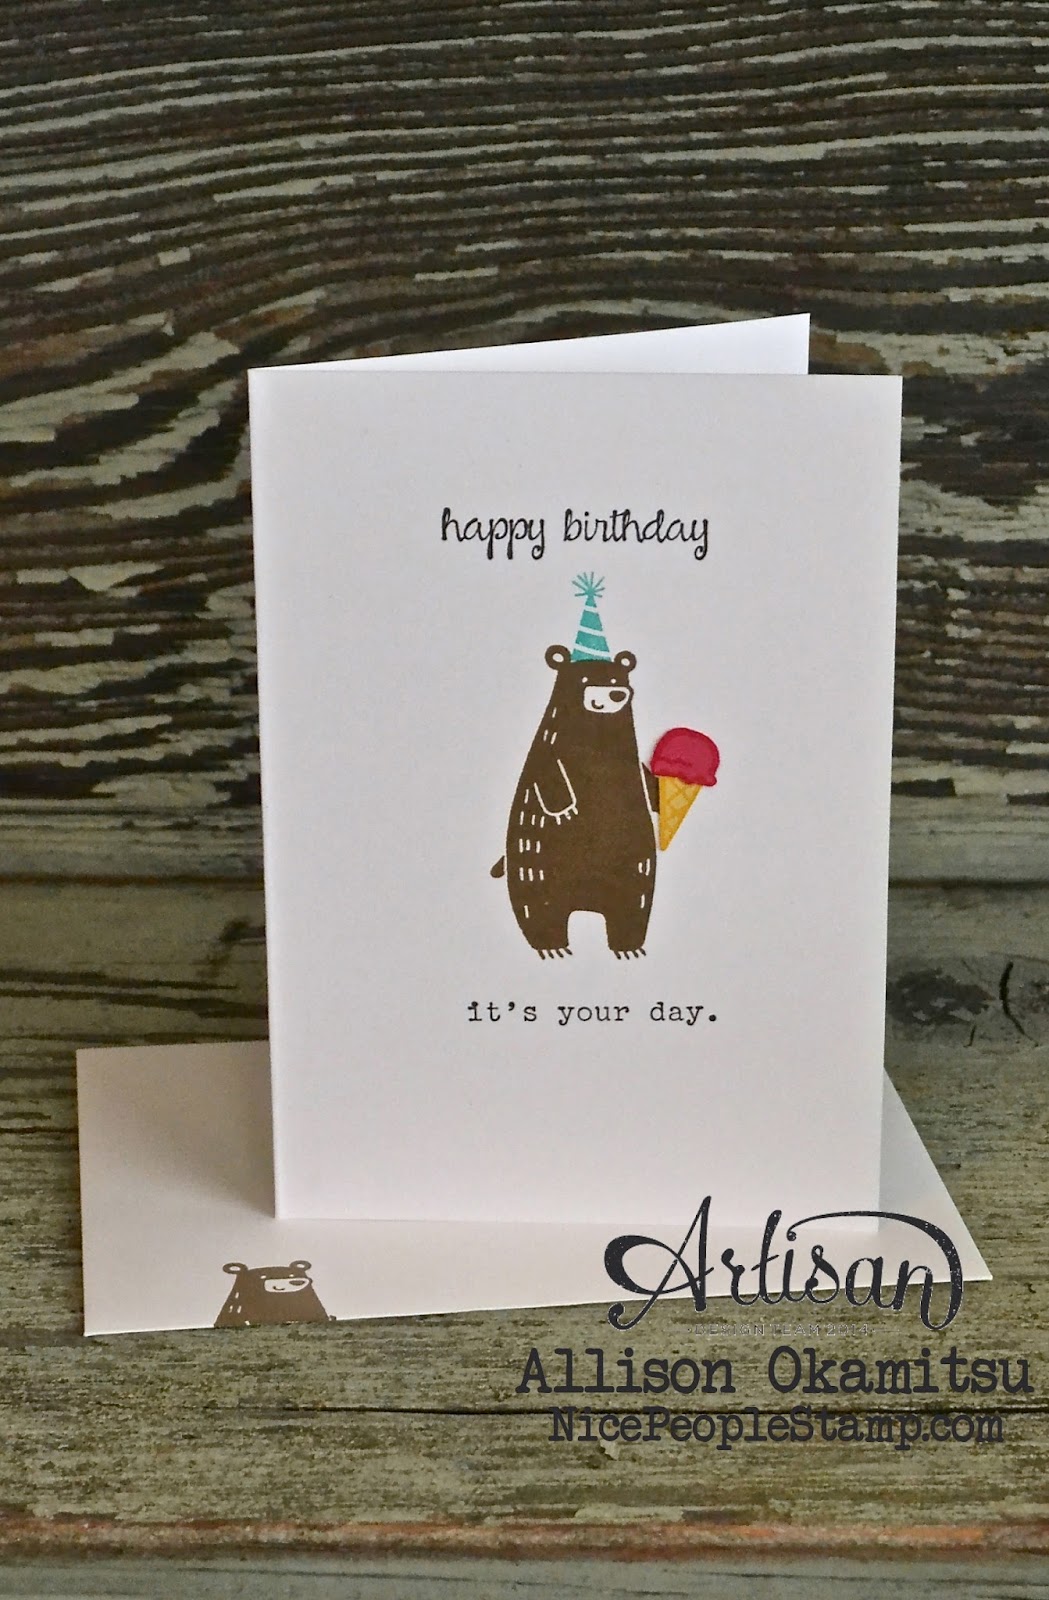
Birthday Bear:
Thankful Forest Friends
And Many More
Words of Truth
No Bones About It
Snow Place
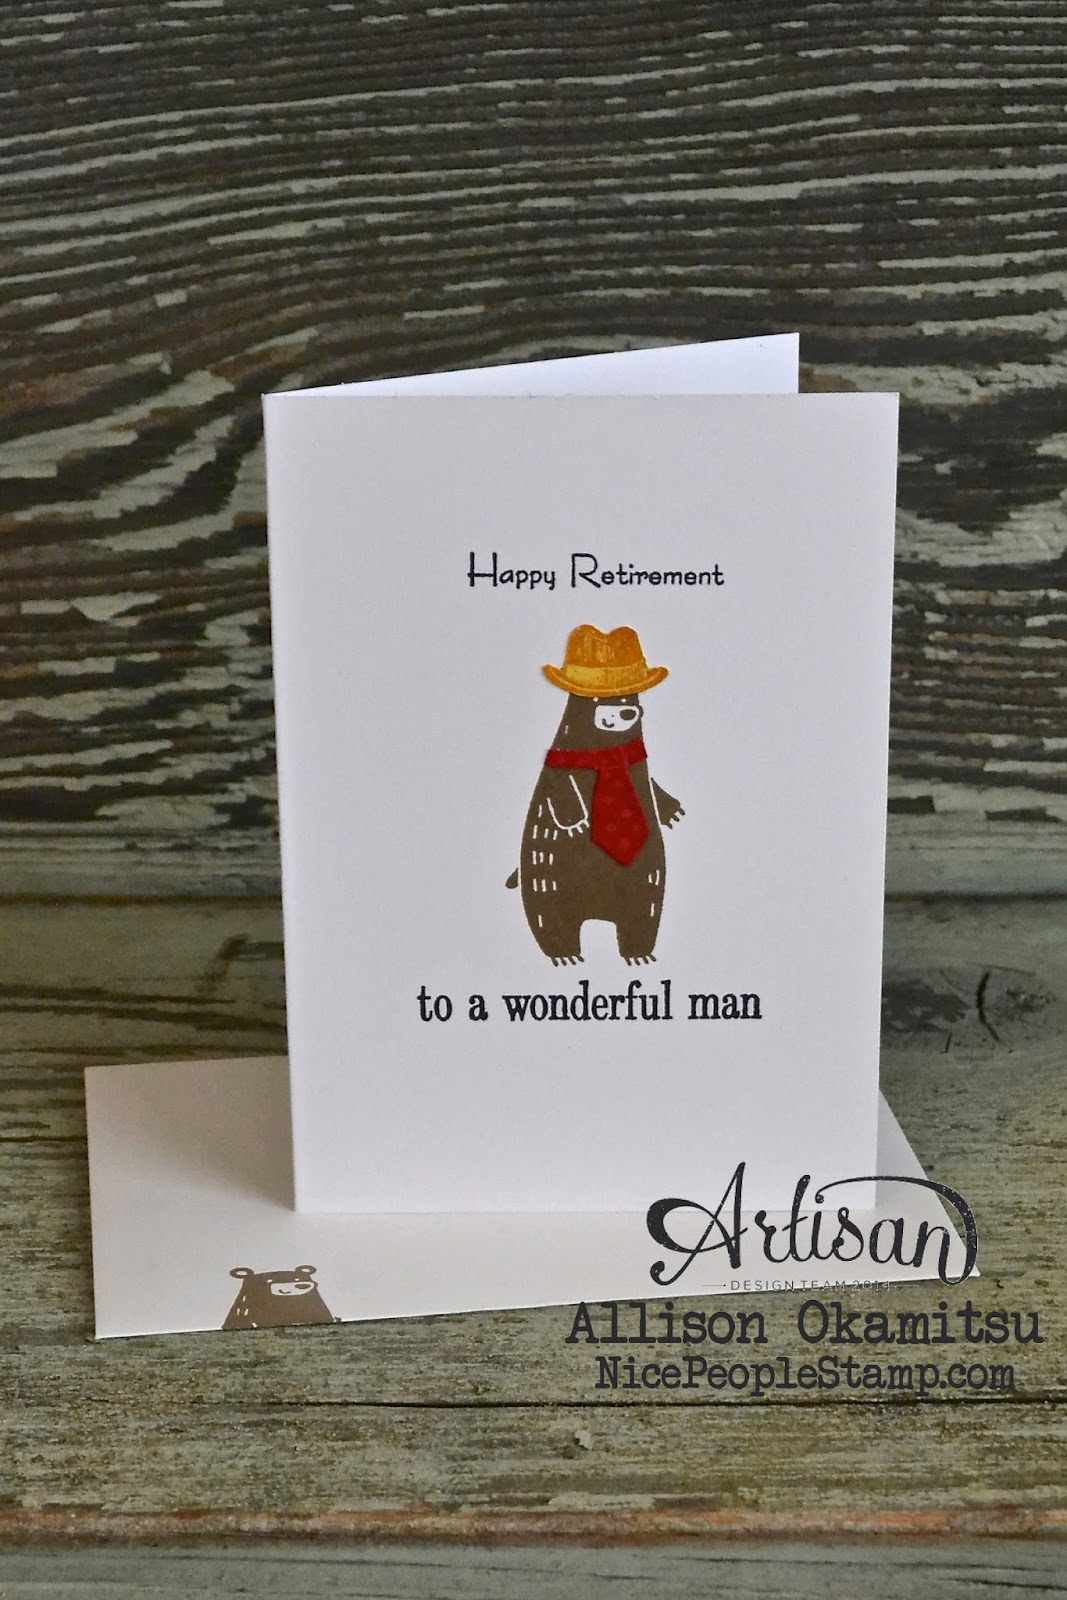
Retirement Bear:
Thankful Forest Friends
Teeny Tiny Wishes
Happy Birthday, Everyone
Guy Greetings
Snow Place
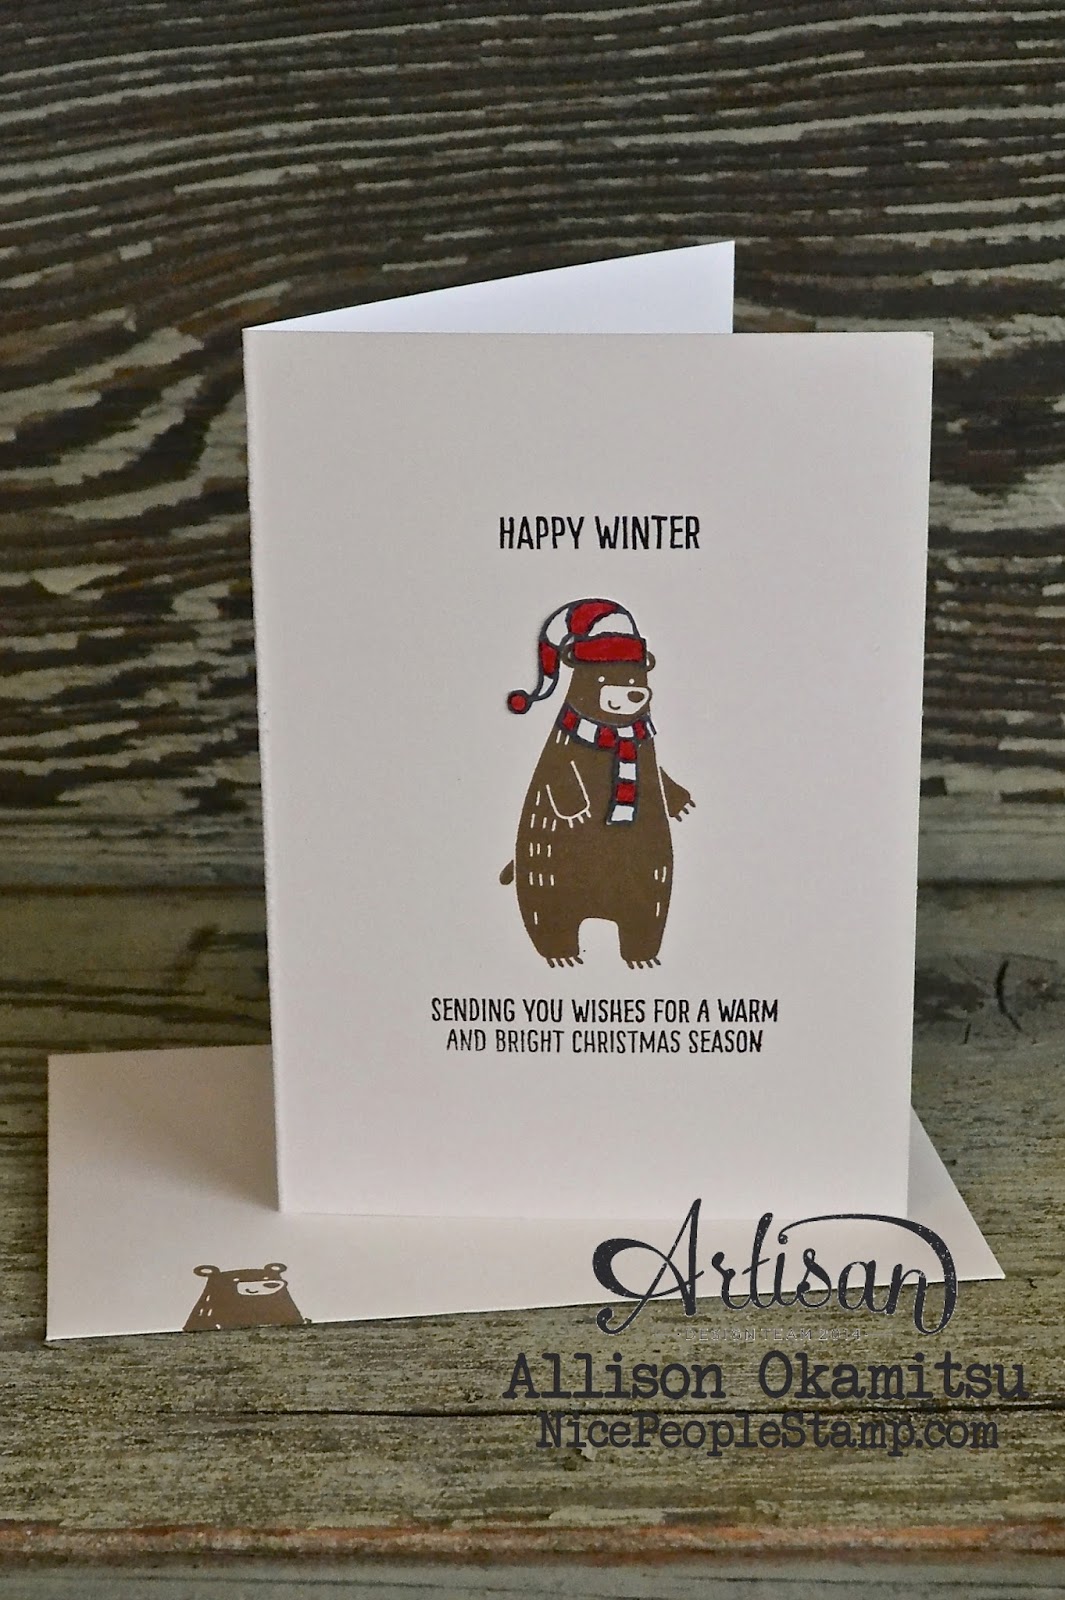
Winter Bear:
Thankful Forest Friends
Happy Scenes
Festive Fireplace
Sparkly Seasons

Congrats Bear:
Thankful Forest Friends
Cottage Greetings
Guy Greetings
Snow Place
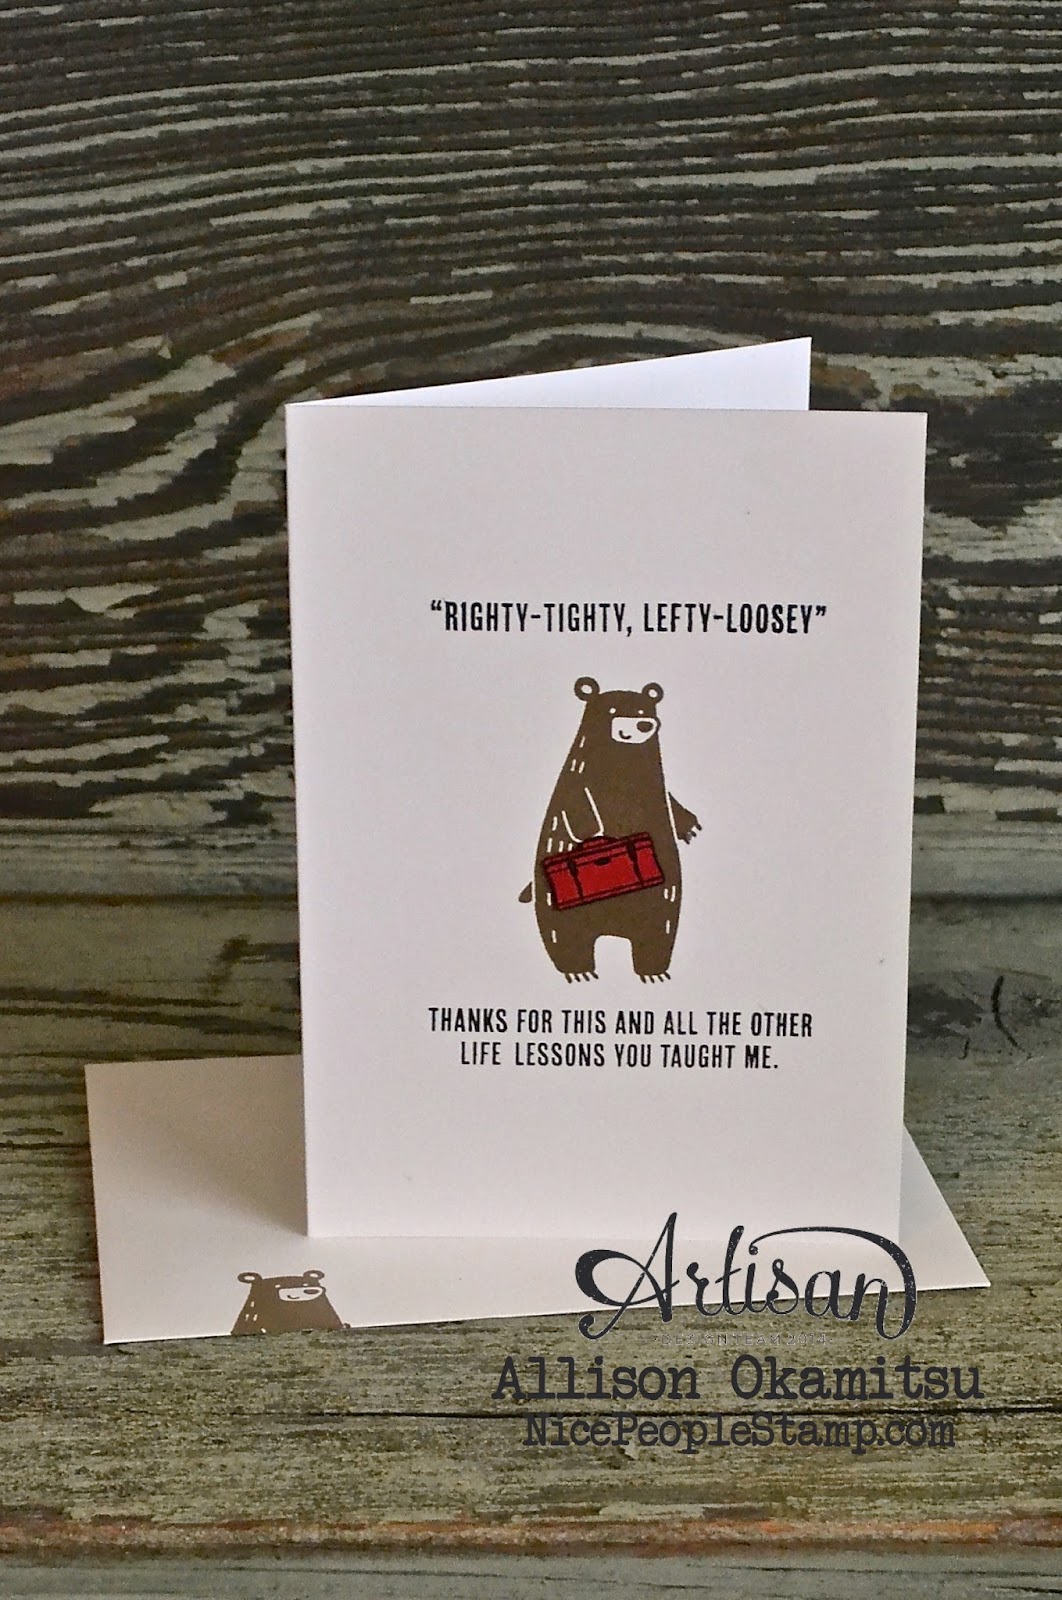
Handyman Bear:
Thankful Forest Friends
Guy Greetings
Let’s Get Away
After creating this fun collection of Papa Bear Notecards I keep thinking of little outfits I could put on a Mama Bear. I’m going to have to find the time to play around with that fun idea sometime soon.
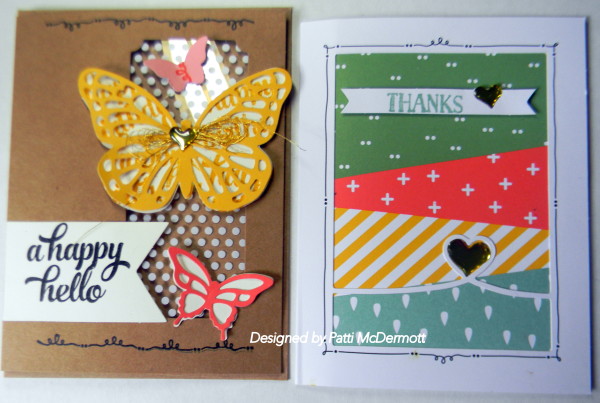
That is the name of this stamp set, page 20 of the HC. I used classic ink from the pads to watercolor the image and then cut out the images with the Square Collections Framelits, page 173 of the AC. I border the image with our gold foil paper, page 148. I used Lost Lagoon, and Pool Party for my paper.

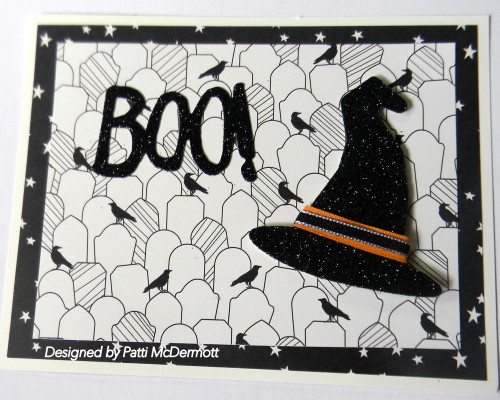
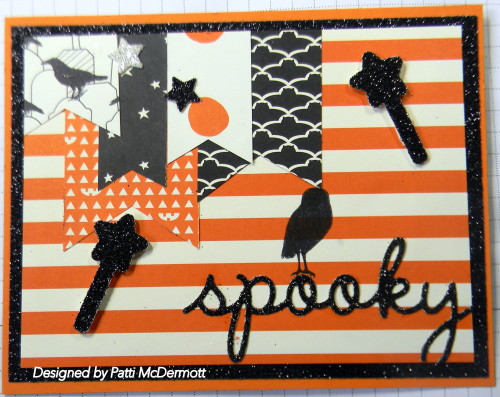
I love this black glimmer paper. It is really stunning! I am hoping top be able to use some of it for Christmas too! Have to get my thinking cap on for that. These were cut out with the Boo to you framelits on page 49 of the HC and I used the DSP Happy Haunting on page 47.
|

These are some of the cards we made at Saturday’s product based class: They were so easy to make and lots of fun! You can find this kit on page 152 of the AC.
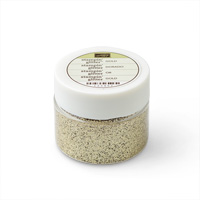
The acorn punch with the matching stamp stands this time on the program. I have once again chosen a noble version, and here is my implementation of it – everything in vanilla – Taupe Espresso and Gold.

The packaging is virtually a shell around the Toffifee-chocolate and to pull out. If practical, you can slide into but after snacking, a new chocolate 🙂

The gold accents I’ve achieved by embossing. The dots are the stamp “Gorgeous Grunge” – still one of my favorites!
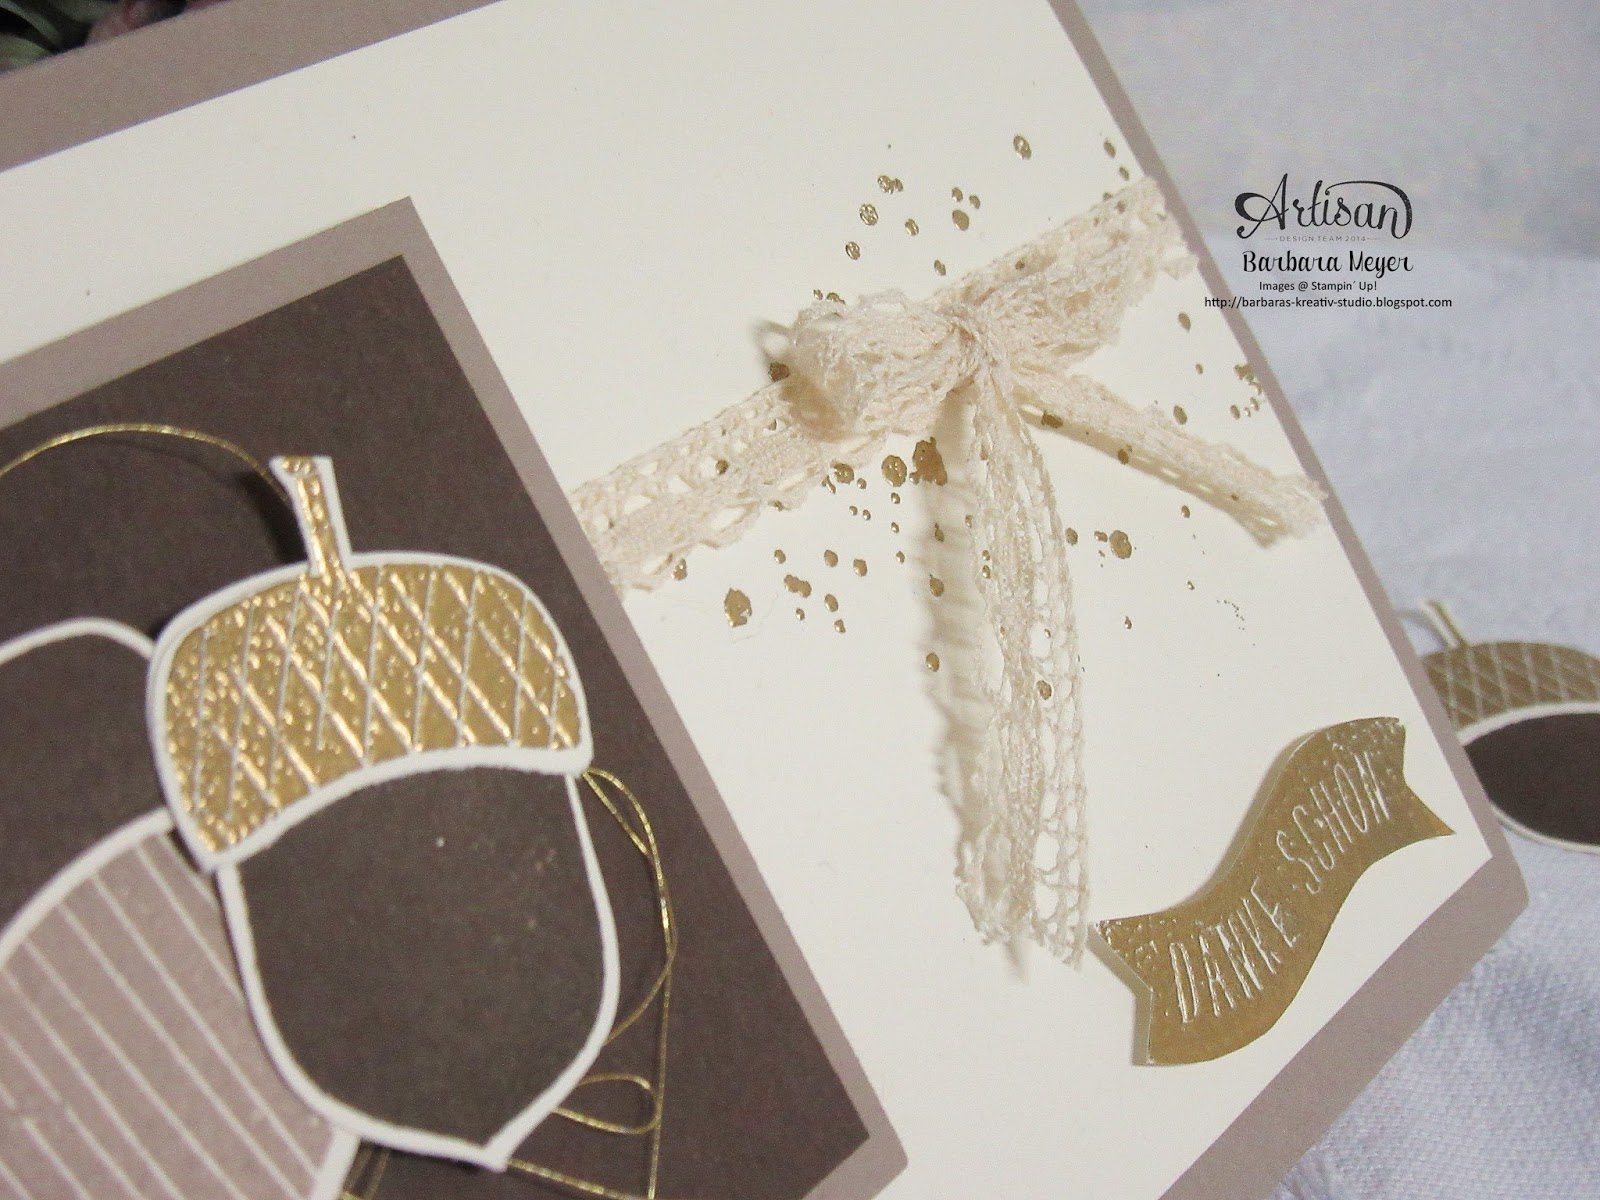
Well, and the crochet and the Golden yarn also fit perfectly.

I have the card designed in the same style.
So I like the set very well – I think I keep it me or do the same again to give away 🙂
So I like the set very well – I think I keep it me or do the same again to give away 🙂
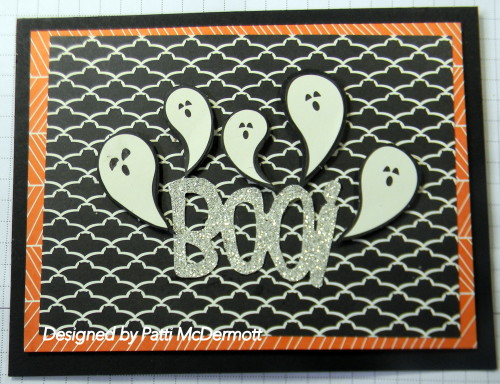
I cut the ghosts out of the DSP Happy Haunting, page 47 of the Holiday catalog. The background is also from the same DSP stack. The BOO! is from the Boo to you Framelits, page 49. I used Dazzling Diamonds glimmer paper.
Founder’s Circle is an exclusive event awarded to our top demonstrators who have shown leadership and a balanced, successful approach toward developing their businesses. This wonderful event (more like a party that lasts for days!) was held last week in St. George, Utah. We’ve loved seeing the achievers’ photos on social media!
Card swaps are a part of nearly every Stampin’ Up! event. It’s always fun to see all of the great things that Stampin’ Up! demonstrators create. The swaps from Founder’s Circle were proudly displayed at the home office, and I wanted to share a few of the wonderful projects that were created. (Trust me, seeing them all together was awe-inspiring!)

First of all, the witch’s hat attached to this little treat bag is pure genius! Janet Baker created this darling project using the Tree Punch (item 135859), Bow Builder Punch (item 137414), 2-1/2″ Circle Punch (item 120906), and the 1″ Circle Punch (item 119868). She also used the new Black Glimmer Paper (item 139605) and the Witches’ Night Photopolymer Stamp Set (item 139708).

Next up is an adorable card designed by Allison Okamitsu. I just love how she showed off the cute reindeer from the Jolly Christmas Stamp Set (item 139876). And, our Rhinestone Basic Jewels (item 119246) can be easily colored using permanent marker (for those who are partial to red-nosed reindeer)!

I also really loved this Halloween card made by Kimberly VanDiepen. She used the Cheer All Year Photopolymer Stamp Set (item 139839) and the Happy Haunting Designer Series Paper (item 139584). This stamp set coordinates with the Season to Season Wreath Kit (item 139645); however, it’s super-versatile outside of the kit, too.

One of my favorite stamp sets from our holiday catalog is Flurry of Wishes (item 139732), showcased in this beautiful card by Sherry Roth. I thought her use of the Hearts Border Punch (item 133784) was the perfect accent.

Check out this elegant card created by Mary Knabe. She added color to our Timeless Elegance Designer Series Paper (item 138444), which is perfect! I think she definitely achieved timeless elegance.

Our new Spider Web Doilies (item 139622) appear in the Halloween section of the catalog, but I love how Joyce Feraco used the white side of the doily as an elegant snowflake. It looks lovely paired with the Winter Wonderland Specialty Designer Series Paper (item 139588).

I really love the star window on this card from Becky Roberts. The Home for Christmas Designer Series Paper (item 139592) is a favorite, and she showcased it beautifully. Also, the stamp set she used—Seasonal Snapshot 2015 (item 139841)—coordinates with the Project Life Collection, but it can be used with so much more.

Lastly, I thought this card created by Esther Boyle was very clever. She used an Oval Framelit Die (item 129381), a Metallic Foil Doily (item 138392), and some Silver Cording Trim (item 139620) to create this sweet angel ornament.
I wish there were time to share them all! Our demonstrators are truly remarkable and have so much creativity to share. A special thanks to them all for sharing what they love.
Enjoy!
Jen C.
Concept Artist
I used the black glimmer paper found on page 47 of the HC and the Boo to you Framelits, page 49. The DSP is Happy Haunting DSP found on page 47. The birds are from the stamp set Among the Branches, page 39.
Autumn is in the air at the home office and we are celebrating with some fun, fall-inspired projects from Paper Pumpkin.
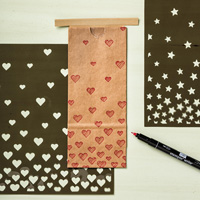
How much do you love the September kit? Did you know that it was designed for Halloween and Thanksgiving? Brilliant indeed! You can use the birch patterned paper straw to make it look like a caramel apple or witch’s broom—or leave out the straw so it looks more like a haystack. Now all of our subscribers in the United States and Canada are ready for this festive fall season!

Here’s another take on the treat bag, using only components from the kit. If you don’t want to add the fringe, the bag is still so cute without it.

And how about the stamp set? This is one you’re going to use over and over again. With sayings like, “Happy haunting, Truly thankful,” and a variety of images, you can use it for almost anything during this season and beyond. Check out these darling covered lollipops made with the Happy Haunting Designer Series Paper—bewitchingly beautiful!

One of the best things about Paper Pumpkin is the ability it gives you to think outside the box (literally) and create your own projects. Instead of treat bags, you could use the Fry Bigz L Die and the Big Shot to make stunning table treats for your Thanksgiving place settings. Everyone will be truly thankful for your talents and kindness.


What projects are you making with your September Paper Pumpkin? Share them with us using #paperpumpkin. And be sure to pick up a refill for your kit here!
|


Another Design Team Member Project
Christmas will be here before you know it, my friends, and what better way to celebrate the days leading up to it than an advent calendar?!

Tiny Treat Boxes (item #135829) make an adorable advent tree. I’ve covered each of the boxes with patterns from the Home for Christmas Designer Series Paper (item #139592)—what fabulous nostalgic designs it has! And the Hello December 2015 Project Life Accessory Pack (item #139654) has some great stickers numbered 1–25 for each box lid. The boxes are the perfect size to hold a treat, love note, or coupon for each day of December until Christmas day.

You’ll want to assemble your tree in layers, with seven boxes on the bottom layer, followed by layers of six, five, four, three, and one. The box on the very top of the tree isn’t meant to be opened, but it sure looks lovely as a topper. Using hot glue, I also adhered a double bow with long, whimsical tails using two yards of Mossy Meadow 5/8″ Striped Cotton Ribbon (item #138419).

Whether you’re counting down until Christmas with little children at home, grown children at university, or your spouse, this Tree Advent Calendar will be a lovely addition to your holiday (or dorm room) décor!
Allison Okamitsu
2014–2015 Artisan Design Team
More images and sentiments from September’s PP. Again I used the Happy Haunting DSP, page 47 of the HC and candy dots, page 161 from the AC. In addition I used the tea lace doilies, page 148 AC and sponged it with Pumpkin Pie, Daffodil Delight, Watermelon Wonder and Old Olive ink refills on a baby wipe. That is also what I used to stamp the images. I used some left over raffia from the kit.
Do you know how awesome our stamp sets are from the Paper Pumpkin kits? This card was created using the stamps from September’s Paper Pumpkin. Not only are there plenty of images but also plenty of sentiments. I used the DSP Happy Haunting, page 47 from the HC and our Candy Dots, page 161 from the AC. Just use your imagination and create your own.

This month we are having fun with a Fall theme! Yesterday was the first day of Fall too! I actually made this card for a pretty swanky card swap recently. I am loving the trendy white and creams of the Fall season and this inspired me to create this card.
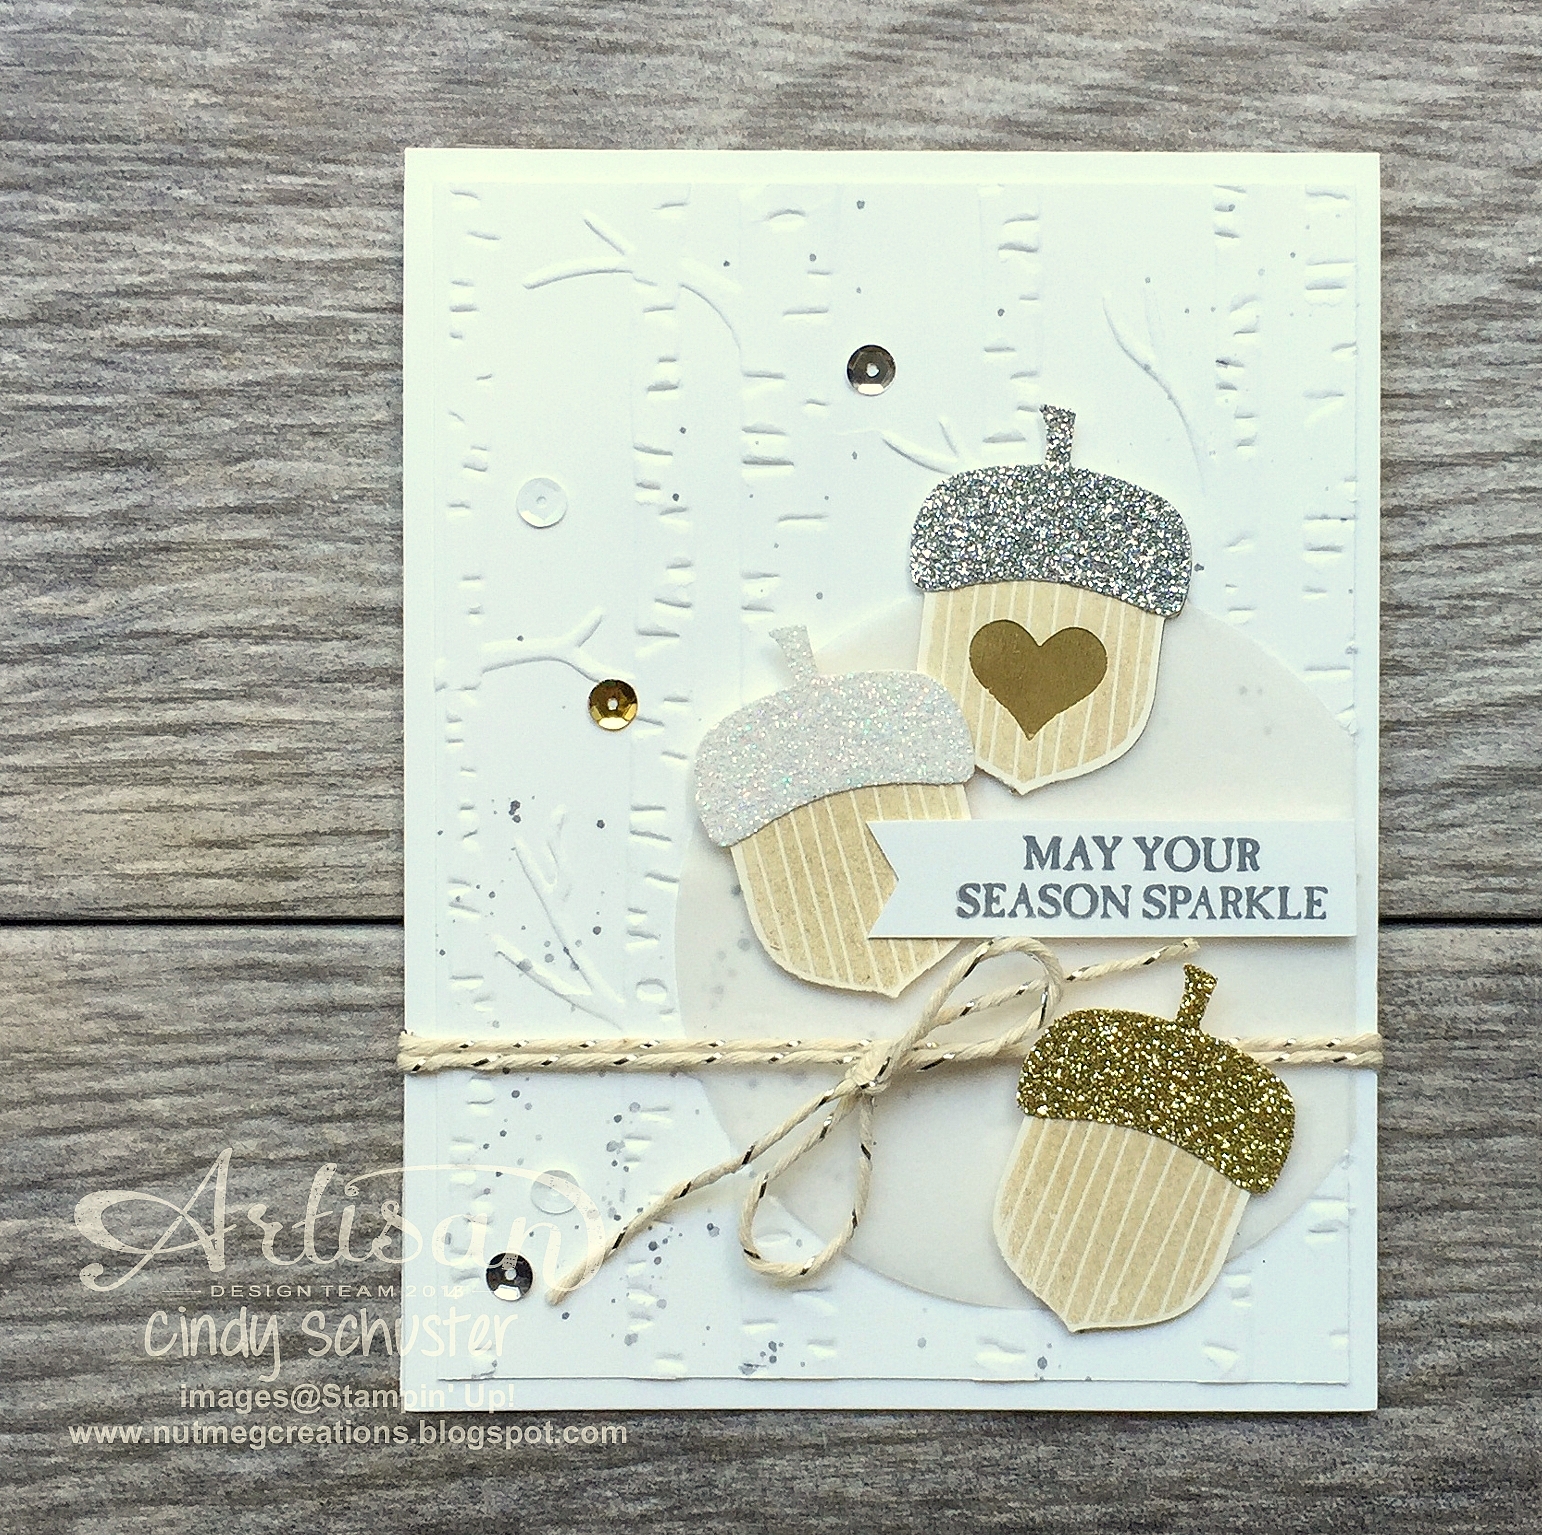
The acorn punch is a must have in the Holiday Catalog! Here I stamped the Acorny Thank You Stamp set with Crumb Cake on Very Vanilla cardstock. Then I punched the acorn tops with the Glimmer Paper in Gold, Silver and Dazzling Diamonds. The background is done with the Woodland Textured Impressions Embossing Folder that I just added some spray of Basic Gray ink with my Aqua Painter. The greeting is from the Sparkly Seasons Stamp Set and I thought it worked well with all the glitter on this card.
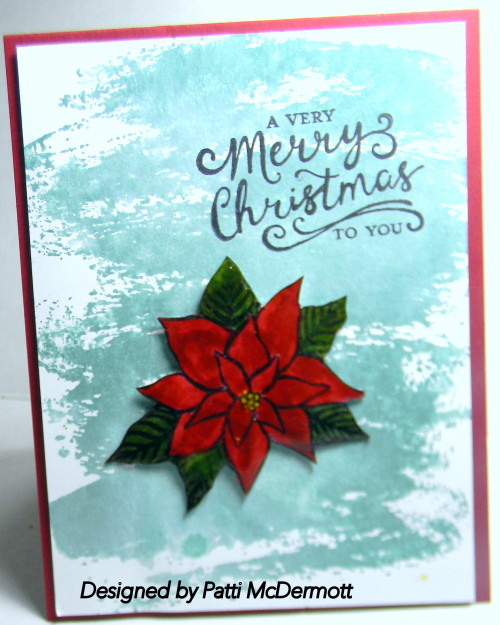
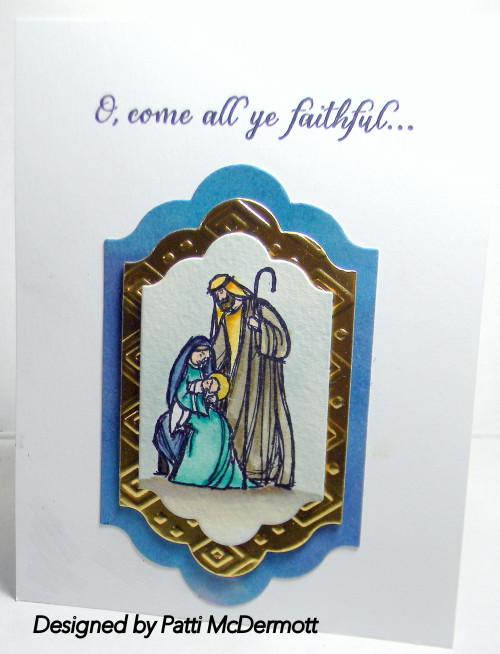
This card was created using the background stamp, Watercolor Wash page 129 of the AC. In addition, from the Holiday Catalog, the set Reason for the Season, page 31 has both the images and the sentiment. This is a great set if you like 2 step stamping, but it can also be used alone, as on this card. It’s hard to tell by my photo but I did use Crystal Effect on the pointsettia, which was colored with Cherry Cobbler and Mossy Meadow.
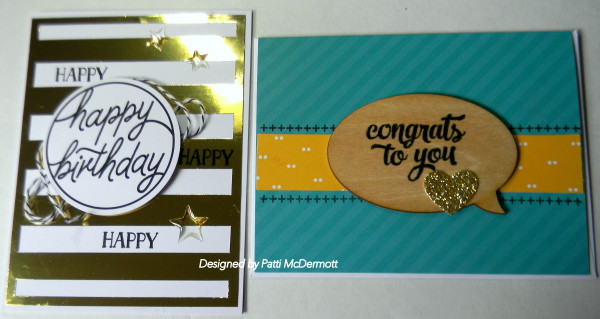
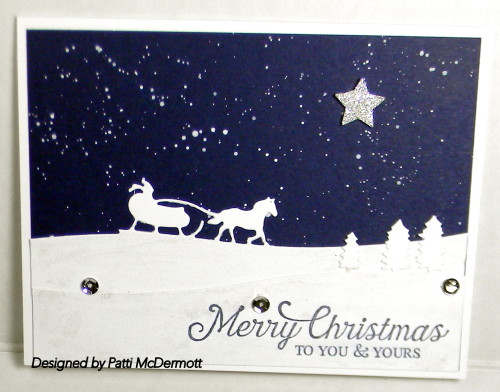
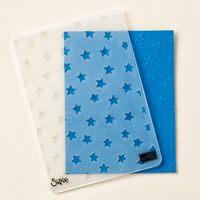
These Edgelits will knock the top of your head off! They are so awesome! There is a stamp set that SU has paired with them but I didn’t use any stamp other than Six Sayings, the Hostess set, on page 51 of the HC. I punched out the star from Silver Glimmer paper with our Itty Bitty Accents punch, page 166 of the AC. I use white ink to splatter the sky and I added the silver sequins to hide a blunder. LOL
|
|
|
||||||
|
|
|
||||||
|


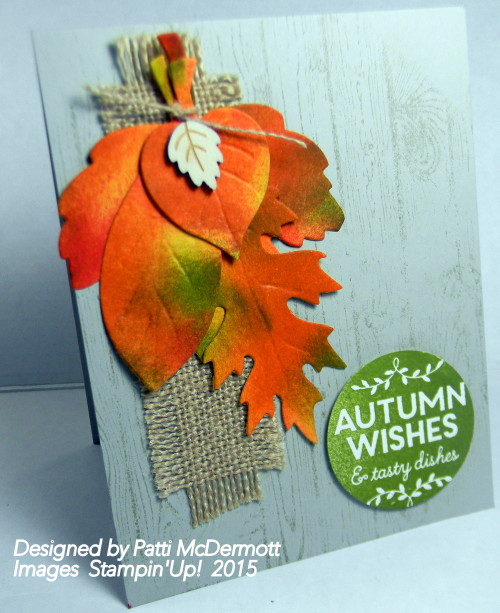
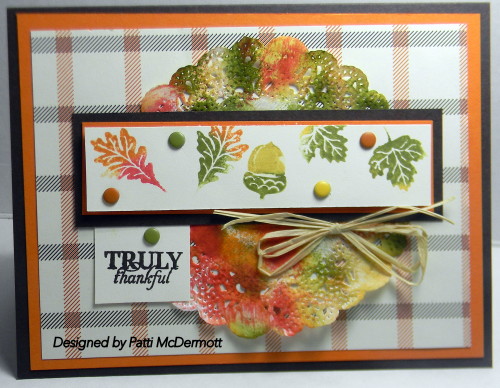
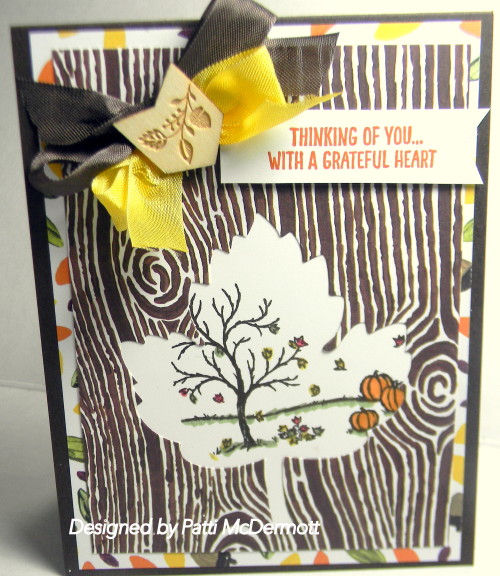
The image cut out from this DSP, page 43 HC, is from the Leaflets Framelits, page 172, AC. I used the maple leaf die. The fall scene, and the sentiment is from the stamp set, Happy Scenes, page 11 of the HC. I colored it with our stampinWrite markers. I love it when a stamp set comes with both images and sentiments. AND, of course this set can be used for just about any season. Don’t you just love these little wooden elements, page 43? The ribbon is our 1/2″ seam binding found on page 159 of the AC. OOPS! I just looked up the page and noticed that they discontinued the Daffodil Delight Seam binding. Oh well, Stuff happens.
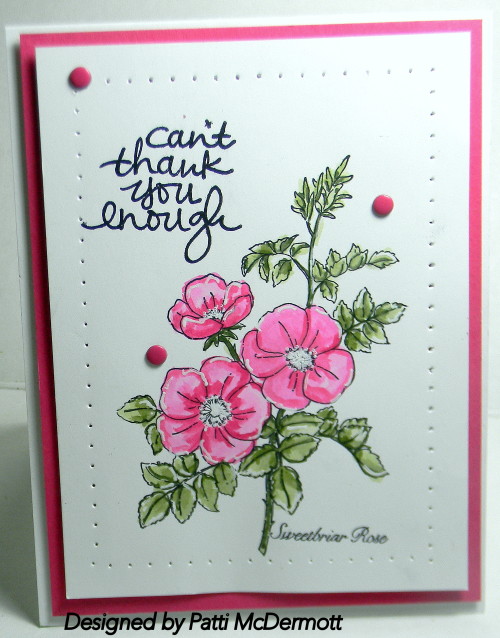
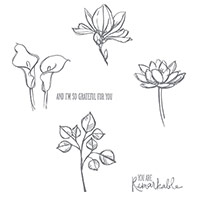
This is a single stamp from the AC, page 115. The sentiment is from a photopolymer stamp set, Lovely Amazing You. I used Melon Mambo and Mossy Meadow on the flowers. I paper Pierced the front and finished off with Brights Candy Dots. Hope you like it!
This little goodie bag is from this month’s Paper Pumpkin especially for Halloween. Although you could change the sentiment and use it for just about any occasion. Everything to make this and 7 more come in the package, including the glue and the most awesome stamps ever! We did this for our 3D item at Camp yesterday, filled with Dove Chocolates of course!

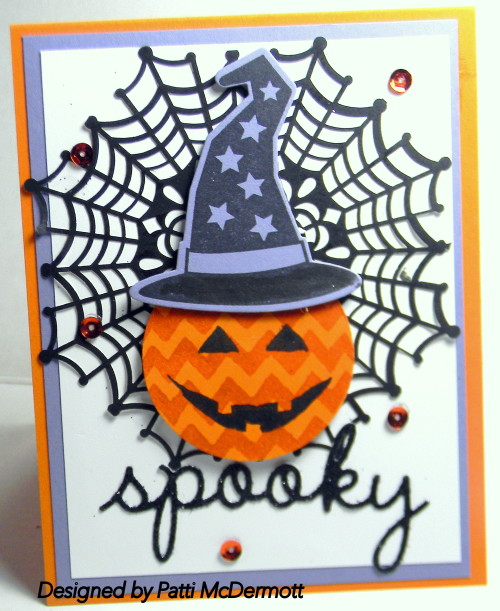
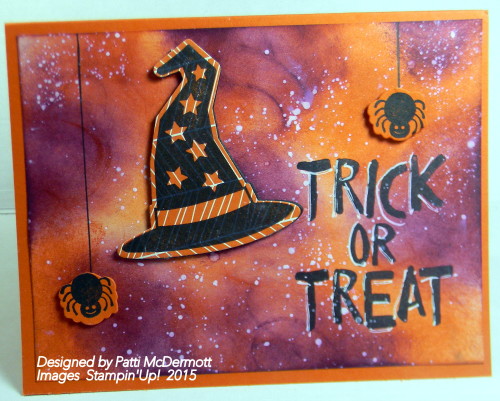
This is one of the cards we will be making today for camp. The stamp set Howl-o-ween Treat can be found on page 49 of the HC. I used the Boo to you framelits (same page) to cut out the hat. The spider web doilies are on page 47 and the “Spooky” Thinlits can be found on page 40. The Pumpkin is stamped with the set Sparkly Seasons, pg 40, and I used the 2″circle punch to cut it out. The sequins are from the Brights Assortment, page 160 of the AC.
I love this set from the HC, page 20 and I used watercolor paper with our classic ink pads and a aqua brush, page 163 of the AC. I used the Mosaic Embossing Folder, page 174 AC on our gold foil paper. I used the framelits, Lots of Labels, page 173, AC and layered them on dimenionals. Colors I used are Island Indigo, Bermuda Bay, Daffodil Delight, Crushed curry and Soft Suede.
I love the ease of using a kit to create. All the work has been done for you and all you have to do is follow the instructions . . . most of the time. Occasionally you might want to take a kit and rethink how you might use it, especially if you are an experienced crafter. That’s exactly what I decided to do with the All Boxed Up Kit (item # 138376).

I love this box kit! It’s such a wonderful way to create beautiful boxes for a little treat. However, I wanted to create a scrap page using the contents of the kit. I love the patterns and colours on the banners in this kit. I knew that they would make a sweet banner on a scrap page.

I chose the woodgrain pattern paper from the Farmer’s Market Designer Series Paper (item # 138448). It was the perfect backdrop I was looking for. I used the Gorgeous Grunge Stamp Set (item # 130517) to add some black splatter to my page. I absolutely love the Basic Black Archival Ink Pad (item # 140931)! It stamps in such a true, crisp black. Next, I got out the coordinating stamp set to the kit—All Boxed Up. I used this stamp set to stamp a greeting on one of the tags in the kit; I used it as part of my banner.

Next, I realized that the adorable clothespins were going to be too bulky on my scrap page, so I decided to pull them apart and just attach one side of the clothespin to my banner pieces using a Glue Dot (item # 103683). After I had split the clothespins apart, I look at the painted springs leftover on my desk and immediately realized how rustic and adorable they were. I knew I had to add them to my page as embellishments! So fun and unexpected! I adhered the springs with Multipurpose Glue (item # 110755) and stapled them using the Handheld Stapler (item # 139083) for extra staying power (plus the staples looked super-cute)
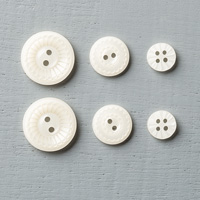
I used all of the contents of the kit, except the box. That adorable Pool Party Pom Pom Trim is from the kit! I added flowers by using the Flower Patch Stamp Set (item # 134207) and the coordinating Flower Fair Framelits Dies (item # 133731). Every scrap page needs some accessories, so the Classy Designer Buttons (item # 138393) were a perfect addition to my page.

I love traditional scrapbooking. There is something so beautiful about detailed pages that capture moments in time.
Color Combo: Basic Black, Bermuda Bay, Island Indigo, Pool Party, Sahara Sand, Watermelon Wonder
Sarah Sagert
Artisan Design Team 2014–2015
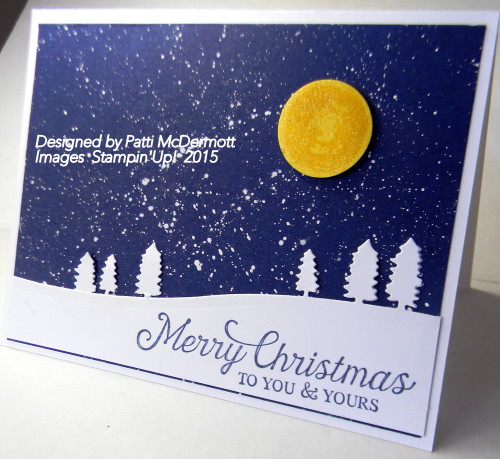
The only stamp I used on this card is from the set Over the Rainbow, page 21 of the AC. That would be the Moon. The background is Night Of Navy card stock and I used the Trees edgelit, page 12 from the HC. The base card is our new heavy Whisper White. OOPS! Sorry, I was wrong, the sentiment is from the Hostess set, Six Sayings, page 51 of the HC.
|
|
|
||||||
|
|
|
||||||
|


Gift Packaging for Tanner and Nate

Although this birthday box is pretty awesome, it doesn’t compare to Tanner’s awesomeness…a kid who is now officially an adult!

Tanner and Nate share a birthday, so I’m showing Nate’s birthday packaging as well.

My artist must have thought that I would ask her where she got the image for his “biker” tag (Nate rides road bicycles and races too), so she sent me this photo…pretty clever, huh?
These are swaps from some of the demos that are in my downline. I didn’t include everyone’s swap because most of them do not sign their names on their swaps and I have such a lousy memory I cannot for the life of me remember who did what. These cards I remember, mainly because one is my daughter, Mo Leeper (top card), the other two are ladies that rode with me to the swap. Pamela Subjek and Stacey Green, respectively. The theme was that we could make anything we wanted as long as it came from the Holiday Catalog.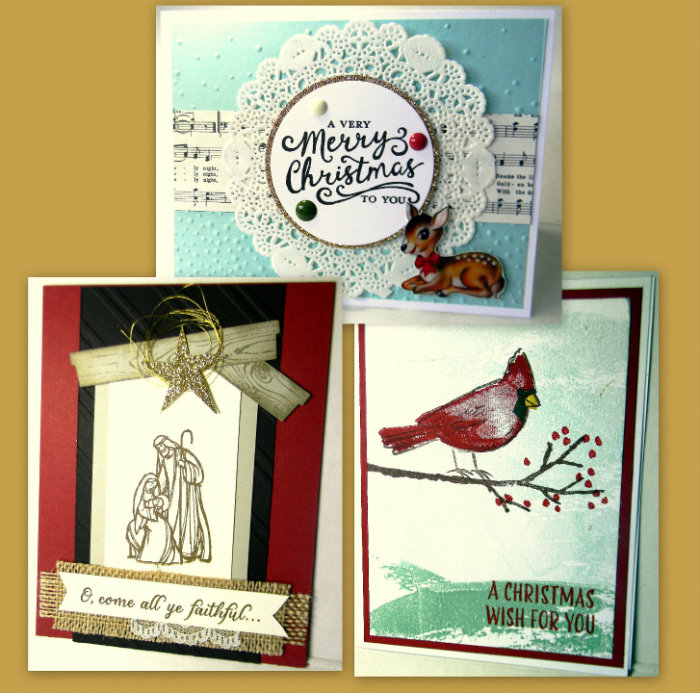
My mom and I love going to the theater to see musicals! We have seen Cats, Mary Poppins, Annie, West Side Story, Chicago, and many more! However, there is one that I have been waiting too long to see . . . Wicked, The Untold Story of the Witches of Oz! I created this little gift package to hold the tickets I’m planning to give my mom for our night out to the theater.

Inspired by the witch’s hat in the Howl-o-ween Treat Stamp Set (item # 139690), the Project Life Seasonal Snapshot 2015 Stamp Set (item # 139841) greetings, and the 2015–2017 In Color, Cucumber Crush, I have the makings of something very wicked indeed!My new favorite tool from the holiday catalog is the Square Pillow Box Thinlits Dies (item # 139657), as there is SO much you can do with them. I used them here to make the belly band for my package. I also used the Envelope Punch Board (item # 133774) to make the section that holds the tickets.

To make the belly band, take two pieces of the Square Pillow Box Framelits Die and snip the sides away as shown in the photo. Adhere together using the Tear & Tape Adhesive (item # 138995) on the tabs.

To make this custom size 3-7/8″ x 8″ envelope with the Happy Haunting Designer Series Paper (item # 139584), cut to 9-1/4″ x 9-1/4″ using the 3-1/8″ score line. Follow the directions on the Envelope Punch Board to complete the other score lines.
Trim 1″ from the two sides in order to close your envelope properly. All you need to do now is fold on the score lines and tie off with the Cucumber Crush 1″ Dotted Lace Trim (item # 138423) to keep the package closed.

The belly band is very simple to slide on or off and it really completes the package when decorated with all of the great Halloween products we have right now. I used a variety of products, such as the Spider Web Doilies (item # 139622), the Boo to You Framelits Dies (item # 139663), the Seasonal Frame Thinlits Dies (item # 139658) to make the Silver Glimmer Paper (item # 135314) spooky greeting, and the Happy Haunting Designer Washi Tape (item # 139608).

Now to choose a city to see the show and plan a girls’ weekend! Where shall we go? New York City?
Cindy Schuster
2014–2015 Artisan Design Team
I love this paper, Happy Haunting DSP, page 47. I used Tangelo Twist and Basic Black Archival ink. I embellished the sentiment with the ribbon, Tangelo Twist page 159 in the AC, and Gold Cording trim on page 24 of the HC. The sentiment is from a set carried over from last year, For all things, page 87 of the AC. The acorns were punched out with the Acorn builder punch, page 45 of the HC.

I sponged this card front with tangelo twist and Blackberry Bliss. Lydia Fielder, Understand Blue used these colors together on a card and I really liked the look of it. Thanks for the inspiration Lydia. I used the stamp set Howl-o-ween Treat, page 49. I used the fabulous Boo to You framelits to cut the images out.
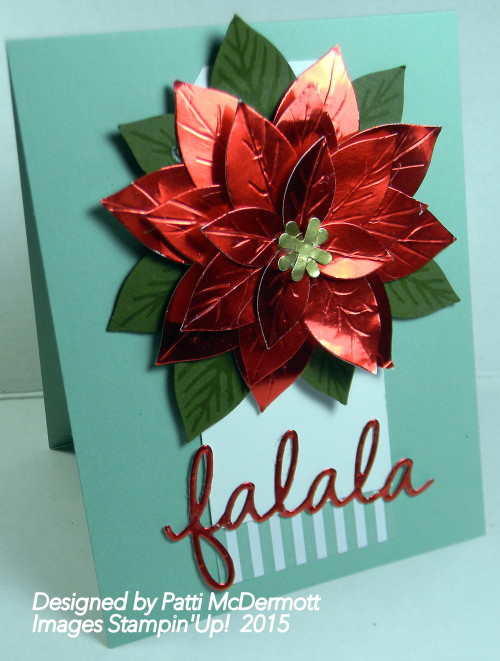
I used the Festive Flower punch, page 31 HC, to punch out the petals on the red foil paper, page 26 HC, the green leaves were stamped with Reason for the Season set on page 31 of the HC. I used the stylus to score the petals and gold foil paper for the center of the poinsettia. The sentiment is from Seasonal Fame Thinlits, page 40, HC. I really like this against the Mint Macaron card stock, don’t you?
ON this card I used the framelits, page 172 of the AC, without the stamp set and I am really happy with the way they turned out. I scored each leaf with the stylus tool. The colors I sponged with are Old Olive, Watermelon Wonder and Tangelo Twist, on Dafodil Delight Card Stock. The sentiment is from the set Among the branches, page 39 of the HC. I am sure getting a lot of use from that set. I embellished with the wooden elements, into the woods, page 43 of the HC.