
I designed this card with the Botanical garden suite. You can get the stamps, the Thinlits dies, and the DSP for a great deal, 15% off regular price by ordering the bundle. And you get a FREE SAB item with this purchase. How awesome is that?

|
|
|
||||||
|
|


What woman doesn’t get excited about diamonds? I know I definitely do! Unfortunately, not everyone’s bank account cooperates when it comes to “genuine” diamonds, but how about a diamond-shaped package for jewelry, chocolates, or other little gifts?

You can make this little diamond box in a jiffy using the Gift Bag Punch Board (item 135862). To do so, you’ll need a piece of Crumb Cake Cardstock (item 120953) at 21.5 x 8.3 cm. Using the Stampin’ Trimmer (item 126889) score the long side at 2 cm.

Take the Gift Bag Punch Board and place the left edge of your paper on the starting line, with the previously scored 2 cm facing downward. Now punch and score the horizontal and triangle sides with the scoring tool. Mark the side line on the bottom edge with a pencil—do not score it!!
Next, place the pencil mark on the starting line and repeat the steps. Punch and score until there is an approximately one-centimeter flap left.
The last step in making the box is to put a strip of Tear & Tape Adhesive (item 138995) on the flap and glue the box together. For the bottom of the box, I used Multipurpose Liquid Glue (item 110755).

To make the lid, you’ll need a piece of paper from the Love Blossoms Designer Series Paper Stack (item 140548) (9.2 x 9.2 cm). With the Stampin’ Trimmer, score on all four sides at 2 cm. Then use the Paper Snips (item 103579) to cut the flaps for gluing (following the diagram); glue the lid together using Multipurpose Liquid Glue.
For the decoration I used the Bow Builder Punch (item 137414) to make a bow out of Blushing Bride Cardstock (item 131198) and attached the individual pieces with Glue Dots (item 103683). I embellished the center of the paper bow with a Very Vintage Designer Button (item 129327).

The satin ribbon that I wrapped around the lid and the string of beads come from the Love Blossoms Embellishment Kit (item 140551). I also decorated the package with flowers from the Itty Bitty Accents Punch Pack (item 133787) and with Pearl Basic Jewels (item 119247).
The stamp “für dich” (“for you”) is from the Birthday Blooms Stamp Set (clear-mount item 140658/ wood-mount item 140655). I embossed it using Silver Stampin’ Emboss Powder (item 109131) on Whisper White Cardstock (item 106549). Then I punched out the heart using the Sweetheart Punch (item 133786).

I hope that I’ve been able to help you with a gift (or rather a package for a gift!) on Valentine’s Day. I wish you lots of fun making your own box!
Jessica Winter
Artisan Design Team 2015-2016
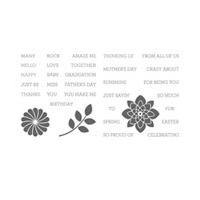
Botanicals for You Stamp Set and Botanical Gardens Designer Vellum Stack

During Stampin’ Up!’s annual Sale-A-Bration event, you earn FREE Sale-A-Bration rewards for every $50 US/$60 CA you spend on Stampin’ Up! products, including the very diverse Botanicals for You Stamp Set and Botanical Gardens Designer Vellum Stack—two of our favorite Sale-A-Bration products!
One of the things that makes these products so cool is that they coordinate perfectly with the Botanical Gardens Suite from the 2016 occasions catalog. Throw all of these products together in a semi-organized way and come out with a set of four fantastic cards, as well as a nifty card holder. Life is good during Sale-A-Bration! Contact your demonstrator today to learn how you can get your hands on these tropically-themed products.
My oldest daughter has a birthday today and I made this card for her. I spent a long weekend at her house in TN recently and we had the best time. She is an incredible cook and a remarkable entertainer.
I had a wonderful time with my only granddaughter, Mary Pat who is 11 years old. I went to her basketball games, we went shopping, and out to lunch while I was there. I thank God for this blessing in my life.

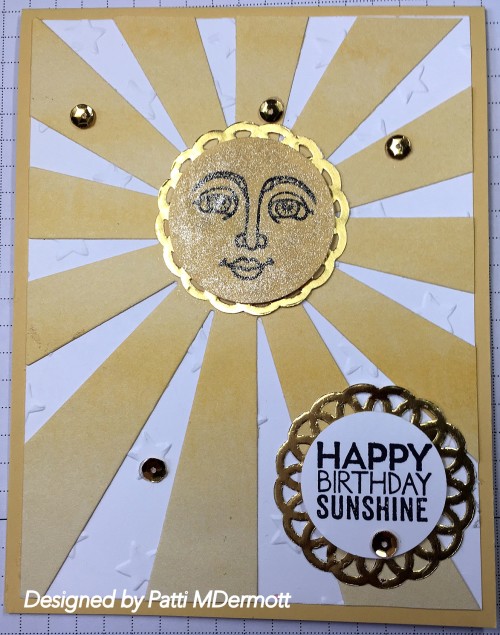
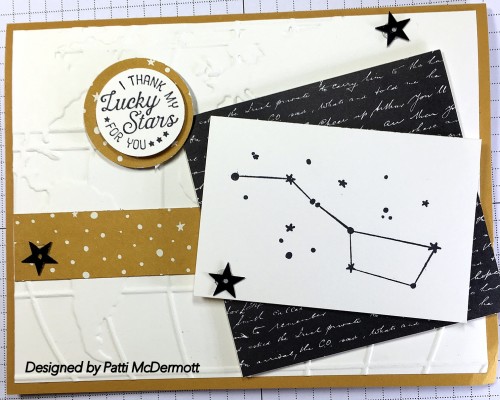
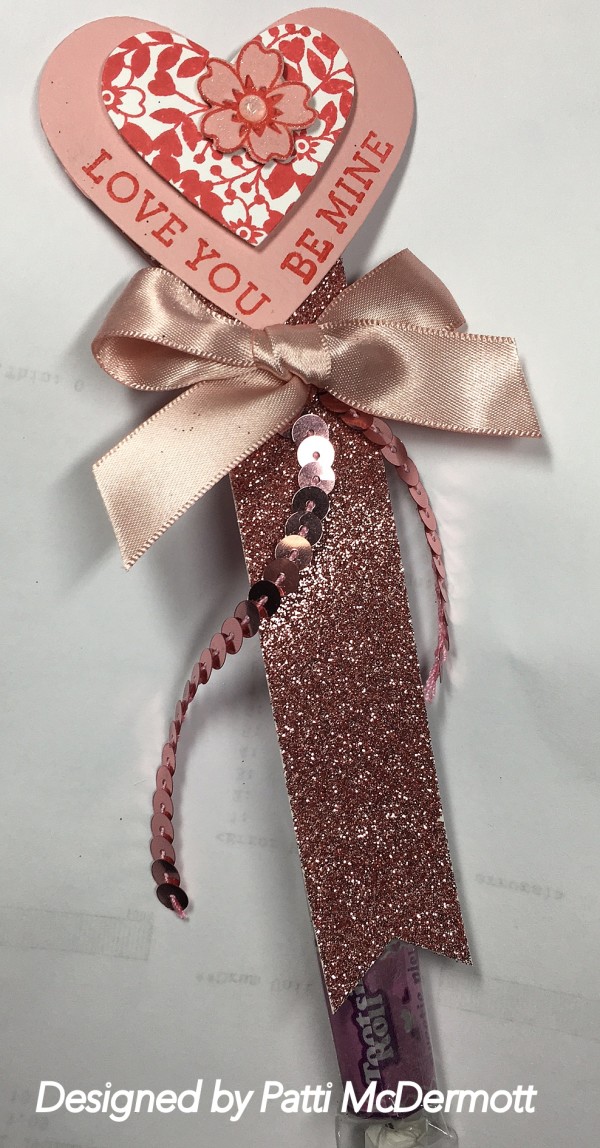
I created this card using the Sunburst Thinlits Die, page 25 of the OC. In addition, I used the Metalic Sequin Assortment, page 160 of the AC. The stamps are from the set Ray of Sunshine, page 78 of the AC. I chose So Saffron for the sunburst.
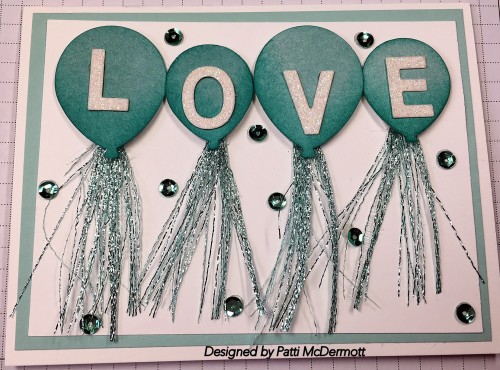
I used the Balloon Bouquet punch on this card, page 13 in the OC. I used the DSP Perfectly Artistic, page 19 of the SAB catty. Sponged the balloons with Bermuda Bay ink and frayed the beautiful Pool Party Glitter ribbon, page 9 of the OC. I used the Little letters thinlits dies, page 172 AC, on Dazzling Diamond Glimmer paper.
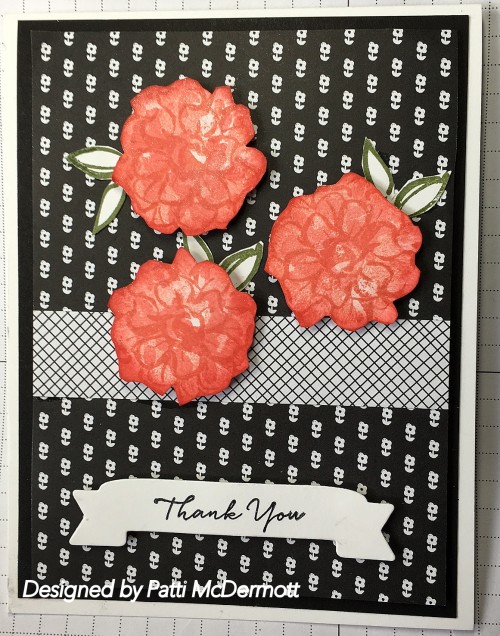
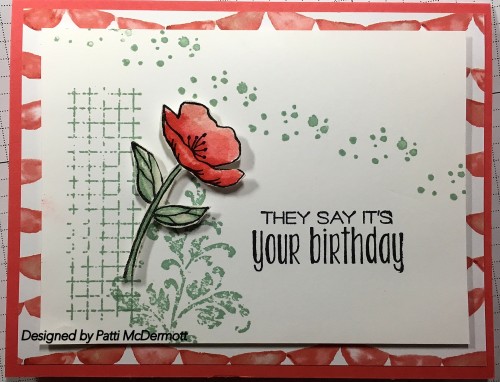
With Valentine’s Day fast approaching it is not too soon to start thinking about what cards you are going to make for the special people in your lives. This card was created using the stamp set, Blooming’ Love, page 17 of the OC. The matching Dies are on page 16. What is great about this set is you can get it by the bundle and save an additional 15%. The set has some wonderful sentiments also with beautiful images. The porcelain dots can be found on page 6.

|


I created this card for our camp on Saturday and it is from the set Going Global, page 30 in the OC. I used the embossing folder, World Traveler Textured Impressions, same page, on the very vanilla background and I used the colors Delightful Dijon and Black Archival inks. The DSP is from the Going Places DSP paper Stack, also on same page.
This set can be found on page 27 of the OC. The matching dies are on page 26 and this can be purchased as a bundle. The great thing about this bundle is that it includes the DSP also. Quite a buy at $51.75. That means if you purchase this bundle through March 31st you can get a FREE Sale-A-Brations item. Double Whammy WOW!
This is what we made at camp today. It contains Tootsie rolls for Valentine’s Day.
Contact me here if you want one. I have Sale-A-Bration catalogs also.
Hey Stampers Sorry I am a day late with these weekly deals but I just got home from Nashville late last night. Just in time I might add. They are having a snow day today. I would have hated if it snowed when I was there. Anyway, better late than never!
|
|
|
||||||
|
|


Hey Stampers I had to translate this into English, as Chantal is one of our Demonstrators from Abroad.
Good morning! Today, we have arrived at the 3rd bloghop of Artisan Design Team. And the first of this year, of course! If you have been following the blog you came here from Amy O’Neill. If you start here and want to follow the blog, so you can immediately through hopping to Cindy Schuster. This time some sappy cards in gold with pink hues. Even though I’m not a ‘gold’ girl, I know it to appreciate more and more. Watching you with?

All cards are made as much as possible in the same color and style punches together in combination with the Love Blossoms Embellishments Kit. The stamps you look back on these cards is a mix of ‘Picture Perfect’, a beautiful set that can stamp it with multiple layers. And with the set ‘First Sight’ which consists mainly of decorative stamps.

As you can see on the map above and below gold splashes. I applied with the “Wink of Stella Gold ‘. Last time I used the “clear” version to apply glitters on the stamps, but with the ‘gold’ version I found it fun to use as the background in conjunction with the embellishments kit.

I like the rose of ‘Picture Perfect’ absolutely great! I have chosen to use the ‘Blushing Bride Glimmer Paper’ as interlayer.


Hello my friends and welcome to the Stampin’ Up! Artisan Design Team blog hop! I am SO excited to finally be able to share this project with you! I made this adorable Valentines Day Countdown waaaaaay back in December and I’ve been counting down the days to share it!
Ever since I made the Tree Advent Calendar, I knew I wanted to use the fabulous Tiny Treat Boxes to make some more advent calendars and fun holiday countdowns. These boxes are truly THE BEST. So here it is, the most adorable Valentines Day Countdown evah!
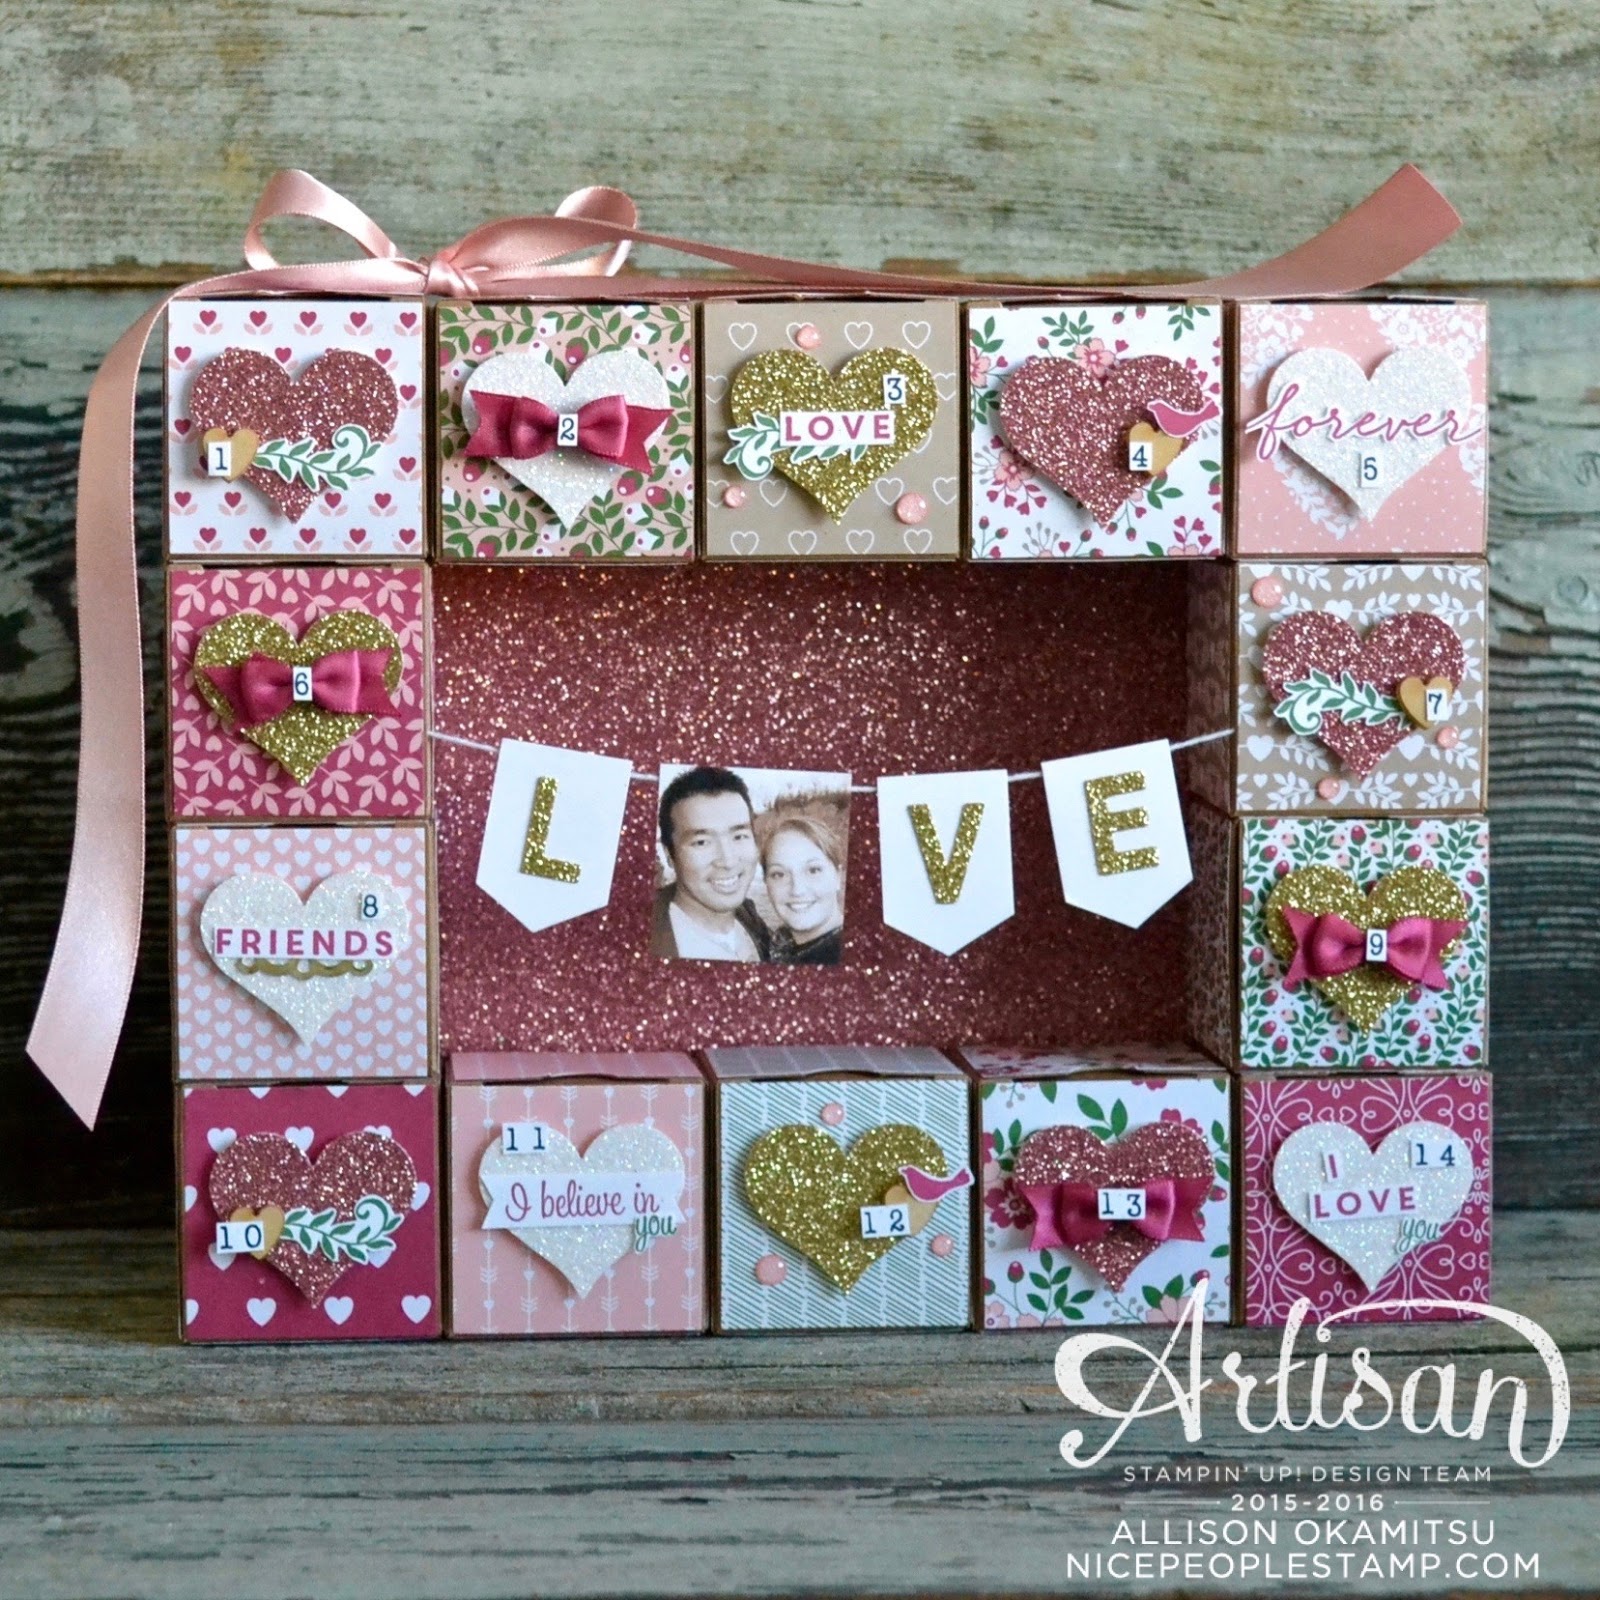
I used lots of new products from the 2016 Occasions Catalogue (all of which are listed at the end of this post), but the real showstoppers here are the Love Blossoms Designer Series Paper Stack and the Love Blossoms Embellishment Kit. Oh, and we can’t forget the new Blushing Bride Glimmer Paper – swoon!
The things I like most about starting a new year are organizing and setting new goals! You put away the Christmas decorations and your home feels fresh and clean all over again; you mark your new 2016 calendar with annual events, activities, and special days; and you look forward to the start of a NEW Stampin’ Up! occasions catalog!

In looking through the new occasions catalog, one cute bundle caught my eye in my quest to get ready for the New Year! It was the Number of Years Stamp Set and the Large Numbers Framelits Dies bundle (item 140811). Instantly, in my mind I saw a perpetual calendar! I cut the Whisper White 8-1/2″ x 11″ Thick Cardstock (item 140272) into 2-1/4″ x 3-1/2″ pieces, trimmed the corners with the Project Life Corner Punch (item 135346), and made the centered top holes with the 1/8″ Circle Punch (item 134365). You’ll want 13 tags in all.

Then I stamped the Number of Years Stamp Set in Tuxedo Black Memento ink (item 132708) and cut them out using the Large Numbers Framelits Dies and my Big Shot (item 113439). I adhered them to the tags using SNAIL Adhesive (item 104332). To optimize space on the hooks, I used both sides of the tags: even numbers and the first six months are on one side, odd numbers and the other six months are on other side (as shown in the photos).

I grabbed the Project Life Day to Day Stamp Set (item 135785) that has each month’s image, about EVERY color of Stampin’ Up ink, then stamped directly onto the Whisper White Thick Cardstock tags. I wanted them to have a tone-on-tone or ombre look. Some are stamped off for a lighter version of that color. You can see how the colors selected for each month match the season.

Then I needed to figure out how to display my calendar, and after finding a long, oblong wood slice at a local store, I knew I had it! I also bought a package of gold metal c-hooks that you just screw evenly placed into the wood. It still seemed to be missing something to finish it off, so I added a piece of my favorite Natural 5/8″ Chevron Ribbon (item 132982).

You could always put the calendar on a wire frame holder and place at your desk—or hang it, like I did. I even cleaned and organized our messy command center in the kitchen after I put my finished perpetual calendar up on the wall! One of my new goals is to change the date each day as I pick up mail to send, make a grocery list, or grab my keys. If I miss a day, I’m sure my family will always catch it for me!
Cindy Schuster
2015–2016 Artisan Design Team
Every now and then you need a gift for someone special. I think everyone loves candles and little tealights, so I made this cute little gift. I adhered the tealights with a bit of washi tape, then put them in a glass jar decorated with matching Designer Series Paper and a beautiful butterfly on top.

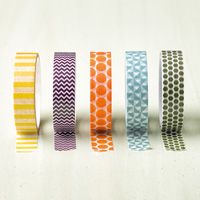
Start by taking a tealight and slowly wrap the Everyday Chic Designer Washi Tape (item 138385) around it. Tear when you’ve wrapped the whole tealight. Do the same with as many tealights as you need to fill the jar. Vary with different designs.
For the top of the jar, I used the matching Everyday Chic Designer Series Paper (item 138445), Butterflies Thinlits Dies (item 137360), and the Sunburst Sayings Stamp Set (item 140725).

If you want to expand your gift, wrap some washi tape around little tealight holders.


Have fun making your own gift in a jar!
Inge Groot
Artisan Design Team 2015-2016

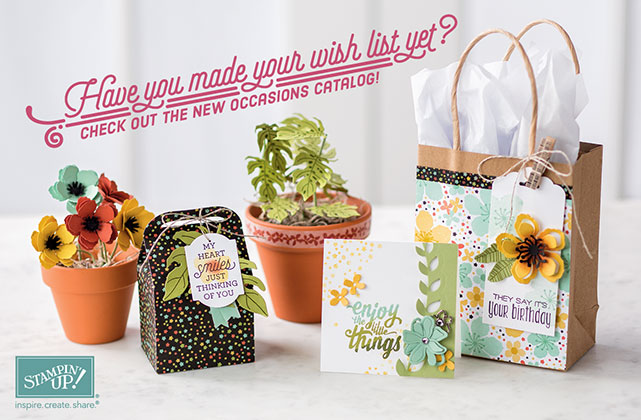
Introducing…the Flowering Fields Stamp Set and Wildflower Fields Designer Series Paper!
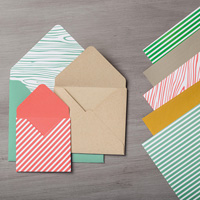
This stamp set and Designer Series Paper are so perfectly coordinated, you’ll be blown away by all the ways you can combine them. Just look at these note cards—aren’t they exquisite? One stamp set and one package of Designer Series Paper can give you all that variety!
You may be feeling a little desperate to get your hands on both of these limited-time Sale-A-Bration products—and we don’t blame you! Just order $50 us/$60 ca worth of current Stampin’ Up! products to get one of these Sale-A-Bration items for FREE! Want both? Order $100 us/$120 ca worth of products—it’s that easy! (Check out the supply list below for ideas of how to get started.)
This is what you’ll need to create these note cards:
Crazy About You and Flower Fields Stamp Sets; Whisper White Cardstock; Wildflower Fields Designer Series Paper; Whisper White Notecards & Envelopes; Basic Black Archival Stampin’ Pad®; Calypso Coral, Hello Honey, Lost Lagoon, and Old Olive Classic Stampin’ Pads; Crushed Curry and Old Olive Baker’s Twine; Stampin’ Dimensionals®; Blender Pens; Big Shot™; Envelope Liners Framelits™ Dies
This card was created using the stamp set Botanical Blooms, page 27 of the OC. The DSP is Botanical Gardens, same page and the matching framelits are on page 26. The first time I saw this DSP I knew I had to buy at least 2 packs of it. I liked everything in this suite so naturally I bought it all. Not sorry either because you can make so many different cards with it. You get a 15% discount if you purchase the bundle. AND THAT bundle will get you a FREE SAB, now through March.

Just a reminder if you want to sign up for this class you must have your Kit before the class begins. The dates of these classes are Friday, January 29th at 6:30PM and Saturday, January 30th at 10AM.
To register for this class you must pay in advance. See Kit on page 33 of the Occasions Catalog. Place order online for $28 plus shipping and tax, or send me your check or Credit Card for $33.42. Deadline for me to order kits is January 19th.
|


This stamp set will only be available until February 15th. If you want this set you need to order it ASAP, because it is one of those sets that go fast! When ever anything is limited it never lasts long. The sentiments in this set, Sky is the Limit, are awesome and can be found on page 16 of the SAB catalog. I used the SAB Perfectly Artistic DSP. This is also limited and will end February 15th. Don’t wait it may not be there later.
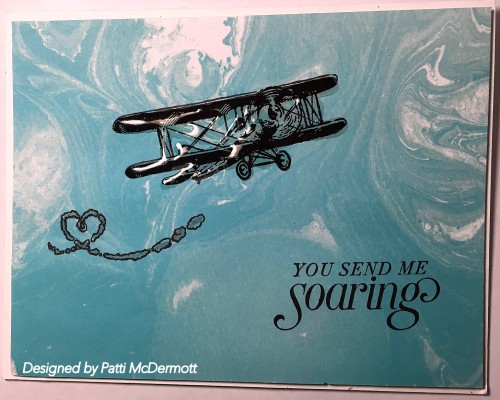 SAB
SAB
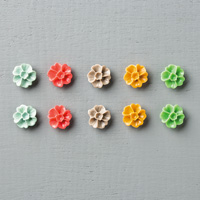
This ice cream cone is from the SAB set, Honeycomb Happiness on page 15 of the SAB catalog. The only way you can get this set is FREE. That is, if you purchase $50 of product before shipping and tax, from anyone of our catalogs. For every $50 you spend in January, February or March, you can earn FREE items from SAB. Place a $150 order and get 3 sets FREE.
The DSP is Birthday Bouquet found on page 9 of the OC. The colors I used are Blushing Bride and Mint Macaron. I also used the new Lots of Labels Framelits, page 173 in the AC.
This was one of the cards we made at Wednesday’s club.

I asked Debbie if I could use her video for my blog to show y’all how this kit is put together. She said I could and I am very grateful to her for the use of this great video.
I wanted y’all to see how easy it is to put together.
I am going to offer a class on this kit. If you are interested in attending this class you must purchase the kit from me before the class. The kit is on page 33 of the OC so you can see exactly what you get from the kit.
I will have the stamp set “Enjoy the Little Things” for you to use so your cost will be just for the kit which is $33.42 if you purchase in advance from me. If you want to go online, it will be $37.92.
Now if you purchase online and don’t live in Mt. Pleasant, you may pay less because of the tax rate in your area.
I will be having 2 classes on this. One morning during the week and one in the evening for those that work during the day. Contact me here if you need more information.
I absolutely love this stamp set, Botanical Blooms, page 27 of the OC, with the matching dies, page 26. In addition the DSP, Botanical Gardens, page 27, is to die for. The patterns on the some of the DSP can actually be cut out with the dies as they are the same size. Such an unbelievable suite. I just had to have it all.
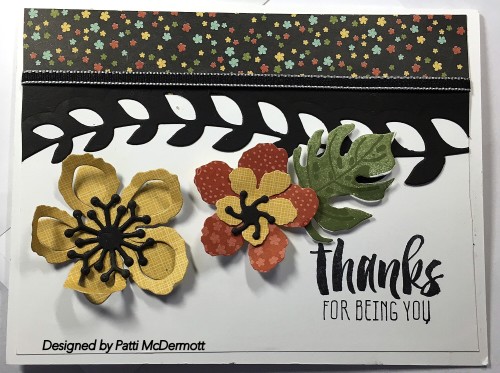
This card was created using the set, What I love, page 7 of the SAB. I used both Calypso Coral and Watermelon Wonder inks for this technique and stampin off with the Watermelon Wonder. I did fussy cut the flowers and the leaves, but it was very easy. Not very intricate at all. The DSP is Every Day Chic page 142 in the AC. The thank you was cut with the banner die from the Large Numbers Framelits, page 10 of the OC.
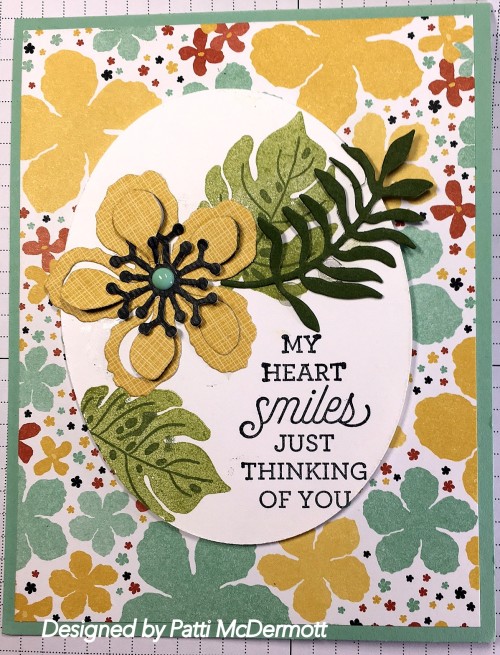
More flowers from the OC with the matching dies. The only stamping on this card is the sentiment, Sweet Sayings, page 41 of the OC. The Flowers were cut from the DSP, Botanical Gardens, page 27. On page 26 are the matching dies that I cut out the flowers and leaves with. This is such an outstanding set, I am sure you will see a ton of cards created with this set and matching dies all over the internet. The great thing about this is if you buy the Bundle, both stamps and dies, you will get 15% off. Quite a savings! I used the enamel dots on this card too. They are so cool!

|
|
|
||||||
|


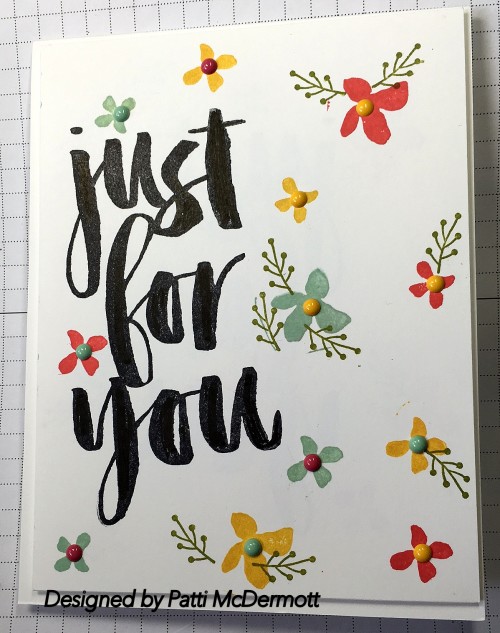
I got in a flower mode yesterday and decided to try out some of our new flower stamps both from the new Occasions Catalog (OC) and the new Sale-A-Bration catalog (SAB). This card was created using the SAB set, Botanicals for You, page 4. The colors I used were Watermelon Wonder, Mint Macaron, Crushed Curry and Old Olive. In addition I added the NEW lovely Enamel Dots, It’s My Party, page 6, of the OC. I think they really set this card off.
If you purchased the Hello December Project Life here is some ideas for you! Still got time through January 4th.
Last year was the first time I made a themed, monthly memory book (or “December Daily”) and now my December 2014 album is one of my favorites. The holidays are here, and I’m ready again to preserve my memories as they happen. Meet my December 2015 album!

As you can see, my album is ready for my December memories. This came together quickly and easily using the Hello December 2015 Project Life Accessory Pack, the Project Life Hello December stamp set, and some acrylic paints from my stash.
Your first order of business is to get your hands on the Hello December product bundle. (When you buy the bundle, you save 15 percent!)

You’ll also need the Kraft 6″ x 8″ Project Life Album (item 139655) and the Variety Pack 6″ x 8″ Project Life Photo Pocket Pages (item 135297).
Making this album is so much fun! I hope you’ll get the supplies to create your own December album this year!
Allison Okamitsu
2014–2015 Artisan Design Team
This is one of my favs in the new OC, page 9. I used the new set Timeless Textures, page 29 for the background and the sentiment is from the set Suite Sayings, page 41. I used Watermelon Wonder and Mint Macaron. The gorgeous DSP is Birthday Bouquet, page 9.
My name is Allison Okamitsu and I’ve been a demonstrator for almost 7 years. I live in Calgary, Alberta with my amazing husband, Hayato, and two adorable little puppy dogs, Chapman and Olivia. I work full time as a Stampin’ Up! Demonstrator, teaching classes both in person and online. Creating with paper is truly my passion, and I’m thrilled to share that with you, so I hope you’ll come and visit me often.
For our first post, the Artisan Design Team was told to create whatever we want. Sounds awesome, right?! I felt kind of paralyzed at first, but then decided I wanted to create something that was ‘me’ or my style, so it was a no brainer to incorporate lots of white space with some watercolouring.

So here it is. My first project for the 2015-2016 Stampin’ Up! Artisan Design Team. It’s me. I am BIG into watercoloring, like whoa! I love the unique, organic, beauty that each watercolouring session brings. No two images are ever alike, and I love that.

For this card I’ve used two new stamp sets from the upcoming Occasions 2016 Catalogue that will go live on January 5th. The dandelion comes from Balloon Celebration and the sentiment from Sunburst Sayings.

For that pretty wrinkled background I’ve used the White Filter Paper on top of Thick Whisper White Cardstock. I love the soft look it brings to the stark white card front.
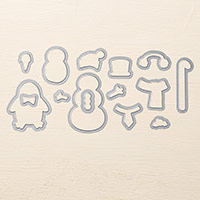
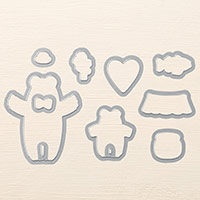
If you rec’d your new catalogs in the mail then you can find this set on page 40 of the Occasion Catalog (OC). It is called Bear Hugs. It has matching framelits, also on the same page. You can get it in wood or clear mount.


