15. July 2016 · Comments Off on More from the Design Team · Categories: Cards

Keeping the Memories Alive

After spending two weeks in Europe this past May, I couldn’t wait to keep the memories alive using Project Life by Stampin’ Up!

I instantly fell in love with the new annual catalog’s Hello Lovely Project Life Card Collection (item 141668) so I knew what I was going to use for my album. The pocket cards from this kit will fit any theme or occasion and I loved how they fit my theme—vacation!

1

Before I started decorating the inside of the album, I started with the outside. And by the way, that’s one of my favorite things about the Espresso 6″ x 8″ Project Life Album (item 139655): you have total freedom to make the album unique and add your own creative personality!

2

The cover of the album was created using two cards from the Hello Lovely Project Life Card Collection and a few pieces from the Hello Lovely Project Life Accessory Pack (item 142687). I stamped the “Happiness” greeting using Early Espresso ink (item 126974) on one of the coordinating stickers from the accessory pack.

Once I completed the album’s front cover, I couldn’t wait to start creating layouts of the trip. I wanted to capture highlights from each country that we had visited over two weeks.  I did this by using the Variety Pack 6″ x 8″ Project Life Photo Pocket Pages (item 135297) which were perfect for snippets of our great vacation. I’ve already made great headway on completing this album and I’m excited to share a few of my favorite layouts with you.

3

For my first layout, I added a simple piece of Linen Thread (item 104199) stapled to the pocket card along with a die cut from one of the 2″ x 2″ cards in the accessory pack. I was a little giddy how the Project Life cards coordinated perfectly with my photos.

4

For the second layout, more embellishments were added including a die cut heart from the Sunshine Wishes Thinlits Dies (item 141489).

One of my favorite pocket pages included in the Variety Pack 6″ x 8″ Project Life Photo Pages is the one without pockets.  I used it as a title page for my album and for memorabilia I collected, but one of my favorite ways to use it was for a traditional scrapbooking layout as you see below.

5

This layout includes a 3″ x 4″ pocket card with a photo trimmed to fit inside the pocket card. I added the “Love” die cut by using the Sunshine Sayings Wishes Dies (item 141489) and a small strip (1″ x 6″) of the Pop of Pink Specialty Designer Series Paper (item 141648) along the edge of the pocket card. The Delicate White Doilies (item 141701) are one of my favorite accessories to use for any project and this one was no exception.

6

The last layout I want to share is my favorite.  I love how all of the elements came together to create a fun layout using one of the 4″ x 6″ pocket cards as a photo mat.  I included elements from the accessory pack, and I also incorporated the stamp set, sequins, washi tape, stickers, and the negative portion of the die cut I had previously used on another layout.

Whether you’re making a special album for a wedding or birthday or you’re preserving your travel memories, the Hello Lovely Project Life Card Collection (item 141668) and Hello Lovely Project Life Accessory Pack (item 142687) will help you create an excellent album to keep your memories alive for many years to come. From the album cover to the sweet photos inside, this Project Life collection fits many themes and will help you make your scrapbooking a simple but gratifying experience.

I hope this album inspires you to start keeping your memories alive with Project Life by Stampin’ Up! You’ll be amazed by how fun and simple the process can be!
Kimberly Van Diepen
Artisan Design Team 2015–2016

14. July 2016 · Comments Off on · Categories: Cards · Tags: , , ,

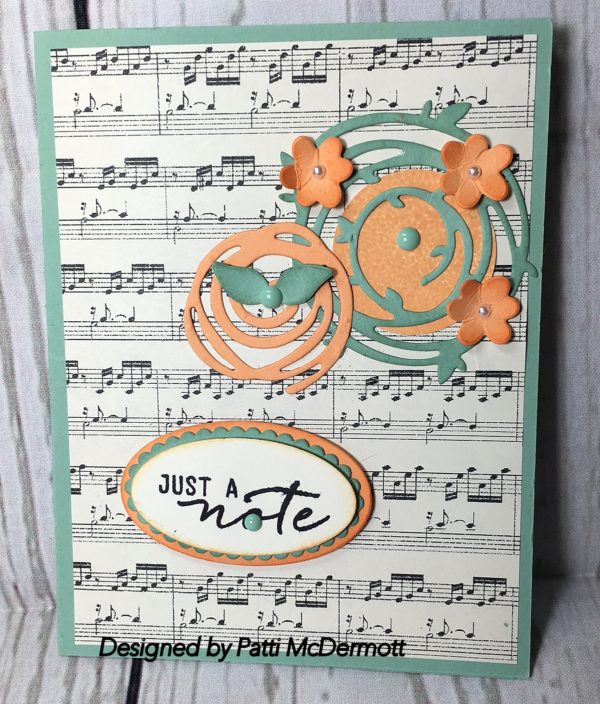
The sentiment on this card is from the all inclusive Kit, Watercolor Wishes, page 8-9.  I used the Christmas Specialty DSP, page 172, and cut out the images with the Swirly Scribbles Thinlits, page 194.  I used Mint Macaron and Peekaboo peach card stock.  I embellished with the Pearl basic jewels and the in-color enamel shapes.  I used the layering Ovals Dies, page 193 for the sentiment.
IMG_1050

Save

Save

13. July 2016 · Comments Off on Lovely! · Categories: Cards · Tags: , ,

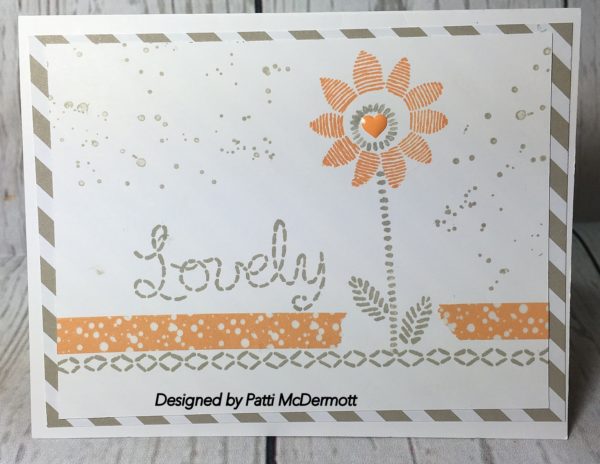
This set, Lovely Stitching, page 98 is one of those set that has so many different images that you could go on forever creating cards with it.  This card we made at my hostess clubs this past week and everyone loved it.  Hope you do too!

I used the In-Color DSP, page 174, for the background paper and whisper white heavy card stock for the base card and regular whisper white for the top layer.  I used colors, Peekaboo Peach and Sahara Sand.  I used gorgeous grunge for the background and the In-Color enamel shaped heart, page 177.
IMG_1048

Save

Save

Save

12. July 2016 · Comments Off on Bunch of Blossoms · Categories: Cards · Tags: , , , ,

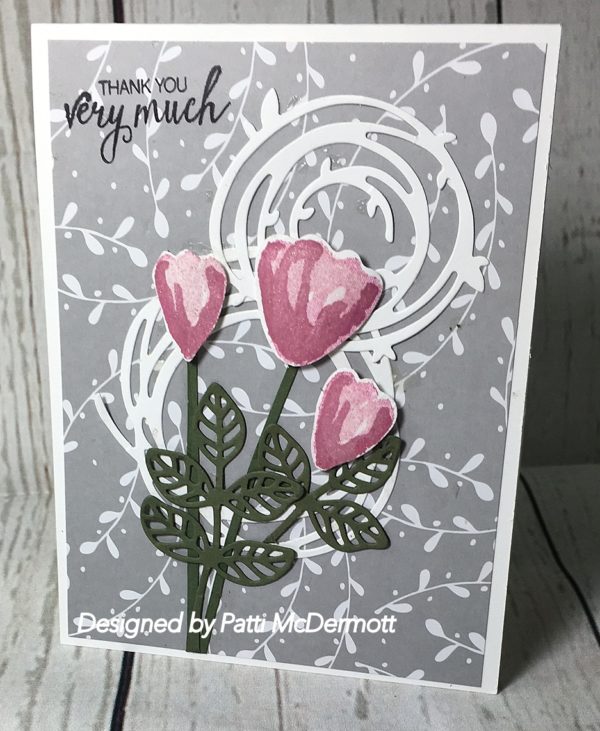
I love this set, Bunch of Blossoms, page 69.  You can buy this with the matching punch, page 188 for a discount on the bundle.  The stamp set is a two step stamp and has wonderful sentiments included with beautiful images.

Here I used the DSP, A Little Foxy Paper Stack, page 174, along with the Thinlits, Swirly Scribbles, page 194.  In addition, I used the Leaves from the Flourish Thinlits, same page.  Colors I used where Sweet Sugarplum, Whisper White and Always Artichoke.
IMG_1043

Save

11. July 2016 · Comments Off on Gate Card · Categories: Cards · Tags: , , ,

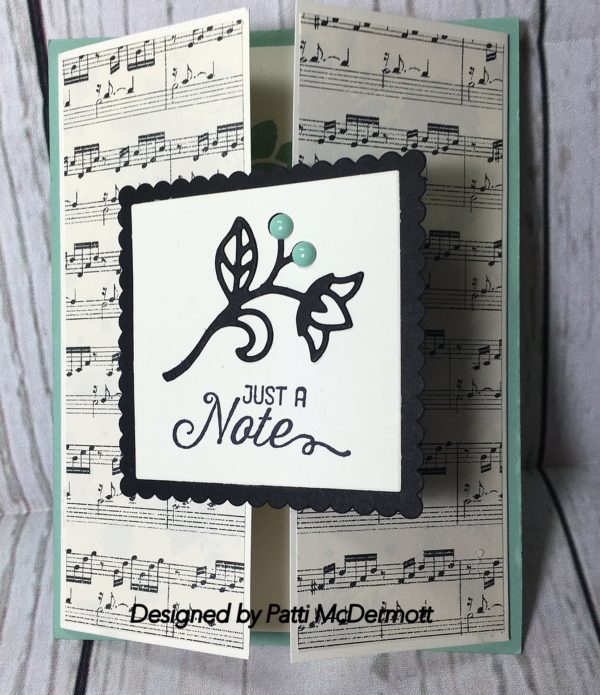
This is another card we made at club classes this past week.  I used the DSP, This Christmas Specialty, page 172 and the back ground base is Mint Macaron.  I used the new Layering Square framelits, page 193 for my image and the sentiment.  The image was cut out with the Flourish Thinlits, page 194 and the sentiment is from Flourishing Phrases, page 49.  Ink is Archival Black and Basic black card stock was used to create the scalloped background.
IMG_1045
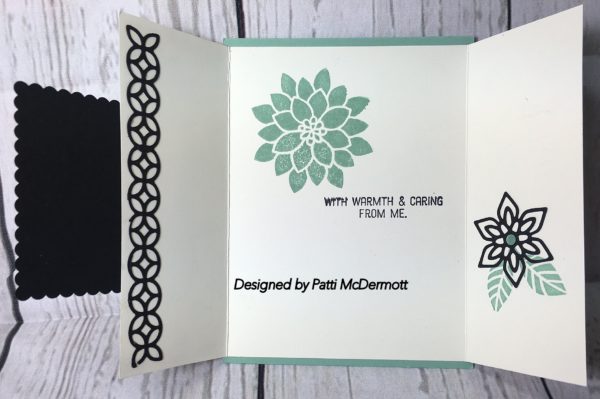
The black images on the inside of the card were also cut from the Flourish thinlits and the flower, along with the stamped images are from the Flourishing Phrases set.

Really great items to use, when you are cutting very intricate dies, like this, are the precision plate, and the Die Brush/ foam mat, both on page 190.  Makes fast work of little chards that normally stick to the cutouts.  I love what fellow demo, Brenda Quintana calls it, Shrapnel. LOL

IMG_1046


Save

Save

Save

Save

Save

10. July 2016 · Comments Off on SUO Challenge – Delight in Nature · Categories: Cards · Tags: , , ,

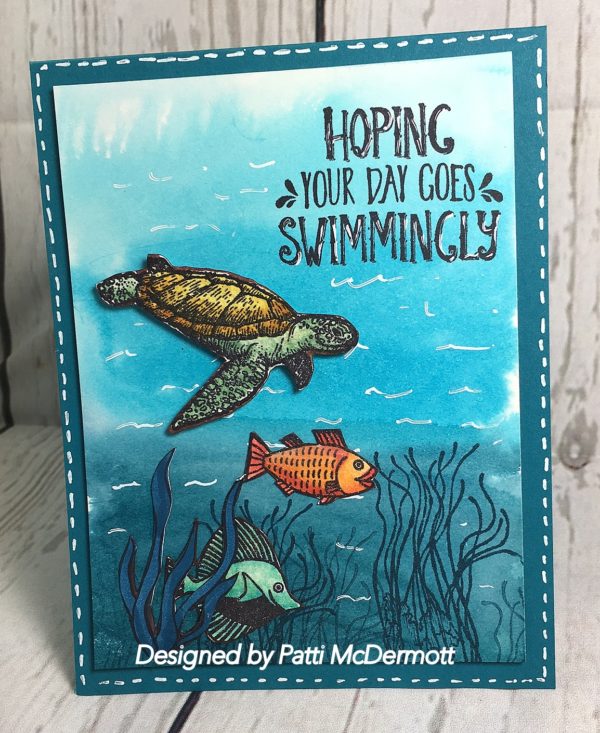
This card I created for the SUO #152 Challenge.  I was to share a project that features something delightful about nature that you can create with Stampin’ Up! products.  So this is what I came up with.  I love anything to do with the Ocean, especially since I live on the coast.
On this card I used a water wash, on Shimmery card stock, for the background of Tempting Turquoise and Island Indigo.  The Stamp sets I used are Seaside Shore, page 93, From Land to Sea, page 98, and Bear Hugs, page 107.  I stamped the images on watercolor paper, page 175, and used an aqua Painter, page 180 to color them. I finished off with a white gel pen (retired) to embellish.  Hope you like it!
IMG_1058

Save

09. July 2016 · Comments Off on Blue Bird Thinlits · Categories: Cards · Tags: , , , ,

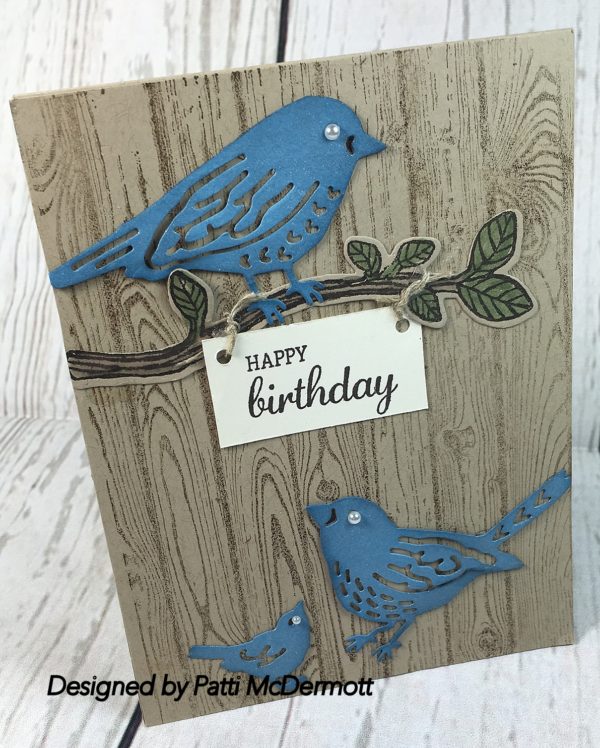
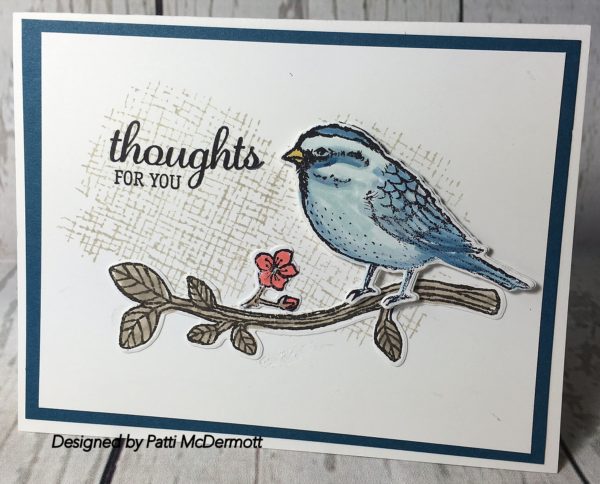
This card was created with the Birds and blooms thinlits, page 194 of the AC.  I used the Hardwood background stamp, page 125 and cut the images out from Marina Mist Card Stock.  The card base is Crumb cake CS and I used the Pearl basic jewels, Page 177 for the eyes.  Sentiment is from the stamp set, Best Birds, page 53.
IMG_1008

Save

Save

Save

08. July 2016 · Comments Off on Christmas in July? · Categories: Cards · Tags: , ,

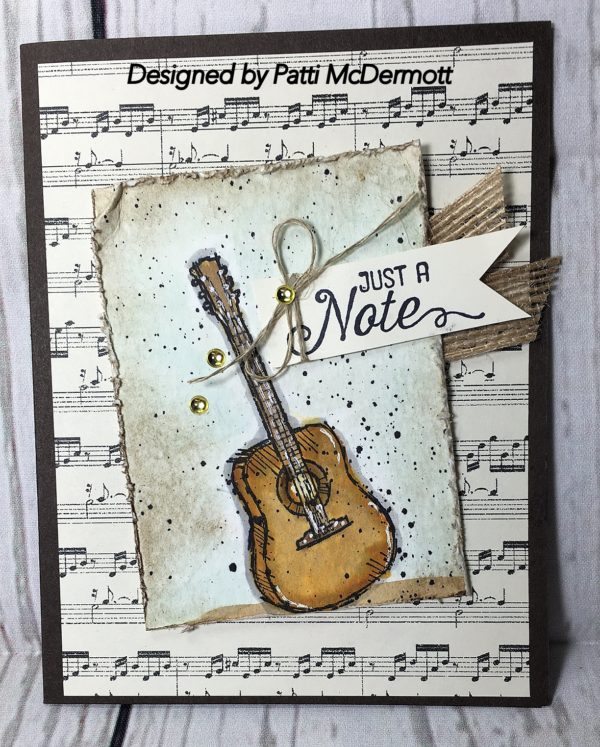
Not really, however, the DSP is This Christmas Specialty paper, page 172 of the AC.  It is the best Selection of DSP for Christmas that I have ever seen.  I especially love this design because it goes with everything, not just Christmas, as in this card.

The stamp set is Country Livin’, page 131 and I colored it with our inks and aqua painter on watercolor paper.  Colors used on this card are Delighful Dijon, Soft Suede, Crumb cake, Early Espresso and Black archival.  I splattered with archival ink mixed with water and a paint brush.  I used our new 5/8″ burlap ribbon, page 178 and linen thread, page 179.  I also used the metallic Enamel shapes, page 177.  The base card is Early Espresso.  I highlighted the guitar with white gel pen.
IMG_1053

Save

Save

Save

Save

07. July 2016 · Comments Off on Robin Redbreast! · Categories: Cards · Tags: , , ,

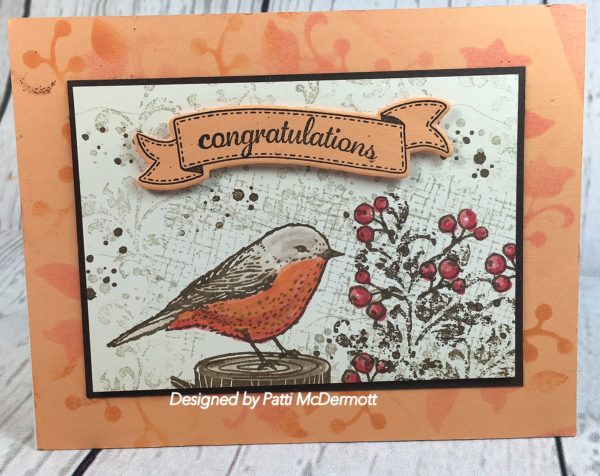
Another card created with Best Birds, page 53.  In addition, I used the set Timeless Textures, page 120.  The tree Stump is from Foxy Friends, page 57.  On the base card, which is Peekaboo Peach, I used the same color ink with a stencil cut out from Flourish Thinlits, page 194.  This is one of my favs as far as stamp sets from the new catalog.  Colors I used are Early Espresso, Soft Suede, Sahara Sand, Peekaboo peach, Flirty Famingo, and Watermelon Wonder.
IMG_1014

Save

Save

06. July 2016 · Comments Off on Irresistibly Floral.. · Categories: Cards · Tags: , , , ,

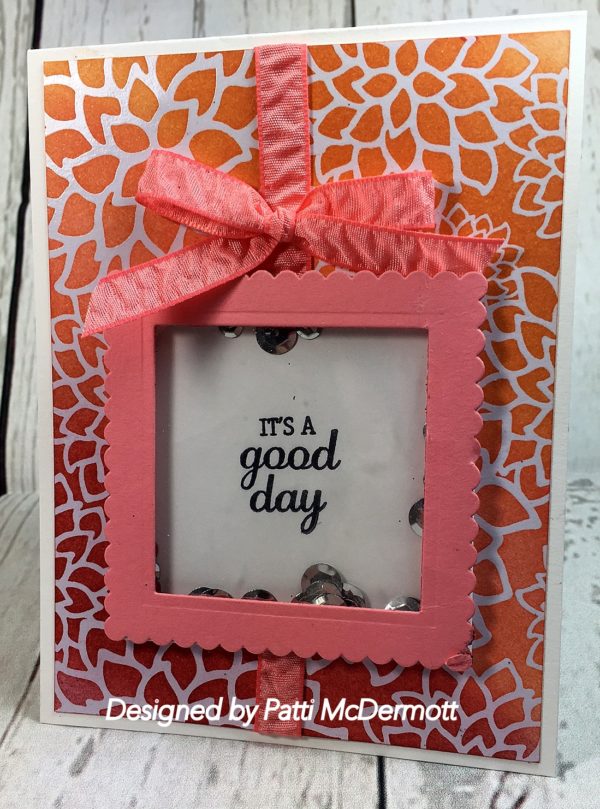
This DSP, page 172, is so cool.  Here, I used inks, Peekaboo Peach, Flirty Flamingo and Sweet Sugarplum and rolled it on the card stock with the new tool, Sponge Brayer, page 180.  What I like about this new tool, is that you can wash the sponges out and continue to reuse them.  However, this tool does comes with 2 brayers and 4 sponges.  So they should last a long time.  If you noticed that replaces the brayer we used to sell and works very well.
I used the peekaboo Peach Ruched ribbon, page 178. I made the shaker using window sheets, page 175 and the layered Square Framelits, page 193.  The sentiment is from the set, Best Birds, page 53.  To create the window I also used our new Foam Adhesive Strips, page 182.
IMG_1026

Save

05. July 2016 · Comments Off on Bonus Days Promotion · Categories: Cards

“I’m so excited about Bonus Days! This is the first time Stampin’ Up! has offered coupons to customers! All you need to do for your $5 USD/$6 CAD coupon is spend $50 USD/$60 CAD in July. Stampin’ Up! will email you a coupon for every $50 USD/$60 CAD you spend, and you can use coupons on anything you want in August!”Social2_BonusDays_demo_July0716_US


Save

05. July 2016 · Comments Off on Vintage Country! · Categories: Cards · Tags: , , , ,

I am in love with this set, Country Livin’, page 131.  I used the Background stamp, Hardwood, page 125 in back of these awesome boots and used the set, Timeless Textures, page 120.  My colors were Marina Mist, Sahara Sand, Smokey Slate, Crumb cake and soft suede.  I used the sentiment from Endless Birthday Wishes, page 22, and the banner framelit, Bunch of Banners, page 193.
IMG_1018

Save

04. July 2016 · Comments Off on Party Hardy on the 4th! · Categories: Cards · Tags: , , ,

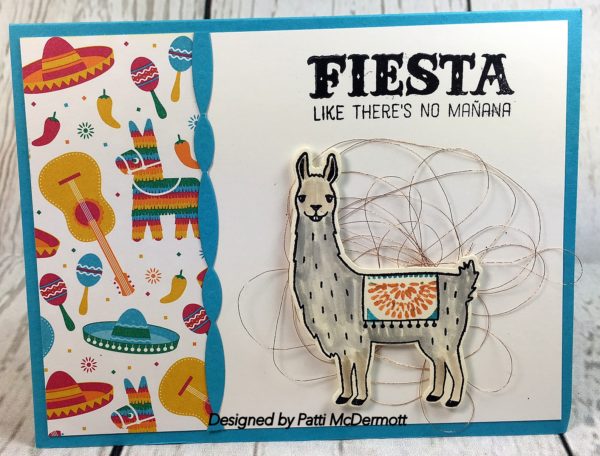
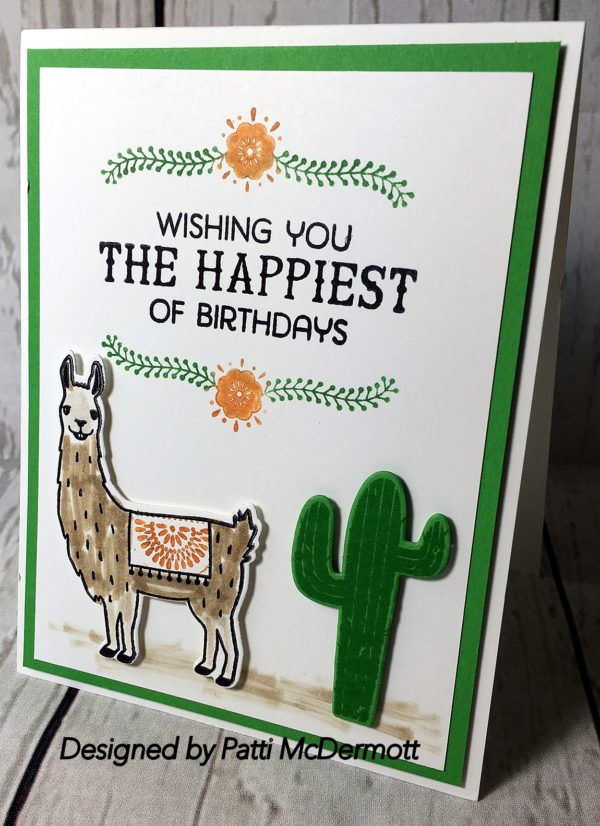
I created this card with the set Birthday Fiesta, page 11 of the AC.  The DSP, page 173, is called Festive Birthday and the images were cut out with the framelits, Fiesta Time, page 193.  Colors I used on this cute little guy are Sahara Sand and Crumb Cake.  Card stock is Whisper white, very vanilla and Tempting Turquoise.  In addition, I used the copper Metallic thread to finish off the card.
IMG_1020

Save

Save

03. July 2016 · Comments Off on From Shelli, our Co-Founder………. · Categories: Cards

Feelings of Guilt

I didn’t plan ahead for Jon and Sean’s birthdays, which happened to be right after the cruise, so we decided to just give them cash without packaging. They’re guys; they won’t notice or care, right? Wrong!

They both mentioned they appreciated their gift, but they look forward to the packaging as well. So, these two ideas are the result of my feelings of guilt. The apron is for Sean, a new stay-at-home dad, and the camera is for Jon, my favorite photographer. I hope they like their empty packages and that you do too (along with the semi-instructions)!

Save

02. July 2016 · Comments Off on Pun Intended! · Categories: Cards · Tags: , ,

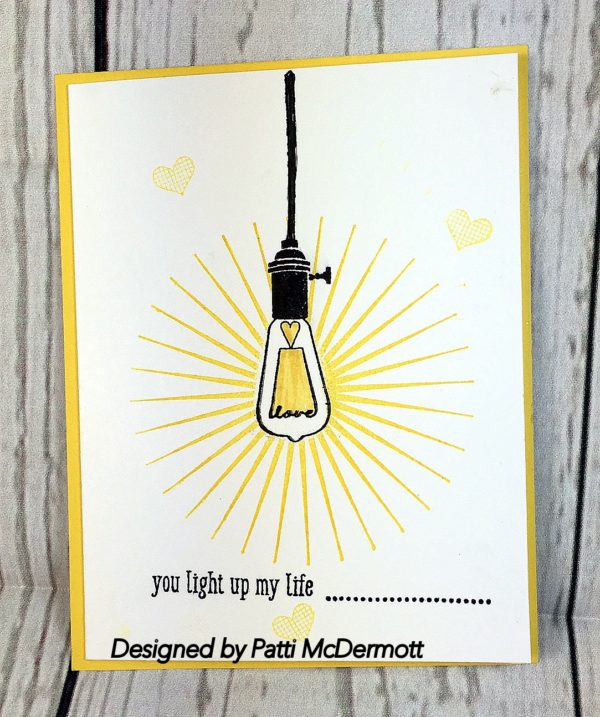
We made this at my camp Saturday, another CAS (Clean and Simple) project.  The images and sentiments are from the Hostess set, Pun Intended, page 200.  You can only get this set if you host a workshop, book party or host a club of at least $150.  You can contact me here to check dates, my house or yours, for your workshop.
I usesd whisper white and Daffodil Delight card stock and Basic Black ink.  The sun burst is from the set, Kinda Eclectic, page 147.  I masked the light bulb and then stamped the sun burst over it.  Great Stamp set.
IMG_1011

Save

01. July 2016 · Comments Off on Help Keep Families Together………. · Categories: Cards · Tags: , , , , ,

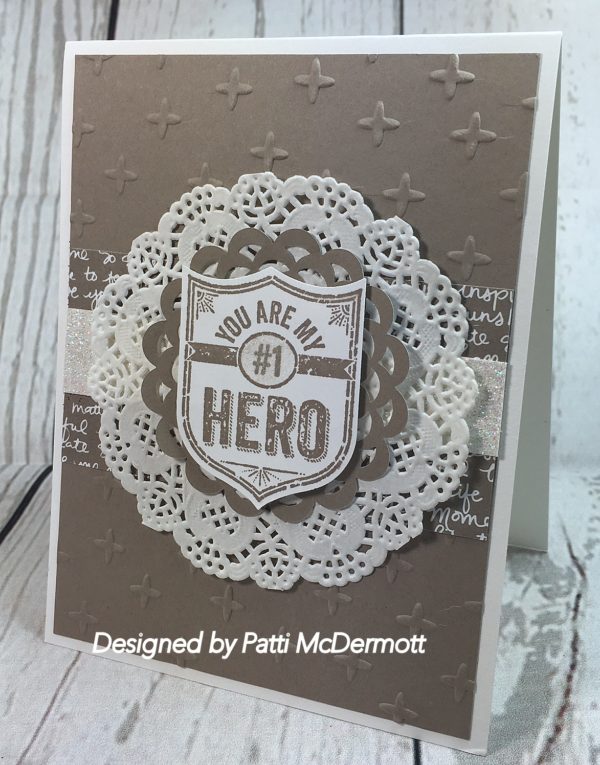
This was one of the cards I created for last Saturday’s Camp.  It is so simple yet very elegant and can be used for a masculine card.  I embossed the background, Tip Top Taupe, with our new Sparkle Embossing folder, page 195.  I used our Neutrals DSP and Dazzling Diamonds glimmer sheets, page 175,  In color Doilies, page 175 and Delicate white Doilies, same page.  The Stamped image is from our awesome Ronald McDonald House set for this year, My Hero.  I used the punch, Best Badge, page 186 to cut out the image.

For every set sold, My Hero, a donation of $3 is donated to the RMHC.  Great buy and great cause.  We have contributed more than $1.5 million dollars to local chapters.  This set is so versatile that making it part of your collection is a no brainer!
IMG_1027op

Save

Save

30. June 2016 · Comments Off on Monochromatic! · Categories: Cards · Tags: , , , ,

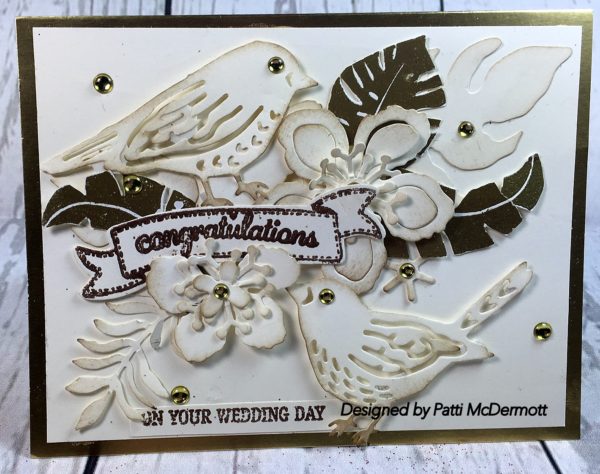
I love making these cards, they are so elegant.  Here I used just Whisper White, Very Vanilla and gold embossing!  The thinlits are Birds & Blooms, page 194 and the flowers are from Botanical Builders, same page.  The sentiments are from Best Birds, page 53, which I curved to fit the banner framelit, page 193. I finished off the card with our Gold Metallic Shapes, page 177.  Final touch, I sponged the edges with soft crumb cake ink.
IMG_1031-1

Save

Save

29. June 2016 · Comments Off on Copper shaker card · Categories: Cards

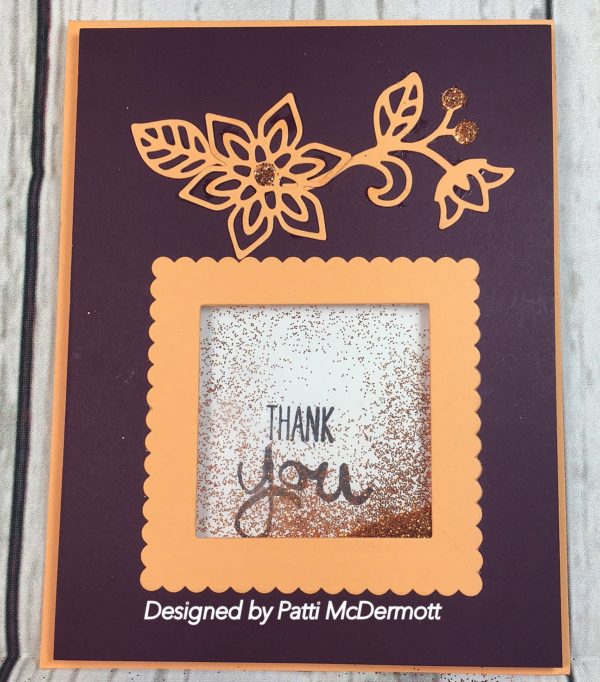
I found this old SU (retired) orange glitter that looked so much like copper that I thought I would use it on a shaker card.  It is very fine and I thought it went well with our Elegant Eggplant.  In addition, I used Peekaboo Peach and cut out the images with our Flourish thinlits, page 194 of the AC.  I used the Layering Square Framelits, page 193, to make the shaker box.  I loved using our new Foam Adhesive strips, page 182 to create the window.  Great stuff.
IMG_1029-1

28. June 2016 · Comments Off on Flowery Greetings – Member Artisan Design Team · Categories: Cards

A new catalog always makes my heart beat faster—and when I think of all the new products, even more new ideas start floating around in my head!

When buying stamps, I don’t make decisions depending on what kind of stamp images I already have in my cabinet—even if there are ten floral stamp sets. (You can never have enough of those!) And I usually don’t buy stamp sets because of their main images, either; it’s the small, unimposing stamps that make it to my must-have list!

Jessica Winter 1

The Jar of Love Stamp Set (item 141587) is a good example. I immediately fell in love with all the beautiful little flowers and I knew I had to have them.

Jessica Winter 6

For my first card, I used Whisper White Thick Cardstock (item 140272) for my card base; then I used a sewing machine to attach a piece of Dapper Denim Cardstock (item 141414) and Soft Sky Cardstock (item 131203). I cut the heart in the background using the Big Shot (item 113439) and the Sunshine Wishes Thinlits Dies (item 141489).

Jessica Winter 3

The die-cut word is from the same Thinlits set. I stamped “Is in the air” from the coordinating Sunshine Sayings Stamp Set (item 141591) in Soft Suede ink (item 126978). To create a poppy, I three-step stamped the largest flower in Calypso Coral (item 126983), Watermelon Wonder (item 138323), and Basic Gray ink (item 140932).

Jessica Winter 5

The best thing about this stamp set is that there is a coordinating Framelits set–Everyday Jars (item 141490); it saves you the trouble of cutting out the images by hand. To stamp the medium flowers, I used Peekaboo Peach (item 141398) and Tangerine Tango ink (item 126946). I also used Calypso Coral ink to stamp the mini flowers and Old Olive ink (item 126953) for the stems.

Finally, I embellished the card with some Burlap Ribbon (item 141487) and 2016–2018 In Color Enamel Shapes (item 141410).

Jessica Winter 7

To create the second card, I used a Soft Sky card base and the leftover flowers from the previous card. I stamped the medium flowers in Peekaboo Peach and Tangerine Tango ink and the stems in Old Olive ink on a piece of Whisper White Cardstock.

Jessica Winter 10

Then I adhered the die-cut flowers to the stamped images using Multipurpose Liquid Glue (item 110755) and Stampin’ Dimensionals (item 104430). Before adding the Burlap Ribbon, I wrapped a double length of Linen Thread (item 104199) around the card.

I hope I was able to inspire you by showcasing my favorite stamp set from the current catalog!

Jessica Winter

2016–2017 Artisan Design Team

Save

27. June 2016 · Comments Off on I’m in Packaging Paradise! · Categories: Cards

Another project of the Artisan Design Team

1

Don’t you just love new catalog season, when you can get your hands on loads of trendy, new products? One such range of products is the Pop of Pink Suite – which includes stamps with fun, summery imagery as well as coordinating accessories. And being me, I just wanted to bust those products out and create some gorgeous packaging with them—so I did!2

First up is a huge gift box created using my Gift Bag Punch Board (135862). The main body of the box is made from two pieces of Basic Black 12″ x 12″ Cardstock (124267). I then cut in half one of the gold-foiled confetti sheets from the Pop of Pink Specialty Designer Series Paper (141648) and wrapped both halves around my box to create a belly band. I wanted to get a little funky with my Melon Mambo Thick Baker’s Twine (141689) though, so I punched holes in the ends of the belly band to make “eyelets” and threaded my twine through them like shoelaces. I finished everything off with a gold flamingo tag created using the Pop of Paradise Stamp Set (141581) and attached it to the project with one of the new Gold Binder Clips (141673).3

Having used the entire first sheet of gold-foiled confetti Pop of Pink Specialty Designer Series Paper in my first project, I moved on to the second one – gold foil dots. This paper is so beautiful, I didn’t want to cut it up. However, I forced myself and made a simple gift bag, again with the Gift Bag Punch Board. For this one, I let the gold foil dots speak for themselves and kept my decoration to a minimum—another Gold Binder Clip and a Melon Mambo Thick Baker’s Twine bow. I also cut a swirly circle from Melon Mambo Cardstock (115320) using the Swirly Scribbles Framelits Dies (141497) and layered it behind my “Hello” greeting for another pop of pink!

4

Finally, no beautifully packaged gift is complete without a matching card—which I made using some more of the gold-foiled dot paper layered onto a card base made from Basic Black Cardstock (121045) and the “Thinking of You” sentiment from the Pop of Paradise Stamp Set (141581). For this project, I found the Melon Mambo Thick Baker’s Twine (141689) a little bulky for the look I was going for, so I split it to get some thinner fibers. You’ll find that it’s made up of three twists of five threads; I just used one of these twists on my card for a lighter bow.

I have always loved how Stampin’ Up! product suites allow me to produce beautifully coordinated projects –and I think I always will. Hope you have fun with this great suite!

Valerie Moody
Artisan Design Team 2015–16

Save

Save

26. June 2016 · Comments Off on Clean and Simple · Categories: Cards · Tags: , ,

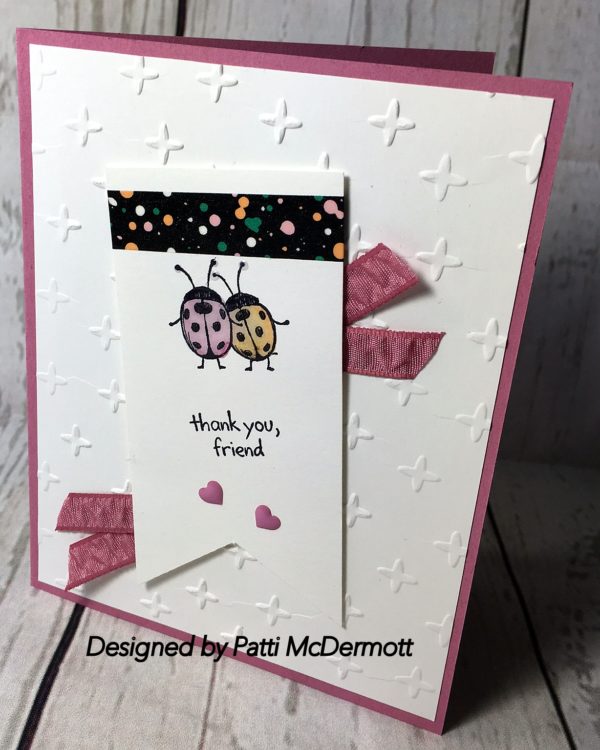
Again I used the hostess set, Love you lots, page 199 along with the embossing folder, Sparkle, page 195 on Whisper White back ground.  The base card is Sweet Sugarplum as is the beautiful ruched ribbon.  I used the Washi tape from Playful Palette, page 179.  In addition, I used the Enamel Hearts from the In-Color Enamel Shapes, page 177.   I decided at the last minute, to cover the lady bugs with our Fine Tip Glue, page 183.  I really like the way it came out.
IMG_1005

Save

Save

Save

25. June 2016 · Comments Off on June Paper Pumpkin: Banner Surprise · Categories: Cards
paperpumpkin_june_slider (1)

It’s a card. It’s a banner. Surprise! It’s the Paper Pumpkin Banner Surprise Kit—and we love it! Of course, you already know we love a good surprise, and this one is no exception. Have you ever given a card with a customizable, confetti-filled banner? Well, here’s your chance.PP_June_component_stamp

The kit includes supplies for six cards, banners, and envelopes. And, you get to decide what greeting to spell out with the gold-foil stickers. It also includes a bonus ink spot to do mix-and-match stamping. It is full of fun surprises!PaperPumpkin_June_Banners_1

PaperPumpkin_June_Banners_2

One of the best things about Paper Pumpkin is the flexibility to get creative with the included supplies. Use the gold stickers on the card front and stamp directly on the cellophane bag. This card uses just one cellophane bag (wrapped around the card front) so you can save the bags for another project, like a bigger banner.

PP_June_alternates_2 (1)

This next card has us all starry-eyed! Grab your Big Shot, Star Framelits, Whisper White Cardstock, and some of the new Foam Adhesive Strips to create an adorable shaker card. A Gold Binder Clip perfectly complements the gold confetti. And the stamps add a fun, splattered effect.

PP_June_alternates_1

Pull in a few supplies like the Fruit Stand Designer Series Paper, Basic Black Baker’s Twine, and the new Sunshine Wishes Thinlits Dies to create a bold card that is sure to brighten anyone’s birthday. Again, we love the splattered effect and the color combination is so on point!

PP_June_alternates_3

If you are one of our new subscribers who joined during the ONEDAYDEAL, congrats on scoring such a great deal, welcome to Paper Pumpkin, and we hope you were surprised and delighted by the June kit! If you’re craving some more fun (and who wouldn’t be?), be sure to grab a refill kit while supplies last.

Save

Save

24. June 2016 · Comments Off on Ahoy! · Categories: Cards · Tags: , ,

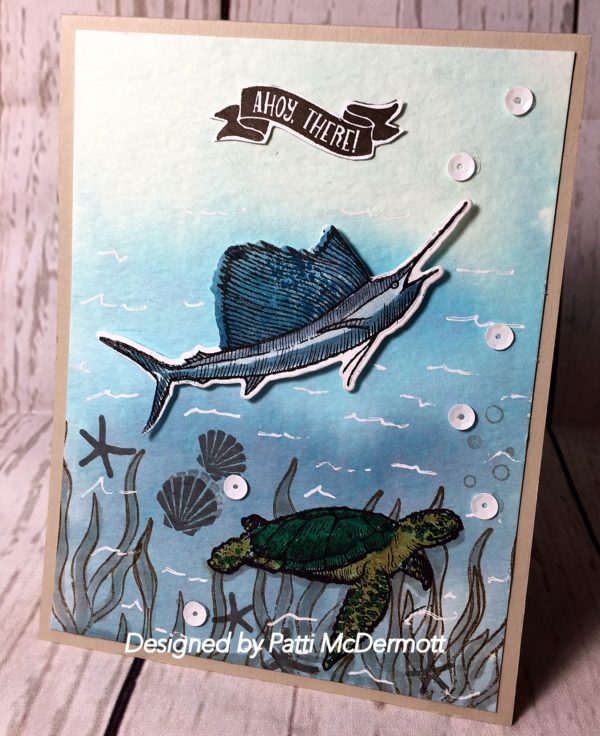
This card was made using the set, From Land to Sea, page 98, along with the set, Seaside Shore, page 93.  The back ground is a Wash using watercolor paper and various inks, soft Sky, Tempting Turquoise and Island Indigo.  I used gold Wink of Stella on the turtle and Emerald Envy ink.  The card base and the Sea Grass is Sahara Sand.
IMG_0986

Save

23. June 2016 · Comments Off on In this World! · Categories: Cards · Tags: , , ,

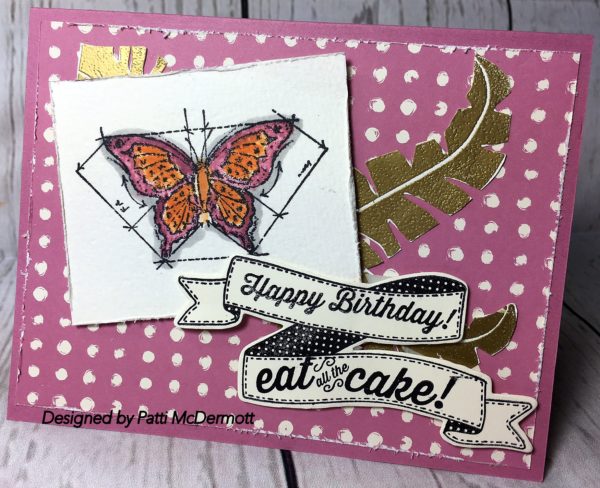
I stamped this butterfly, page 145, on Watercolor paper and used the colors, Peekaboo Peach and Sweet Sugarplum.  Two of my favorite new in-colors.  The Background DSP is from  Playful Palette, page 174.  The leaves from Pop of Paradise, page 85, are embossed in gold.  The sentiment is from Birthday Banners, page 15, and cut out with matching framelits, Bunch of Banners, page 193.
IMG_1003

Save

22. June 2016 · Comments Off on Thinking of You! · Categories: Cards · Tags: , , ,

I submitted this card for the SUO challenge to use something from the new catalog.  Here I used the new in-color Dapper Denin and Flirty Flamingo.
I am crazy about this set, Best Birds, page 53, because the matching thinlits are so awesome.  It has 5 different bird thinlits that you can choose from and they are so cool! What really sets this apart is the sentiments included with the set.  Pretty much every occasion is covered.
This is another one of those sets that you can get a 10% discount by purchasing the set and thinlits as a bundle.  Incredible deal if you are looking for versatility. Keep watching as I will be using this set quite often in my blog.  I love it!
IMG_0982

Save

Save

Save

21. June 2016 · Comments Off on Stinkin’ Cute! · Categories: Cards · Tags: , ,

I love this hostess set, Love you Lots, page 199 in the AC.  I have made a lot of cards with the set because it is so much fun.  I love the little whimsical characters and the sentiments are perfect.   The background DSP paper if from the paper stack, Playful Pallette, page 174. In addition, I used the Washi Tape, Playful Palette, page 179.  Primary color used is our new in-color Emerald Envy.
If you host a workshop in your home, or mine, you can select this set as one of your hostess gifts.  In fact, that is the only way you can get this set, unless you have a book party.  It is not a set that you can get any other way.  Contact me here to find out more.
IMG_0995

Save

Save

20. June 2016 · Comments Off on Under the Sea! · Categories: Cards · Tags: , ,

We made this card at our last Friday night Club.  We used the set Seaside Shore, page 93 of the AC and the background is created using the DSP, By the Shore, page 173.  I used Night of Navy, Soft Sky inks and the gold Wink of STella marker.  I also used white gel pen.
IMG_0983

Save

Save

19. June 2016 · Comments Off on Happy Birthday! · Categories: Cards · Tags: , , , ,

I created this card with the set, Birthday Fiesta, page 11 in the AC.  Colors used were Soft Suede, Sahara Sand, Pumpkin Pie, and Cucumber Crush.  I love this set because it is so versatile and comes with matching Fiesta Time Framelits, page 193.  You can get this set and framelits for a discount if you buy the bundle together.
IMG_0980

Save

18. June 2016 · Comments Off on Join my team and enjoy the fun! · Categories: Cards

More Stamps, More Rewards, and a NEW Catalog

Recruiting_Blogpost_Jun2016

You’ve probably already seen that our Starter Kits come with extra product credit, but this month we have even better news! In addition to the extra product credit, you’ll get two FREE stamp sets in your Starter Kit when you start your business in June. That’s an added value of up to $104 USD/$136 CAD, depending on which stamps you choose. We have amazing new stamps in the new annual catalog for you to choose from, and we know that you can start your business right when you have more stamps as a demonstrator.

If that’s not enough to get excited about, June is also the month of extra Stampin’ Rewards! You’ll get $35 USD/$40 CAD in extra Stampin’ Rewards when you host a stamping event  with $350 USD/$400 CAD or more in orders. So get creative! Have fun! You can use those extra Stampin’ Rewards to get more products from the new annual catalog or on your Starter Kit.

We’re more than excited about these offers, and we hope you are too! Don’t wait too long! June will be over before you know it.

Learn about becoming a demonstrator or join now. And remember to contact your demonstrator to take advantage of this month’s special offers.

17. June 2016 · Comments Off on From Connie Collins, Artisan Design Team Member · Categories: Cards

Connie is one of my favs from the team and I love what she did here:

Cutie Pie Beach Party

Summertime is fun time and what better time for a beach-themed birthday party? I’m going to show you how to make this adorable beach ball and matching tag using the Cutie Pie Thinlits Dies (item 138273) and the Big Shot (item 143263).

1

First, you’ll need to die cut and assemble 10 pie boxes using the Cutie Pie Thinlits Dies. I recommend using Whisper White Thick Cardstock (item 140272) along with Daffodil Delight (item 119683), Cucumber Crush (item 138335), Pacific Point (item 111350), Tangerine Tango (item 111349), and Real Red Cardstock (item 102482).

2

Next, cut a template for the top of the box using the same die. Trace around the edges of some coordinating polka dot paper from the Brights (item 138434) and 2015–2017 In Color (item 138432) Designer Series Paper Stacks and cut by hand.

3

Glue the triangles to the top of the coordinating box.

4

Glue the sides of the boxes together to form a circle. Place a white box in between each of the colored boxes. (It’s easier to work in sections.)

5

Die cut two 2-15/16″ circles from Whisper White Thick Cardstock. Stamp the word “Sunshine” from the Crazy about You Stamp Set (item 138859) on one of the circles in Tangerine Tango ink (item 126946); glue it to the center of the box where the triangles come to a point. Glue the second circle to the center of the back for added stability. Die cut the word “Hello” from Pacific Point Cardstock using the Hello You Thinlits Dies (item 137363) and adhere it to the circle. Cut a small flower and leaves using the Swirly Scribbles Thinlits Dies (item 141497).

6

To create the matching tag, cut 10 triangles using the small triangle from the Cutie Pie Thinlits Dies.

7

Glue the pieces (in the same order as before) to a piece of thin white copy paper. (Hint: Save one of the white triangles for last—just in case some of the edges don’t line up exactly.)

8

Use the same circle die as before to die cut a circle from the center. (You’ll have a lot of waste, so you may want to cut shorter triangles for future tags now that you know how big the pieces need to be.) Die cut an additional circle from Whisper White Thick Cardstock and glue it to the back of the tag for added stability. Use a 3/4″ Circle Punch (item 119873) to create the center of the tag from a piece of Whisper White Thick Cardstock. Punch a small hole in the top of the tag using a 1/8″ Circle Punch (item 134365) and tie the tag to the top of a 2″ x 8″ Cellophane Bag (item 141703) filled with colorful gumballs using Linen Thread (item 104199).

9

Finally, make some coordinating flowers from the same supplies using the Botanical Builder Framelits Dies (item 140625).

10

These projects are easy enough that you can get the kids involved, too. Have fun crafting this summer!

Connie Collins
Artisan Design Team 2015–2016
Save

16. June 2016 · Comments Off on Endless Thanks · Categories: Cards · Tags: , , ,

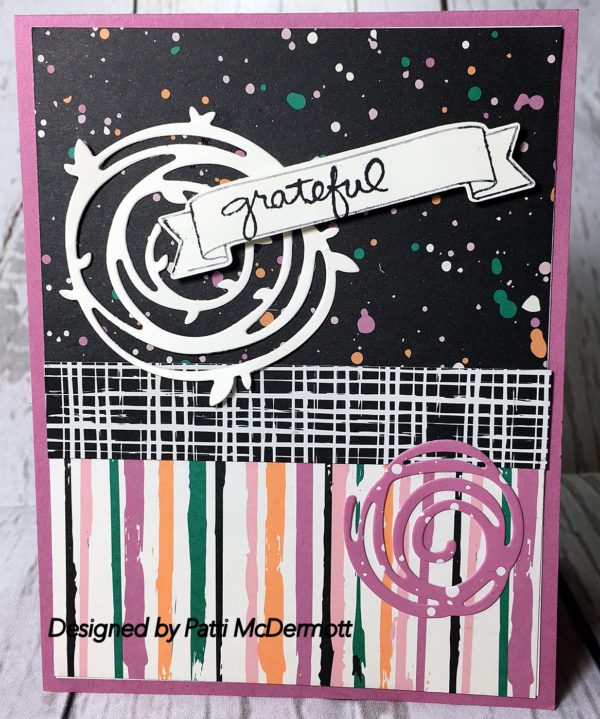
I am so glad they carried over the PP set Endless Thanks, page 42.  I needed to send out a thank you to one of my customers and wanted to use the set, Swirly Bird, page 152, and grabbed my go to set for thank yous.  I used the DSP 6″ X 6″ Paper stack, Playful Palette, page 174 and the matching Swirly Scribbles Thinlits, page 194.  I love these thinlits, you only have to surf the web to find tons of cards made with these and the Swirly Bird set.  You can get this as a bundle (142353) and save 10% by purchasing both as a bundle.
IMG_0952

15. June 2016 · Comments Off on Macho masculine! · Categories: Cards · Tags: , , , ,

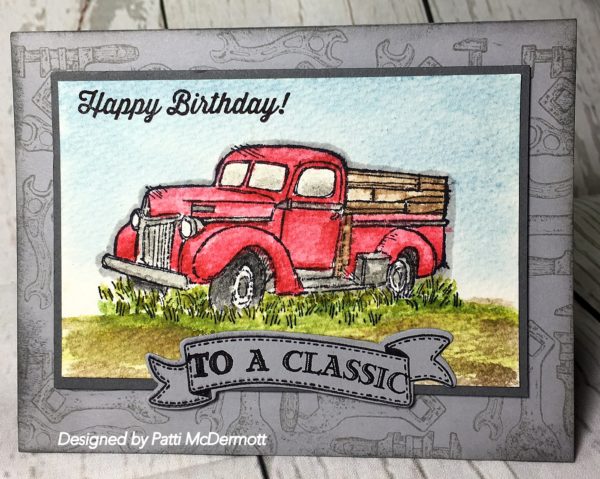
I love this new set with the vintage images.  So cool.  Here I used our classic inks with the aqua painter, page 180, and watercolor paper, page 175 to paint the classic truck.  I used real Red, soft sky, soft suede, Wild Wasabi and old Olive inks.  The card stock is Smokey Slate and stamped with same, using an image from Guy Greetings, page 114.  What man wouldn’t love this card for his birthday?  Banner is cut from the new Bunch of banner framelits, page 193.
IMG_0945

14. June 2016 · Comments Off on From the SU site: · Categories: Cards

We just love that Helen Read has created some fun color combinations for the new 2016-2018 In Colors. So inspiring seeing all that color together.

14. June 2016 · Comments Off on More Stamps, More Rewards, and a NEW Catalog · Categories: Cards
Recruiting_Blogpost_Jun2016

You’ve probably already seen that our Starter Kits come with extra product credit, but this month we have even better news! In addition to the extra product credit, you’ll get two FREE stamp sets in your Starter Kit when you start your business in June. That’s an added value of up to $104 USD/$136 CAD, depending on which stamps you choose. We have amazing new stamps in the new annual catalog for you to choose from, and we know that you can start your business right when you have more stamps as a demonstrator.If that’s not enough to get excited about, June is also the month of extra Stampin’ Rewards! You’ll get $35 USD/$40 CAD in extra Stampin’ Rewards when you host a stamping event  with $350 USD/$400 CAD or more in orders. So get creative! Have fun! You can use those extra Stampin’ Rewards to get more products from the new annual catalog or on your Starter Kit.We’re more than excited about these offers, and we hope you are too! Don’t wait too long! June will be over before you know it.
Learn about becoming a demonstrator or join now. And remember to contact your demonstrator to take advantage of this month’s special offers.

13. June 2016 · Comments Off on In this World · Categories: Cards · Tags: , , ,

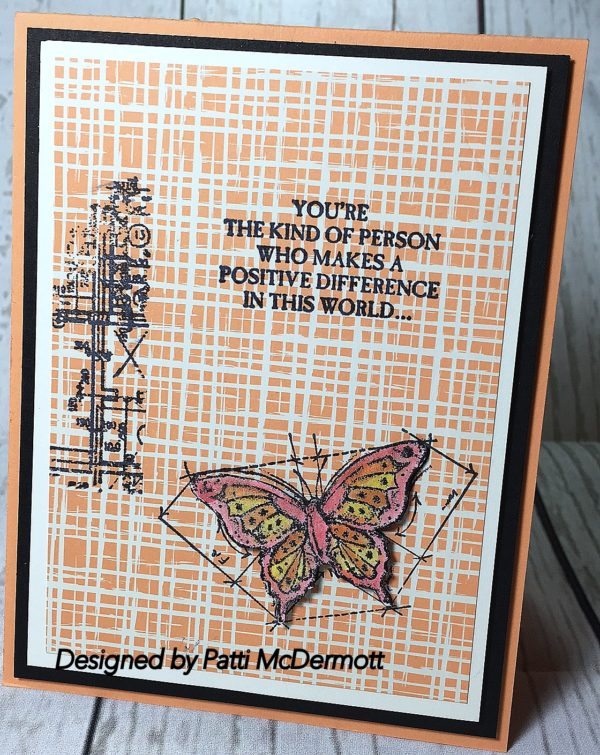
You can find this set on page 145.  I love the sentiment on this card.  On the inside of the card it reads …Especially in my life.  I can never get enough of vintage and that is why I love this set.  The DSP is from the 6″ X 6″ paper stack, Playful Palette, page 174.  The colors I used on the butterfly were Daffodil Delight, Peekaboo Peach, and Flirty Flamingo.  I did use the Wink of Stella clear pen, page 181, on the butterfly.  Basic Black is layer after Very Vanilla on a Peekaboo Peach card base.  I did fussy cut the butterfly.  Hope you like it!
IMG_0948