08. July 2017 · Comments Off on Join my team during the July Promotion! · Categories: Cards

And get a FREE Essentials Gift Pack:

With your $99 Starter Kit purchased from July 1–31, you will also receive a ITEM NUMBER DESCRIPTION
118485 D Block (X2)
130148 Grid Paper
103579 Paper Snips
104332 SNAIL Adhesive
102300 Bone Folder
144804 Carols of Christmas Stamp Set 

That’s a $72 value! With so many crafting basics included in the
Essentials Gift Pack, you can start crafting with your friends faster
than ever.

Christmas in July

Ho, ho, ho! Our Christmas in July promotion makes it easier than ever to sign up to be a demonstrator!

Just purchase your Starter Kit by July 31 and you will receive a FREE Essentials Gift Pack including Paper Snips, SNAIL Adhesive, Grid Paper, two D Blocks (one for you and one for a stamping friend!), and a Bone Folder. That’s an added value of $52 US/$68 CAN! And since as a new demonstrator you can get your hands on new products before anyone else, we will include the Carols of Christmas Stamp Set from the holiday catalog for FREE ($20 US/$26 CAN Value)! With so many basic items included with your kit, you’ll be able to spend your Starter Kit dollars on the fun stuff—like your favorite stamp sets and accessories!

Go here to sign up:     http://www.stampinup.net/esuite/home/pattispad/jointhefun

If you are not directed to my website with the above link, please copy and paste into your browser.

07. July 2017 · Comments Off on Love the Artisan Design Team · Categories: Cards

Playing with Paper

1

It’s finally June and time to get our hands on the new products in the 2017-2018 annual catalog (US/CA). I’m a big fan of anything cute, so the Pick a Pattern Designer Series Paper (144163) is high on my list.

Stampin’ Up! makes my life easier by offering product suites since they allow me to coordinate my projects quickly. The Pick a Pattern Designer Series Paper is part of the Pick a Pattern Product Suite. #gofigure

2

The first order of business was to cut out as many of the cute little forest friends that I could before my favorite television show ended. As I cut, I was creating a pile of animals. It wasn’t long before I knew I wanted these creatures to be the focal point of the card.

Next I began embossing some sentiments with White Stampin’ Emboss Powder (109132) on Basic Black Cardstock (121045). Because the animals are so small, I decided to use the Tabs for Everything Stamp Set (143907). It couldn’t have been a better fit as “Happy life” is certainly a motto for many campers.

In order to allow the background to look like a soft sky, I used Watercolor Paper (122959), Tempting Turquoise Classic Stampin’ Ink Refill (101041), and an Aqua Painter (103954) to quickly brush a watercolor sky. Once dry, I adhered the cuties and added a layer of Sahara Sand Cardstock (121043) as well as a piece of patterned paper from Pick a Pattern Designer Series Paper.

3

My second card uses the moose cut out from the Pick a Pattern Designer Series Paper as well as the sentiment from the Pieces & Patterns Stamp Set (143843). With the help of the Stitched Shapes Framelits Dies (145372) I was able to add several layers to create a simple and fun card. These Framelits are a favorite of mine so I have plenty of extras cut out; that way I can grab them whenever I am working on a project.

4

How cute is the little raccoon in the Adirondack chair? That cute little chair was die cut using the Seasonal Layers Thinlits Dies (143751). It’s the perfect size for our little pals.

5

With plenty of creatures to spare, I’ll be sure to whip up some more cards soon.

Thanks so much for dropping by!

Cathy Caines
2017 Stampin’ Up! Artisan Design Team

26. June 2017 · Comments Off on By Allison Okamitsu · Categories: Cards

For the Love of Lemon Lime

Hello, my friends, and welcome! I’m Canadian Stampin’ Up! demonstrator and Artisan Design Team member, Allison Okamitsu. It’s a thrilling experience to be a guest blogger for Stampin’ Up! and I’m very excited to share my deep love for the new kid on the color block, Lemon Lime Twist. This bright, bold, and beautiful color is new to the Stampin’ Up! family, and I’m here to show you how this electric green fits in perfectly with the existing family of colors.

I’ve had a great time experimenting and have come up with three fun color combos to share with you.

1

This first combination is bright, flirty, and fun. Lemon Lime Twist, Flirty Flamingo, Tempting Turquoise, and Smoky Slate team up to create a super-fab card.

2

I used the Bike Ride Stamp Set (143716) and Lift Me Up Stamp Set (142893) to make an uplifting card for a long-distance friend. The bright color combo will put a smile on the face of anyone lucky enough to receive it. What better way to show your out-of-town bestie that you’re thinking of them?

Next up, I reached for a selection of Brights colors to complement Lemon Lime Twist.

3

Real Red, Tangerine Tango, and Pacific Point look even more bold and brilliant than usual next to Lemon Lime Twist.

4

This card features a Lemon Lime Twist dinosaur from the Pieces & Patterns Stamp Set (143840) and bold vertical stripes from the Banners for You Stamp Set (141710). It’ll be a hit with my nephews, for sure!

Last but certainly not least is what I think is my favorite color combination of all.

5

It’s rare for me to use so many colors on one project, but somehow this combination just works without looking overdone.

6

Because Stampin’ Up! has such a large selection of colors, it’s easy to create a card with a range of blues and greens, and it’s the perfect way to showcase the Feather Together Stamp Set (141597). I love that Lemon Lime Twist can go from loud and electric (see the previous card) to beautifully bold on this card. It just depends on what other colors it’s partnered with.

Thank you so much for visiting today. I hope I’ve inspired you to embrace the Lemon Lime Twist Classic Stampin’ Pad (14486) and Lemon Lime Twist Cardstock (144245) and come up with your own innovative color combinations. This color has become a fast favorite of mine, and one you’ll be seeing a lot of in my upcoming projects.

Allison Okamitsu
2017 Artisan Design Team

25. June 2017 · Comments Off on June Paper Pumpkin: One in a Melon · Categories: Cards
Paper_Pumpkin_June2017_Main

The long days of summer are here, and for some of us that can only mean one thing: more hours to spend crafting! Paper Pumpkin can go anywhere you do, so whether you’re on your way to the beach (or heading to your lounge chair in the backyard!) be sure to bring this kit with you. You’ll feel refreshed just looking at the designed paper with its watermelons, pineapples, lemons, and limes; then there’s the fun of putting together our yummy, summer-themed projects! Check out the how-to’s below.

Each One in a Melon kit comes with 6 printed card bases, 4 printed bags, 6 white envelopes, 2 sheets watercolor die-cut pieces, 2 sheets white die-cut pieces, 1 sheet laser-cut leaf stickers, 4 sheets printed cotton paper, 4 yds. pink baker’s twine, 4 green mini clothespins, 100 dimensionals, and 100 adhesive dots.

PP_June_AltImages

We’re pretty sure this kit will be the pine-apple of your eye (wink, wink) once you start playing with all of the elements inside! And the creative possibilities are endless. Check out the projects above for some sweet alternate ideas—like our stamped fruit slices tied to Crumb Cake envelopes and secured with White Baker’s Twine. Wouldn’t they make great gift card enclosures?

You could also fussy cut a few pineapple images from the designed paper and pop them up with dimensionals on one of the kit’s die-cut banners. For a perfect finishing touch, embellish with a pink baker’s twine bow.

Or make the Hooray card using Pool Party Cardstock and some of the fun die- and laser-cut pieces included with this month’s kit. With the sunny yellow banner as a focal point, it’s the perfect summer birthday card.

And don’t forget to check our Pinterest page for more fun ideas!

Save

23. June 2017 · Comments Off on Another Artisan Design Team Member · Categories: Cards

Everyday Adventure

I can’t get over how quickly the time has come for another annual catalog launch. The new catalog always brings so much excitement to the stamping community with its fresh new In Colors, stamp images, and accessories.

Each year I love to put together a collection of cards that showcases the new In Colors along with other coordinating products. I chose the Fresh Florals Designer Series Paper Stack (item 144131) along with the Dare to Dream Host Stamp Set (item 143769) to create a fun set of cards.

1

This year’s Host stamp sets are fantastic, but the Dare to Dream Stamp Set stood out for me because of the beautiful greetings and fonts. I love when I can create my own greeting from a collection of words in a set. The Dare to Dream Stamp Set gives you this opportunity and so much more.

2

Keeping a monochromatic theme made these cards quick and easy to duplicate. While I kept the added accessories simple, they added just enough “WOW” to the card.

Each card starts with a Whisper White Thick Cardstock (item 140272) base (4-1/4″ x 11″). Then I added two layers from the Fresh Floral Designer Series Paper Stack measuring 3-1/2″ x 5″ and 3-1/8″ x 4-3/4″.

The adventure image was stamped on each of the five new 2017–2019 In Color Cardstock (item 144247) pieces measuring 1″ x 4-1/4″. I added a 1″ x 4-1/4″ strip under the greeting using the Fresh Florals Designer Series Paper Stack.

3

I wanted to break up some of the patterns from the Fresh Florals Designer Series Paper so the greeting would remain the focal point. To do this, I added a piece of Whisper White Cardstock (item 100730) and stamped the fun floral spray image from the Dare to Dream Stamp Set using each of the five new In Colors.

4

Lastly, I added a few new embellishments to each of the cards such as the 1/2″ Finely Woven Ribbon in Berry Burst (144133), Fresh Fig (item 144132), and Lemon Lime Twist (item 144135). I also added the new Glitter Enamel Dots (item 144200). The Glitter Enamel Dots are unique because the many ombre shades coordinate with the new In Colors.

5

I hope this inspires you to create a collection of cards using the new 2017–2019 In Colors products. The possibilities are endless with these fun new products!

Kimberly Van Diepen
Artisan Design Team 2017

Save

21. June 2017 · Comments Off on View some of our gorgeous DSP · Categories: Cards, Videos

19. June 2017 · Comments Off on Coffee Cup Rings True! · Categories: Cards · Tags: , , , ,

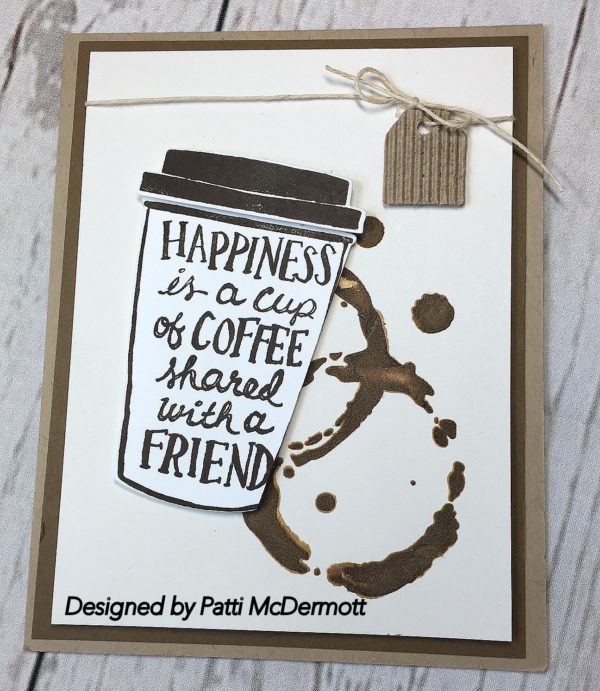
This set is so awesome!  You can find this set, Coffee Cafe’ on page 31 of the AC.  It has matching dies, Coffee Cups Framelits, page 213, matching DSP, Coffee Break, page188, Corrugated Elements, page 196.  It also has a Cardstock pack that matches all the colors in the DSP.

The best part: You can bundle the set and dies and receive a 10% discount.  This is going to be a fantastic item for the Holidays.  I can see this being used for SB gift cards, etc.  The coffee splatter is made with our new Embossing Paste, page 201.  I dyed the paste with Soft Suede ink.  The stencil, however, is not SU.   It is Tim Holz and I have had it a long time for use in my Art journals.

Card stock used is Very Vanilla over Soft Suede and based on Crumb Cake.

Save

Save

Save

Save

Save

18. June 2017 · Comments Off on Hogs & Kisses for Father’s Day! · Categories: Cards · Tags: , ,

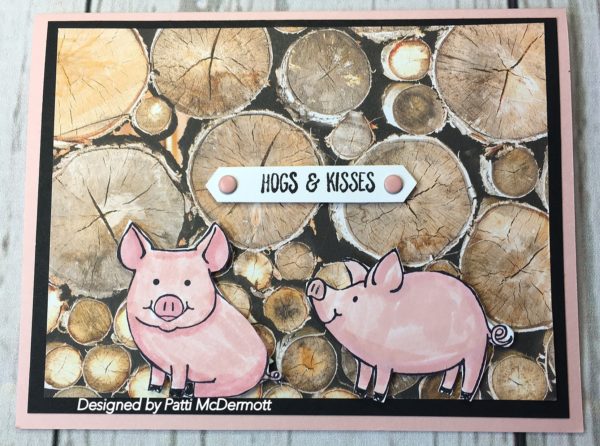
Tell me you don’t think these piggies are stinkin’ cute!  I love this set, This little Piggy, page 48 in the AC.  I will be using this set quite a bit.  The images and sentiments are super!  Here I used our new Powder Pink ink along with Pink Pirouette and Basic Black Ink.  The DSP is Wood Textures, page 148.

Save

Save

15. June 2017 · Comments Off on Artisan Design team projects · Categories: Cards

My Heart Is Glossed Over with Happiness

Hello, friends! I’m thrilled to be writing for the Stampin’ Up! blog this week. I’ve been playing with some of my new favorites from the 2017–2018 annual catalog (US/CA) and I’m bursting at the seams with my excitement over these new products!

If you’ve been stamping for a long time, you may have been as thrilled as I was to find that Glossy White Cardstock (item 144240) has made its triumphant return! The glossy surface is non-porous, which lends itself to some amazing techniques with ink.

One of my favorite tricks with Glossy White Cardstock is to use alcohol to blend the ink. I’ve filled a Stampin’ Spritzer (item 126185) with isopropyl alcohol for this purpose—it has a permanent home in my craft room!

After spending several days playing with ink, I am covered in stains and happy to share three of my favorite techniques with you.

Technique #1: The Brushstroke

1

This technique couldn’t be easier, and it results in an amazing layered background that looks like it was painted by a master. How perfect to pair with paint brushes! These stamps, from the Crafting Forever Stamp Set (item 143955) and the Just Add Text Stamp Set (item 143931) fit this artistic technique to a tee.

To recreate this technique, start with a dry sheet of Glossy White Cardstock and an ink pad of your choice. I used a Bermuda Bay Classic Stampin’ Pad (item 131171) and an Old Olive Classic Stampin’ Pad (item 126953). Holding your ink pad at a 45-degree angle to your cardstock, simply drag the ink along the surface. Varying your pressure and angle will change the look slightly. Adding a variety of layers and textures with your ink will perfect the “painted” look!

Technique #2: The Fade

2

The fade is so easy with Glossy White Cardstock, and it creates a subtle effect of a spotlight on a stamped image. Start by embossing the image of your choice. I used White Stampin’ Emboss Powder (item 109132). Heat-set with your Heat Tool (item 129053). Choose three Classic Stampin’ Pads in the same color scheme—I used Pool Party (item 126982), Bermuda Bay (131171), and Island Indigo (item 126986); then, using Sponge Daubers (item 133773), sponge the ink in a circular motion, starting with the lightest color in the center. Continue adding colors one at a time to the outer edges, proceeding from lightest to darkest. When your colors have been added, add some isopropyl alcohol to a clean Sponge Dauber and blend the inks.

I used this technique to spotlight the scissors from the Crafting Forever Stamp Set and added the coordinating sentiment die-cut using Stitched Shapes Framelits Dies (item 145372). Accented with a background stamp from the Tabs for Everything Stamp Set (item 143907) and Bermuda Bay 3/8″ Mini Chevron Ribbon (item 144198), this card makes a great clean-and-simple note for a friend.

Technique #3: The Faux Watercolor

3

Talk about wow factor! This background technique is SO easy but it packs a major punch. You’ll need Glossy White Cardstock, isopropyl alcohol in a Stampin’ Spritzer, and a Classic Stampin’ Ink Refill in your choice of color. Shown here is Berry Burst (item 144089.) And there’s a little bonus! This technique yields TWO background pieces, so you have half the work per card!

To create this background, start by cutting two pieces of Glossy White Cardstock to your desired size (mine are 4-1/8″ x 5-3/8″). On ONE sheet of your cardstock, spray thoroughly with isopropyl alcohol, then drip your Classic Stampin’ Ink Refill over the surface. I recommend around 8–10 drops in various locations. Spray your cardstock again (it should be very wet) and tilt it in various directions until the ink runs. Set it flat on your protected surface, then place the second piece of Glossy White Cardstock shiny-side-down on the wet surface. You may want to slide your top piece of cardstock slightly to achieve a more blended look. Separate the two pieces of cardstock and your background design is finished; set it aside to dry and you’re ready to go!

If you find your ink didn’t blend as desired, simply add more alcohol while it’s still wet (since the alcohol is what helps it blend).

The focal point of this card was created with the Color Theory Designer Series Paper Stack (item 144193), Crafting Forever Stamp Set, Berry Burst 1/2″ Finely Woven Ribbon (item 144133), and a sentiment from the Wood Words Stamp Set (item 143928). Layering these elements in the corner lets the background shine.

Speaking of the Crafting Forever Stamp Set, in addition to the fabulous stamps used here, there’s one more great stamp included in this set that’s a must-have for every crafter.

4

The Stampin’ Up! Angel Policy means you can sell projects you’ve made with Stampin’ Up! copyright images as long as they include “© Stampin’ Up!” on them. Each catalog has one of these sets, and this year’s is Crafting Forever! How fabulous is that?!

5

Thank you so much for joining me today. I hope this blog inspired you to get out your new Glossy White Cardstock and start playing. Enjoy those inky hands!

Cheers,

Shannon Lane
2017 Artisan Design Team

Save

10. June 2017 · Comments Off on Wood Textures Suite · Categories: Cards · Tags: , , ,

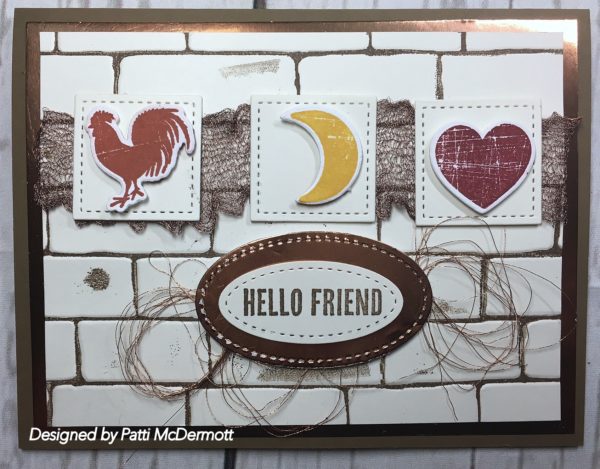
We all rec’d this set FREE at the OnStage in Savannah Georgia.  It was so much fun and I couldn’t wait to get home to start playing with this set and some of the embellishments.  The set, Wood Words, page 159 of the AC can be purchased with matching dies, Wood Crate framelits, page 212.  You get 10% off if you bundle them.  I used copper foil on this card and love the way it turned out.  In addition, I used the stitched Shaped framelits, page 214.  The ribbon, Copper Trim, can be found on page 199.  I stretched the ribbon and layered it behind the images.  I also used the copper metalic thread, 198 in back of the sentiment.  The back ground is embossed with the Brick Wall Embossing Folder, page 210.

Save

08. June 2017 · Comments Off on More from the Artisan Design Team · Categories: Cards

Dads & Grads

Hello, crafty friends! I’m excited to share some my favorite things with you today and the Eastern Palace Suite Premier Bundle (147207) is at the top of my list right now.

I’m especially loving the Eastern Palace Specialty Designer Series Paper which is included with this awesome product collection! As soon as I saw it, I knew its rich fresh colors would be perfect for just about any occasion. Today I wanted to share a couple of cards that will be perfect for the guys in your life!

1

Aren’t these colors so yummy together?! I may be seriously crushing on Lemon Lime Twist at the moment. Lol!

2

I wanted to make sure the papers were the star of the show so I grabbed my Large Letters Framelits (141712) and  used the fabulous sentiments in the Eastern Beauty Stamp Set and the Eastern Medallion Thinlits to bring it all together.

3

Since I wasn’t about to toss any part of that beautiful paper, I decided to use the negative cutouts to create a great focal point for my “Dad” card. If you’re a little . . . uh . . . fussy about things being just right, here’s a tip for lining things up perfectly.

4

So all you have to do is lay the cutouts back into the shapes and add adhesive to the ones you want to stay in place. Then just remove the letters and everything should look just right.

Hope you’re inspired to use this amazing product suite to make a few cards to celebrate all the dudes you know!

Mercedes Weber
Artisan Design Team 2017

07. June 2017 · Comments Off on Colorful Seasons · Categories: Cards · Tags: , ,

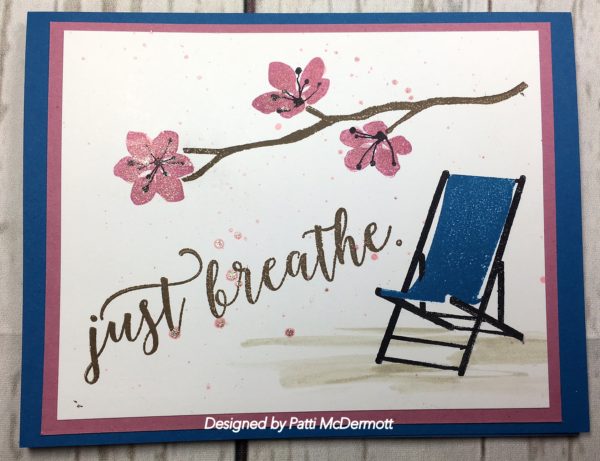
This set can be found on page 147 of the AC.  I used Sweet Sugarplum on the flowers and Pacific Point on the chair, Soft Suede on the sentiment.  I love this set it is so versatile.  You can see several samples of this set on the internet or even Pinterest.  I added Wink of Stella (tinted with ink refill & alcohol) on the flowers and then a slight splatter over the front of the card.  It does have matching dies (Seasonal Layers), page 216, and you can get both of these items as a bundle and save %10.  Seasonal Layers contains 17 dies and the possibilities are endless with this combination.

Save

Save

05. June 2017 · Comments Off on Artisan Design Team · Categories: Cards

Everyday Adventure

I can’t get over how quickly the time has come for another annual catalog launch. The new catalog always brings so much excitement to the stamping community with its fresh new In Colors, stamp images, and accessories.

Each year I love to put together a collection of cards that showcases the new In Colors along with other coordinating products. I chose the Fresh Florals Designer Series Paper Stack (item 144131) along with the Dare to Dream Host Stamp Set (item 143769) to create a fun set of cards.

1

This year’s Host stamp sets are fantastic, but the Dare to Dream Stamp Set stood out for me because of the beautiful greetings and fonts. I love when I can create my own greeting from a collection of words in a set. The Dare to Dream Stamp Set gives you this opportunity and so much more.

2

Keeping a monochromatic theme made these cards quick and easy to duplicate. While I kept the added accessories simple, they added just enough “WOW” to the card.

Each card starts with a Whisper White Thick Cardstock (item 140272) base (4-1/4″ x 11″). Then I added two layers from the Fresh Floral Designer Series Paper Stack measuring 3-1/2″ x 5″ and 3-1/8″ x 4-3/4″.

The adventure image was stamped on each of the five new 2017–2019 In Color Cardstock (item 144247) pieces measuring 1″ x 4-1/4″. I added a 1″ x 4-1/4″ strip under the greeting using the Fresh Florals Designer Series Paper Stack.

3

I wanted to break up some of the patterns from the Fresh Florals Designer Series Paper so the greeting would remain the focal point. To do this, I added a piece of Whisper White Cardstock (item 100730) and stamped the fun floral spray image from the Dare to Dream Stamp Set using each of the five new In Colors.

4

Lastly, I added a few new embellishments to each of the cards such as the 1/2″ Finely Woven Ribbon in Berry Burst (144133), Fresh Fig (item 144132), and Lemon Lime Twist (item 144135). I also added the new Glitter Enamel Dots (item 144200). The Glitter Enamel Dots are unique because the many ombre shades coordinate with the new In Colors.

5

I hope this inspires you to create a collection of cards using the new 2017–2019 In Colors products. The possibilities are endless with these fun new products!

Kimberly Van Diepen
Artisan Design Team 2017

Save

04. June 2017 · Comments Off on Just do it! · Categories: Cards · Tags: , , ,

This set, Crafting Forever, you will find in the new Annual Catalog (AC), page 181.  I used water color paper and our classic ink pads and an Aqua Painter, page 200.  The background paper is from the new Color Theory DSP Paper stack, page 187.  The dies I used are, Layering Circle Framelits, Layering Oval Framelits and Stitched Shapes Framelits, both on page 214. I used whisper White and layered these on Basic Black Card Stock, page 185.

Save

Save

Save

Save

03. June 2017 · Comments Off on New catalogs are now here! · Categories: Cards

Hello Crafters and Stampers,

I am so excited about our new catalog.  It is the best ever!  So many gorgeous stamp sets and loads of wonderful embellishments.  SU has added more dies, framelits, thinlits and punches to go with these new sets.  Many of them are sold as bundles which means you get 10% off by buying both the stamp set and the matching framelits, thinlits, or punches.

If you have not receive your catalog, please contact me at www.patmojac@bellsouth.net and I will send one out to you.

In addition, June is the month to hold a workshop, either in your home or mine.   All my hostesses that have a $350 workshop in June will receive an addition $35 in FREE rewards over and above the $42.  Call ASAP so we can schedule your workshop.

Hugs, Patti


01. June 2017 · Comments Off on Coastal Waters · Categories: Cards · Tags: , , ,

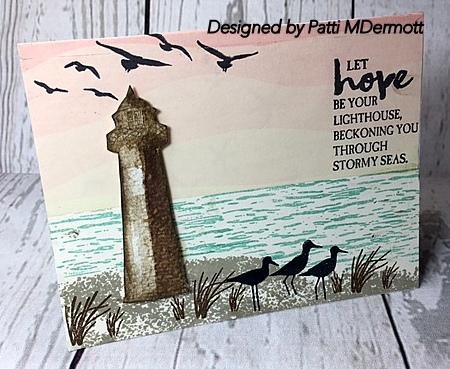
I am so glad that they carried over this set, High Tide, page 25 of the OC.  It is one of my favs.  Here I used it with the DSP, By the Shore, page 173 AC.  This is a very versatile set because it not only has wonderful images, but it has terrific sentiments.  Of course, living here by the coast, this set is very special to me.  I will get a lot of use out of this set.

Save

Save

20. May 2017 · Comments Off on May Paper Pumpkin · Categories: Cards

12. May 2017 · Comments Off on · Categories: Cards

Gifts for Spring

Photo 1

Are you in the mood for spring? This project contains three gift ideas with florals and spring in mind!

Photo 2

For this card I used the Diagonal Stripe Stamp (141917) and the new Lemon Lime Twist Classic Stampin’ Pad (144086) to create my background. I am so in love with this new In Color! Did you know that you are able to order it in May? This color is the definition of spring for me!

The little flowers are from the Jar of Love Stamp Set (141587); I stamped them in Lemon Lime Twist (of course), Flirty Flamingo (141397), and Peekaboo Peach (141398).

The little bumblebee is from the Dragonfly Dreams Stamp Set (142924); I fussycut this little one out. For the sentiment I used the Dutch version of the Florishing Phrases Stamp Set (141531), Recht uit het Hart (143204). It says in English “For you, from me.” How cute is that!

Photo 3

And because I really love gift packaging, I made my own little box with the Gift Box Punch Board (135863). I used the measurements L and S to create this box. The final sizes are 8.3 cm x 8.3 cm x 4.4 cm. A perfect size for Mother’s Day chocolates, right? The blue paper is from the Tasty Treats Specialty Designer Series Paper (142770). The Pool Party background really stands out behind the flowers.

Photo 4

To finish it off, I used a piece of the Flirty Flamingo 3/8″ Ruched Ribbon (141426) and, of course, (because I love bling and sparkle) some little Rhinestone Basic Jewels (144220) available in May!

Photo 5

This picture frame was very easy to make and is a perfect gift for Mother’s Day! I used my leftover paper scraps and flowers that I didn’t use on my previous projects. This picture is an old one of my hubby and me. It sits on my scrap table now . . .

Enjoy spring and let it inspire you to create something beautiful!

Miriam van Eyden
2017 Artisan Design Team

Save

10. May 2017 · Comments Off on Another Artisan Design team project · Categories: Cards

Mother’s Day Pampering Gift Set

Mother’s Day is coming up and I’ve put together a pretty manicure gift set for a mom—or for any amazing woman who could use a little pampering! I love putting gifts together in fun packaging and of course they must coordinate! But that’s easy to do by just making sure you use all the same elements for each item.

1

Do you have a few of the Mini Egg Cartons

(item 142776) left over? Don’t let them go to waste. They are great gift holders for treats any time of the year. I decided to use them to hold little mini nail polishes. They fit perfectly!

2

3

I used some of the items from the Eastern Palace Premier Bundle

(item 147207)—which are available to customers now from the new 2017–2018 annual catalog (item 146113). I decorated the outside of the carton with an Eastern Palace Specialty Designer Series Paper (item 144147) belly band. This gold paper is to die for. (I will be using it up quickly!) A 2″ x 12″ strip of this paper just fits around the carton—with a little wiggle room to take the belly band on and off. I used a small piece of Very Vanilla Cardstock (item 101650) to adhere the ends of the Designer Series Paper together. This way the Designer Series Paper can touch and you don’t have to overlap the paper to adhere it. You also don’t have to worry about the seam because that will be covered by the medallion.4

Then I added two medallions to the belly band using the new Eastern Medallions Thinlits Dies (item 143725). The large medallion was die cut in Basic Black Cardstock (item 121045) and the smaller one uses the polka dot Designer Series Paper from the Eastern Palace Specialty Designer Series Paper.To make the larger medallion you will need to use one of the large Layering Circle Framelits Dies (item 141705) to cut it into a circle shape as shown below.

5

The medallion is decorated with flowers from the Jar of Love Stamp Set (item 141587). I stamped the flowers in Sweet Sugarplum (item 141395), Pink Pirouette (item 126956), and Tranquil Tide (item 144085) ink on Whisper White Cardstock (item 100730). First I stamped off the image once on scrap paper which gives you the lighter color on the flowers. (For the Tranquil Tide flower, I stamped off twice on scrap paper before stamping on Whisper White Cardstock.) The leaves were stamped in Lemon Lime Twist ink (item 144086). This is already my new favorite color! I love this time of year when you can experiment mixing the old and new colors. The rest of the egg carton is decorated with a Basic Black Solid Baker’s Twine (item 141682) bow and a gold tassel from the Mini Tassels Assortment (item 144154).

6

Also, included in this gift set is a Glassine Gift Bag (item 141700) filled with a nail file, lotion, and manicure set. I die cut two additional medallions with the Gold Foil Sheets (item 132622) and Basic Black Cardstock. I stamped and die cut another flower and a couple of leaves. I found the best way to adhere the leaves and flowers is to put Mini Glue Dots (item 103683) on the back of each one and arrange them how you like.

7

Finally, you can’t give a gift like this without a pretty card. (Mom or any other woman deserves one, after all!) I decided to use one of the sentiments from the All Things Thanks Stamp Set (item 143089) as the focal point of the card. I stamped the sentiment with Basic Black Archival ink (item 140931) on a die cut Whisper White Cardstock circle. I used another piece of the polka dot Designer Series Paper and a strip of the gorgeous gold Designer Series Paper from the Eastern Palace Specialty Designer Series Paper for the card background. I mounted this on Basic Black Cardstock and Whisper White Thick Cardstock (item 140272). Then I stamped and die cut more flowers using the same technique that I employed for the egg carton and glassine bag. The two-step stamping with this set along with the coordinating dies makes creating multiples of an image quick and easy. The final touches for this card were another Basic Black Solid Baker’s Twine bow and gold sequins from the Metallics Sequin Assortment (item 138390).

I hope you can see how using the same elements across all these projects makes everything look coordinated—and that this inspires you to make coordinating gift sets!

Jennifer Sootkoos
2017 Artisan Design Team

Save

09. May 2017 · Comments Off on Super savings on Paper Pumpkin · Categories: Cards

For first-time subscribers only.

  • Subscribers must join by Saturday, June 10, 2017; 11:50 PM (MT).
  • Available for month-to-month subscriptions, not prepaid subscriptions.
  • Discount applied to one kit per month for the first three months of a new subscription. After that, the price for each month’s kit will return to the regular price of $19.95 US/$26.95 CA.

Save

08. May 2017 · Comments Off on Mint Macaron · Categories: Cards · Tags: , , ,

I really love this incolor and will be sorry to see it go.  But we do have some beautiful new incolors to replace the outgoing ones.  Certainly makes it interesting every year.  Fortunately there were no changes to our core colors this year.
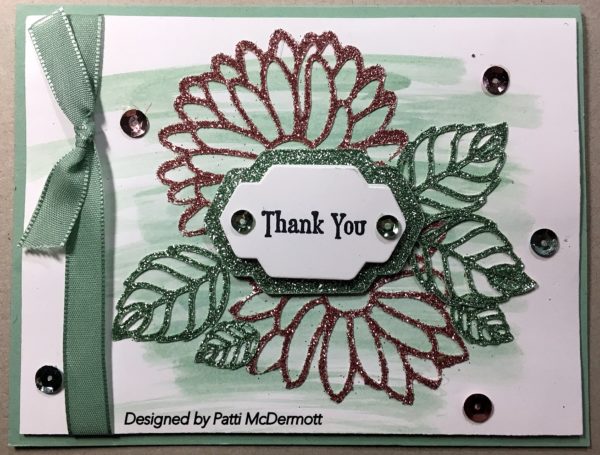
I used a mint macaron wash for the background on whisper White card stock and die cut the flowers and leaves with the Stylist Stems Framelits dies on page 42 of the OC.  I used the SAB glimmer paper in addition to the Mint macaron sheer ribbon found on page 178 in the AC.

ok

Save

Save

Save

06. May 2017 · Comments Off on Nailed it! · Categories: Cards · Tags: , , , ,

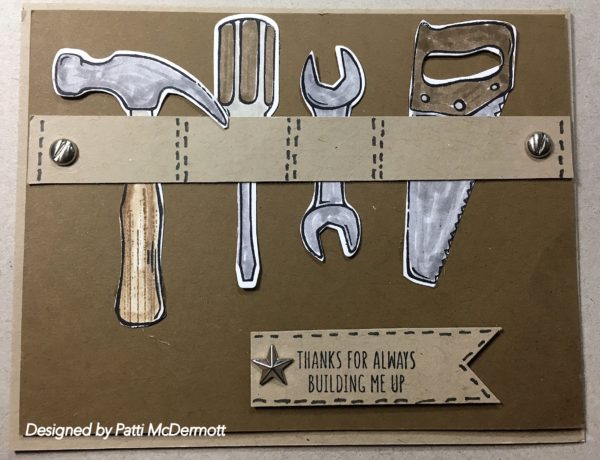
I am really disappointed that this set, page 48 of the OC is retiring.  As far as I know, the Build it framelits dies have already been sold out.  Since this is such an awesome masculine set and it went over so well with just about all of our customers around the world, maybe SU will think of designing another set with matching dies in the future.  I am hoping that maybe they will decide to come back with this set.  Wouldn’t that be nice.  Wishful thinking!
Colors I used were Soft Suede, Smokey Slate and Crumb cake.  I added the Urban Underground Embellishments on page 47.

Save

Save

05. May 2017 · Comments Off on Use link below to place your order! · Categories: Cards

                http://www.pattispad.stampinup.net

Save

Save

Save

Save

28. April 2017 · Comments Off on Dragonfly · Categories: Cards · Tags: , , ,

This was created with the stamp set Dragofly Dreams, page 26 in the OC.  I used black embossing powder and tempting turouoise ink.  I used the Metalic enamel shapes, page 177 of the AC.  One really great set because of the fantastic sentiments and will be very versatile because of it.  In addition, it has its own diecuts, Detailed Dragonfly Thinlits on the same page and can be purchased as a bundle with a 10% discount.  This set will be held over, along with the thinlits to the new annual catalog.  However, the bundled discount will not be available after May 31st.

Save

Save

27. April 2017 · Comments Off on Happy Birthday to my baby! · Categories: Cards · Tags: , , , ,

My youngest, Maureen Erin (Mo), will be 29 today and I am so blessed to have such a thoughtful and loving daughter.  She is also a Demonstrator and so much fun to be around.  My oldest daughter, Amy,  also a blessing, is a Demonstrator but she lives in TN and I do not get to see her as much.  However, we all try to plan SU conventions and on stage locals together.  We all love Stampin’up! © and look forward to doing all things that bring us closer together.  This is just one of the ways and it is so rewarding.

If you want to join our team, just go to my website and click on Join Now:

http://www.pattispad.stampinup.net

Save

Save

Save

Save

Save

21. April 2017 · Comments Off on From our Co-Founder Shelli · Categories: Cards

Building Things

Jon celebrated his birthday recently, and this is what my artist created for his packaging. Handy with all kinds of tools, he just finished a bathroom in their home, but what he’s really good at building is cool industrial furniture! Jon’s also excellent at building relationships—one of the reasons we love him and are so glad he’s part of our family!

Save

20. April 2017 · Comments Off on Artisan Design Team project · Categories: Cards

All-Occasion Card Set

Hello there! Do you have a favorite item that you like to give? For me, it’s a set of all-occasion handmade greeting cards. For many, cards are a way to celebrate specific occasions or a way to express emotions. But no matter the reason for sending a card, one thing is for sure—they’re always sure to brighten someone’s day!

1

This beautiful set consists of four different cards/envelopes and an adorable little window box to hold them. To create this set I used the Love Sparkles Stamp Set (item #143183), Whisper White Note Cards & Envelopes (item # 131527), and silver Designer Series Paper from the Neutrals Designer Series Paper Stack (item # 138435). Various other elements such as Silver Metallic Thread (item # 138402), Rhinestone Basic Jewels (item #119246), 5/8″ Silver Satin Ribbon (item # 134548), and Silver Sequin Trim (item # 138399) were used to embellish the cards.

The first is a thank you card. The flower was created using the Big Shot (item # 143263) and Succulent Framelits Dies (item # 142757). Not only are these dies used to create succulents but they also make pretty flowers! This Daffodil Delight Cardstock (item #119683) flower is the perfect addition to this card. It adds a subtle yet pretty touch to this soft color scheme.

2

Next up is a gorgeous love note. This sweet card features the Falling Petals Textured Impressions Embossing Folder (item # 142761) and a Real Red Cardstock (item # 102482) heart cut from the Sunshine Wishes Thinlits Dies (item #141489). The Love banner was created by stamping the Love sentiment in Real Red ink (item # 126949) on a Pink Pirouette Cardstock (item # 111351) banner. A tiny little white bow from the Sending Love Ribbon Combo Pack (item # 142737) adorns the right side of the heart.

3

The last two cards are pretty much dual purpose. Since they don’t specifically refer to any occasion they can either be for a birthday, congratulations, or just because. The first one features an adorable balloon bouquet created with the Balloon Bouquet Punch (item #140609) and the silver Designer Series Paper from the Neutrals Designer Series Paper Stack (item #138435). A simple Pool Party Cardstock (item # 122924) banner stamped with Island Indigo ink (item #126986) adds the perfect finishing touch!

4

Last but not least, this card says “It’s your day to sparkle” (another dual purpose card). My favorite element on this card is the little banner created using the Confetti Stars Punch (item # 135861). So fun!

5

This picture shows how the completed set looks all boxed up and ready to go.

6

Thanks for joining me! I hope you have enjoyed my project and are inspired to create a set of all-occasion cards for yourself or to gift!

Dani Dziama
2017 Artisan Design Team

17. April 2017 · Comments Off on Easter from Artisan Design member · Categories: Cards

Beautiful, Giftable Easter Baskets

Easter is the perfect opportunity for giving small, hand-crafted presents.

1

These small baskets are a great Easter gift, and can be easily made with the Basket Builder Framelits Dies (item 143228).

2

Instructions

You need 2 strips of cardstock for the baskets, sized 13.5 x 5.5 cm.

Score them at 4 cm and 9.5 cm.

3

The grass is die cut with the Framelits, but the cuts don’t go all the way through to the end of the cardstock. For this, let the bottom edge of the Framelits hang just over the edge of the cutting plate of the Big Shot Die Cutting Machine (item 143263).

4

Once you’ve die cut both strips, the baskets can be assembled.

5

The blades of grass can be carefully intertwined . . .

6

. . . so that you don’t necessarily have to glue the basket together at the sides.

Unless you want to put in lots of chocolate. 😉

7

Now you can decorate the baskets, for example with small eggs (Basket Builder Framelits Dies; item 143228), butterflies (Timeless Tags Thinlits Dies; item 142755), ribbons (3/8″ [1 cm] Ruched Ribbon in Flirty Flamingo, item 141426; Peekaboo Peach, item 141427; Sweet Sugarplum, item 141428),

and a sentiment (Time of Year Stamp Set, item 141790, and Bunch of Banners Framelits Dies, item 141488).

And you can fill them, too. A few chocolate eggs and a little lamb found their way into my baskets.

8

Wishing you lots of fun with this project!

Sylwia Schreck
2017 Artisan Design Team

15. April 2017 · Comments Off on See What’s retiring! · Categories: Cards

Go here to see Lists:

www.pattispad.stampinup.net


Save

Save

Save

Save

Save

Save

Save

Save

Save

Save

11. April 2017 · Comments Off on Need boxes? · Categories: Cards

31. March 2017 · Comments Off on Sale-A-Bration (Last day to get this FREE) · Categories: 3D Items · Tags: , ,

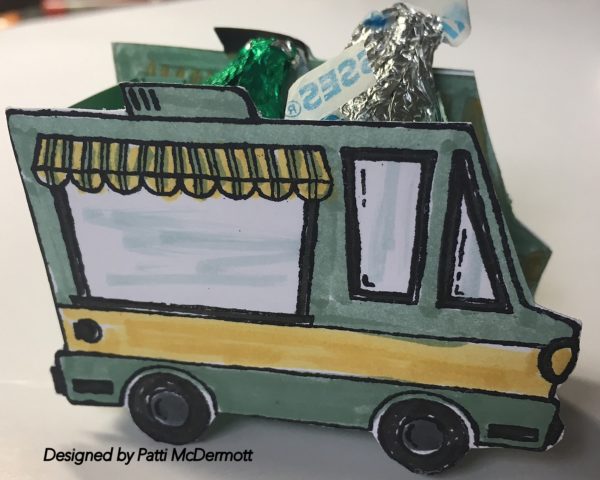
Isn’t this the cutest little treat holder?  I created this with the SAB set, Tasty Trucks, page 12 of the SAB Catalog.  I used the colors Mint Macaron and Daffodil Delight.  I fussy cut the image out and double backed it to make it stronger for both sides.  The center part to create the box is 1 1/2″ x 5 1/8″, scored at 1 1/2″ from each end (long side) and 1/4″ from each side (short side). There are several patterns to make this on You Tube, just put “Tasty Trucks Stampin’up” in the search box and you will find many.

If you spend $50 in merchandise you can get this set.  You can place an order on my site 24-7 but make sure it is before midnight tonight.

GO HERE:  www.pattispad.stampinup.net

Save

30. March 2017 · Comments Off on More from the Artisan Design team. · Categories: Cards

Time for Easter Crafting

I’m really excited that Easter is in April this year. Why? Because it means more time for Easter crafting!

I don’t know why, but I absolutely love Easter (even more than Christmas)! Maybe it’s because my birthday is in the spring, or it could be the craftiness of egg painting—or it might even be the challenge of finding every last hidden egg. I don’t know. But either way, it’s fun, colorful, and makes me happy.

Before Valentine’s Day was even over, I had a ton of ideas for the Basket Bunch Photopolymer Bundle (item 144731). The Basket Bunch Stamp Set (item 143186) is absolutely adorable and it just screams “Design a scene with me!” It really does! So I couldn’t resist and decided to make little Easter egg dioramas.

1

Now, before you get too excited, I have to say: I used fake eggs. They don’t break (they actually bounce, if you really want to know), you can cut into them with scissors, and oh yeah, there is no messy center to deal with. So it was the obvious choice. They’re called DIY Easter Eggs and you can find them pretty much anywhere Easter stuff is being sold.

To begin, I drew a “window opening” on my egg, poked a hole with my Paper Piercing Tool (item 126189), and cut it out using my Paper Snips (item 103579). To color my egg shells, I simply used the ink pad of choice and a Sponge Dauber (item 133773) to rub it on the outside. I let them dry overnight.

Now, you’re probably thinking that designing inside an egg is pretty tedious and if I had to guess, I would agree. You see, I didn’t design or assemble my little scenes inside the egg. I designed everything on a cardstock circle, punched using the 1-1/4″ Circle Punch (item 119861). Once my design was complete, I placed the scenery (bottom first) into the egg and turned it.

2

3

I love all the different images in the Basket Bunch Stamp Set and the coordinating Basket Builder Framelits Dies (item 143228)—which make it quick and easy to cut them out. The possibilities are endless with this bundle. You can have a bunny in his carrot garden, a basket of flowers, or even little chickadees hanging out at the farm.

4

5

6

7

To finish off my little egg dioramas I added the Whisper White Mini Pompom Trim (item 141486) to the opening. This trim is absolutely perfect to complete the look.

Thank you for joining me today and Happy Easter crafting!

Martha Inchley
2017 Artisan Design Team

29. March 2017 · Comments Off on Pop-up Balloons! · Categories: Cards · Tags: , , ,

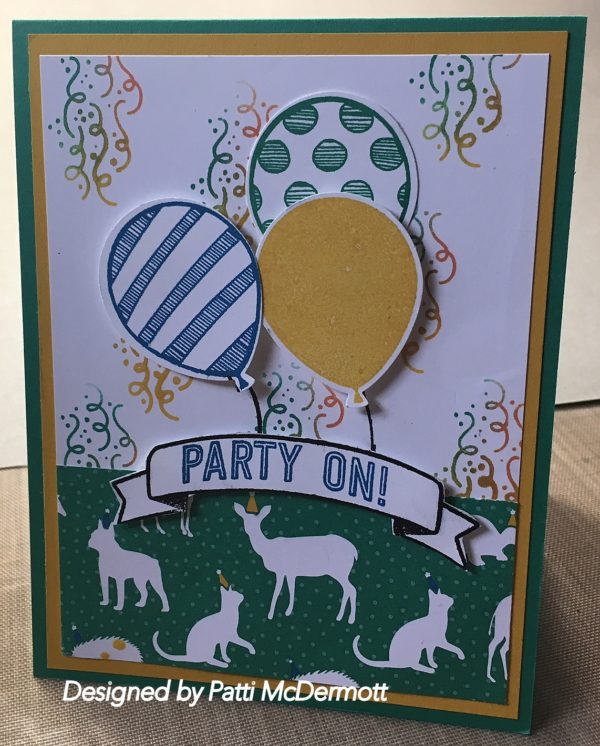
This card was so much fun to create.  It is not hard to do at all if you have the right tools.  Right now you can get these Balloon pop-up Thinlits Dies, Page 5 of the OC to make this card.  I used the Party Animal DSP on same page.  I used the embossing Folder, Celebrations Duo found on page 40 in the OC and the sentiment inside from DragonFly Dreams, page 26.

Save

Save

25. March 2017 · Comments Off on March Paper Pumpkin Bunny Buddies · Categories: Cards

Part of the planning process for each kit includes the Paper Pumpkin team gathering together to assemble the kit once we receive a final sample. It’s one of our favorite things! When we sat down to create this kit, we couldn’t help but love it! The best part was personalizing the bunnies. The mix-and-match stamping works beautifully on the cards and bags. It’s also worth mentioning that our second- favorite part was adding the pompom bunny tails—too cute! We hope you enjoy the kit as much as we do.

Each Bunny Buddies Kit comes with supplies for nine bunny cards and bags. You might recognize the patterns and colors. They are from the Playful Palette Suite, found on p. 118 of the 2016-2017 annual catalog. The jewel-toned color scheme is soft and fun for springtime while the patterns offer a modern twist. And after all, “playful” is the perfect way to describe little bunnies, right? Be sure to check out the full product suite online or in the catalog.

March_PP1

We always like to share more ideas with you and this month is no “egg”ception. Here are three ideas we think you’ll find simply “ear”resistible! (Much in the same way that we can’t resist a good bunny pun.)

March_PP2

First up, it’s easy to transform the bunny bags into little baskets. Just tie up the ears and add a tag. Everything you need is already in the kit—including three different colors of baker’s twine!

March_PP3

Next up is another treat bag, but for a slightly larger treat—like maybe a giant chocolate Easter egg or a solid chocolate bunny. (Okay, it doesn’t have to be chocolate!) Decorate a Petite Café Gift Bag with accessories from the kit. This adorable pompom trim looks like it’s straight out of the Playful Palette Suite, but it’s actually a custom creation. Use a needle and Whisper White Solid Baker’s Twine to thread some of the pompom bunny tails together. Pretty brilliant, right? We think so.

March_PP4

Finally, don’t forget about the other images in the Bunny Buddies Stamp Set. Send an eggs-pression of love to some“bunny” you love with this cheerful card. Stamp the eggs with a bright palette and then add some texture with the Brick Wall Textured Impressions Embossing Folder.

March_PP5

Be sure to grab some Bunny Buddies Refills to use at all your Easter egg hunts!

PP_SAB (1)

And, don’t forget, you can skip to the Sale-A-Bration with Paper Pumpkin. Get a 3-month subscription for just $55 USD/$74 CAD and instantly qualify for a FREE Sale-A-Bration item.  Don’t miss it. Sale-A-Bation ends on March 31! Learn more here and check out the free items you can earn here (US/CAN).

24. March 2017 · Comments Off on Oh Yeah! · Categories: Cards · Tags: , , , ,

Ok, I am obsessed with this stamp set, Nailed it, page 48, oc.  I love the fact that there are die cuts that go with these stamps and I think I have made at least 5 or 6 different cards with them so far.  The possibilities are endless.  What I love about this set are all the embellishments, washi tape and DSP that you can use with it.  These are all listed on page 47 along with the lovely embossing folder, Hexagons Dynamic Textured impressions.  In addition, another stamp set in this same catalog, Urban District can also be combined to make dozens of masculine cards for Dad or the men in your life.  Save 10% by buying the bundle.

Save

Save