15. August 2016 · Comments Off on Fun with Swirly Birds · Categories: Cards

13. August 2016 · Comments Off on Fancy Flowers · Categories: Cards · Tags: , , ,

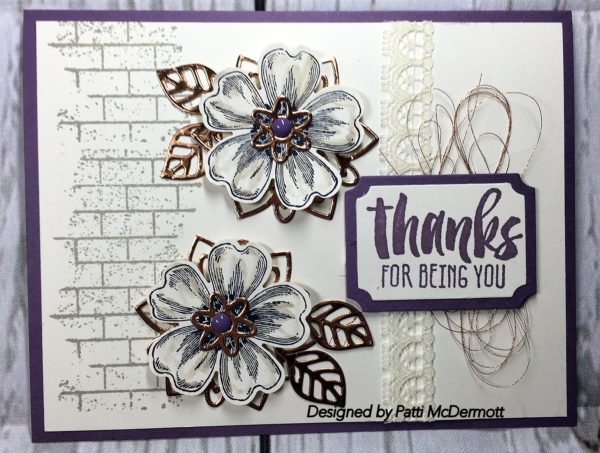
I created this card using the images from the set, Flower Shop, page 105 with the matching Pansy punch, page 187.  I was really in a punch type mood all this week.  Maybe it was because I rec’d my new goodies last week that included new punches and decided that I haven’t used my old ones in awhile.
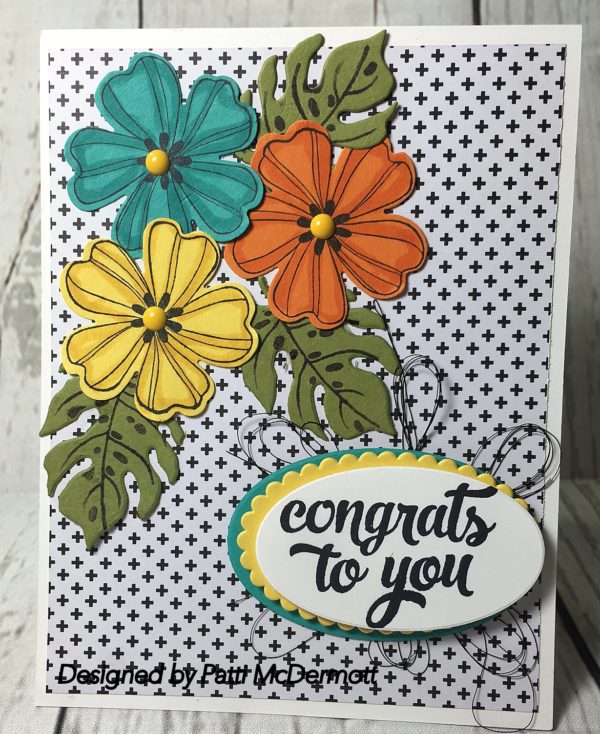
The leaves are cut out with the Framelits, Botanical Builder found on page 194 and stamped with the set Botanical Blooms, page 142.  I added Enamel Shapes, page 177, to the center of the flowers.Colors used were Burmuda Bay, Pumpkin Pie, Crushed Curry, Old Olive and Basic Black Achrival Ink.
The background paper is from Pop of Pink Specialty DSP, page 172.  In addition, I added the new Black Metallic thread, page 178, behind the sentiment, found on page 86 with the Tin of Stamps set.
IMG_1158

Save

Save

12. August 2016 · Comments Off on My own Foxy Friends Cased · Categories: Cards · Tags: , , ,

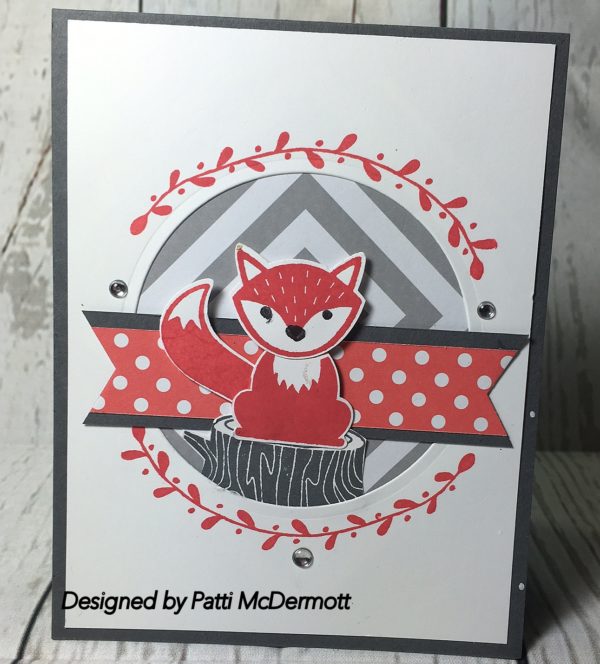
Last week I featured this same card a little differently.  I used a different pattern of the DSP, A Little Foxy Paper Stack, page 174.  Here I used the colors Watermelon Wonder, Basic Gray and Smokey Slate.  In addition, I added our beautiful Rhinestone Basic Jewels.  The circle was cut with our new Layered Circle Famelits, page 193, and I replaced the ribbon with paper.
IMG_1155

Save

Save

Save

11. August 2016 · Comments Off on Semi-cased Congrats Card · Categories: Cards · Tags: , , ,

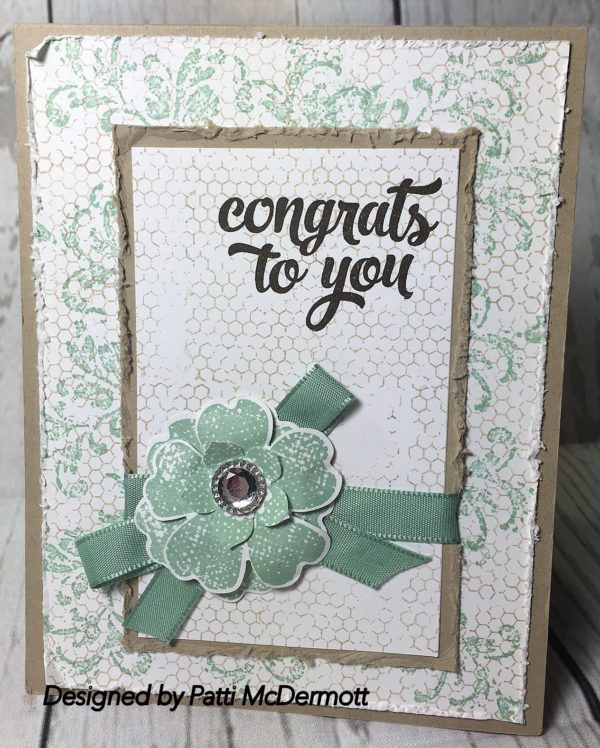
I got the idea for this card from the gallery in Stampin’ Connection.  I had saved this to my favorites on my Mac, but I cannot remember who the demo was.  If you know, please let me know so I can give her credit.  I have changed most of the stamps used, and the sentiment, except for Butterfly Basics, page 113, and Flower Shop, page 105, and colors have been cased.  Grateful for the inspiration.
IMG_1151

Save

Save

10. August 2016 · Comments Off on Birds and Blooms Thinlits (SUO Challenge) · Categories: Cards · Tags: , , ,

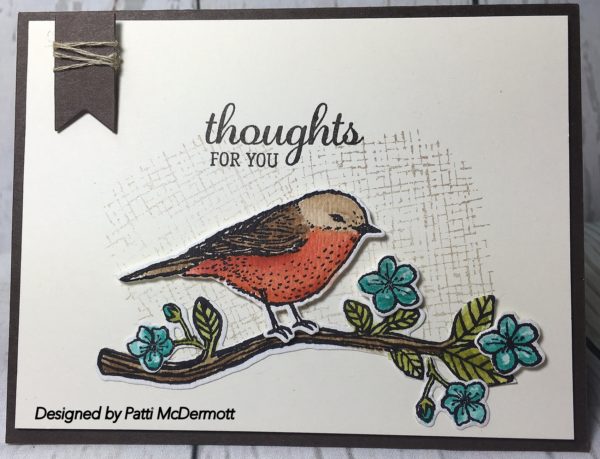
Yes, I love these Thinlits also, found on page 194.  Of course, the first time I saw this stamp set, Best Birds, page 53, I knew I HAD TO HAVE IT!  There is so much you can do with this set and the matching Thinlits.
I watercolored the bird with Early Espresso, Crumb cake and Tangerine Tango.  Other colors used were Bermuda Bay and Old Olive.
You can get a 10% discount on both the set and Thinlets if you buy them as a bundle.  Can’t beat that for this very versatile bundle.
IMG_1150

Save

Save

Save

09. August 2016 · Comments Off on Classic Birthday! · Categories: Cards · Tags: , , , ,

Lovely As a Tree, page 130, is such a great stamp set and I hope Shelli keeps her word and NEVER retires this set.  I used it here in the background.  I masked the truck to add the trees.  Stamp set used is Country Livin’ page 131.  Colors used are Marina Mist, Crumb Cake, Soft Suede, Early Espresso and Old Olive.  The banner is from the stamp set, Birthday Banners, page 15 and the Guy Greetings, page 114.  This is great masculine card. You can find the Framelits, Bunch of Banners on page 193.
IMG_1154

Save

Save

08. August 2016 · Comments Off on Design Team Member, Marisa Gunn · Categories: Cards

Mixing Texture Stamps and Watercolor Stamping

Have you seen the new Touches of Texture Stamp Set (item 143251)? It’s filled with several beautiful line art stamps as well as different filler and texture stamps. I thought it would be fun to use a watercolor stamping technique and some simple layering to make a set of note cards and a coordinating gift bag to share with you today.

1

I started with the Whisper White Note Cards & Envelopes (item 131527). I stamped the splatter texture stamp in Crushed Curry ink (item 131173). Then I added the striped tape from the Affectionately Yours Designer Washi Tape (Item 141635). I also added a piece of Crushed Curry Cardstock (item 131199) that I cut with the washi tape die shape from the Mini Treat Bag Thinlits Dies (item 137547) and adhered it above the tape. Next, I added a few wrapped rounds of the Basic Black Metallic Thread (item 141695).

4

For the watercolor stamping technique, follow the pictured steps below.

  1. Stamp the outline image in Basic Black Archival ink (item 140931) on Watercolor Paper (item 122959). Punch out using the 2″ Circle Punch (item 133782).
  2. Spray the image with water using a Stampin’ Spritzer (item 126185).
  3. Ink the flower filler image in Crushed Curry ink, then roll the edges in Watermelon Wonder ink (item 138323).
  4. Stamp on the wet watercolor paper and let the ink bleed naturally. The watercolored images look terrific with all of the other textures from the stamp set!

Adhere the watercolor piece to the card using Stampin’ Dimensionals (item 104430).

6

All of the greetings from the cards are images from the Love & Affection Stamp Set (item 141545) stamped in Tuxedo Black Memento ink (item 132708). I used Flirty Flamingo ink (item 141397) for the linen texture stamp, Flirty Flamingo Cardstock (item 141416) for the die cut, and the floral tape from the Affectionately Yours Designer Washi Tape. The ink colors I used here to stamp on the watercolor piece were Flirty Flamingo ink and Cucumber Crush ink (item 138324).

5

I also decided to make some custom envelopes for these cards using the new 2015–2017 In Color Envelope Paper (item 141697) and the Envelope Punch Board (item 133774). You can also see below a close-up of the card front and how all the textures work together to add interest to a simple card.

7

The last card uses Dapper Denim ink (item 141394) and Cucumber Crush ink which were stamped with two of the watercolor texture stamps over the dragonfly stamp. The die cut tape piece is cut from Cucumber Crush Cardstock (item 138335).

3

This card set would make a great gift for someone, so I created a gift bag to hold the cards and envelopes for that purpose. I started with the Glassine Gift Bags (item 141700). I cut a piece of Whisper White Thick Cardstock (item 140272) to 2″ wide using the Stampin’ Trimmer (item 126889) and then punched it using the Banner Triple Punch (item 138292). I stamped it with the lacy image using Flirty Flamingo ink, then added the striped tape, another die cut taped piece of Crushed Curry Cardstock, and more Basic Black Metallic Thread.

2

The colors for the watercolor piece are Flirty Flamingo, Watermelon Wonder, and Crushed Curry ink. The small greeting is from the Thoughtful Banners Stamp Set (item 141614). I clipped the tag to the bag with Gold Binder Clips (item 141673).

10

Well, I hope you enjoyed these samples and that you give the “watercolor stamping” technique a try. It’s perfect to add texture, color, and interest to your next stamping project!

Marisa Gunn
Artisan Design Team 2015–2016


Save

06. August 2016 · Comments Off on Cute Baby Cards from SU · Categories: Cards

It’s been a busy week, but as I look back, there’s not a whole lot worth blogging about, so I’ll share a couple of cute cards that I’m sending to congratulate parents of new babies. Enjoy!

Save

Save

06. August 2016 · Comments Off on Coming up for air! · Categories: Cards · Tags: , ,

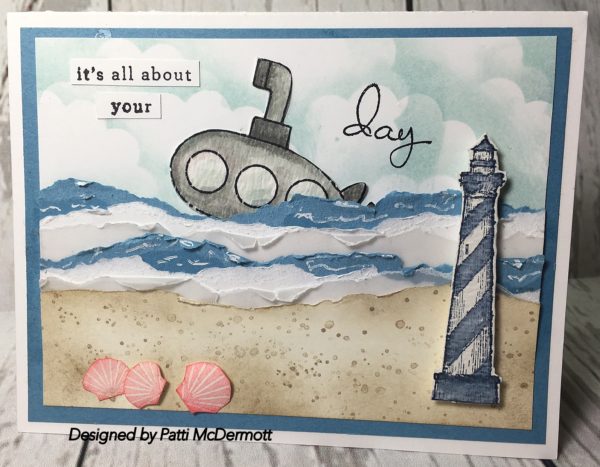
I created this card with the sets, Seaside Shore, page 93 and You’re Sublime, page 80.  In addition,  I used the light house found in the set From Land to Sea, page 98.  Colors I used are Marina Mist, Soft Sky, Crumb Cake, Smoky Slate, Basic Gray and Pink Pirouette.
The sentiment is from the set, Endless Birthday Wishes, Page 22.  I used Vellum card stock, Marina Mist and Heavy Whisper White card stock.
IMG_1148

Save

Save

04. August 2016 · Comments Off on Another Fox Card · Categories: Cards · Tags: , , ,

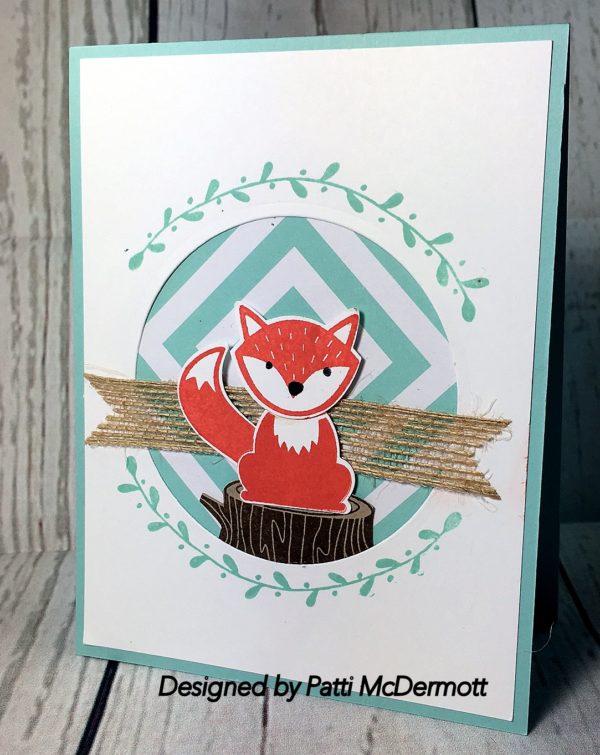
We made this at our camp on Saturday and everyone loved it.  How can you not love a little critter like this?  Colors I used are Calypso Coral and Pool party.  The images are stamped from the set, Foxy Friends, page 57.  I cut the window out with our new layered circle framelits, page 193.  The paper is from A Little Foxy DSP 6″ X 6″ paper stack, page 174.  I finished it off with the new 5/8″ burlap ribbon, page 178.
IMG_1144

Save

03. August 2016 · Comments Off on Seaside Shore · Categories: Cards · Tags: , , , ,

The sentiment from this set can be found on page 93.  I decided to create this card using the beautiful DSP, By the Shore, page 173.  I used Calypso Coral card stock and Mint Macaron 3/8″ sheer linen ribbon, page 178.  This is one of those cards that I consider a CAS (clean and simple).
IMG_1138

Save

02. August 2016 · Comments Off on Stamp Camp Card · Categories: Cards · Tags: , , ,

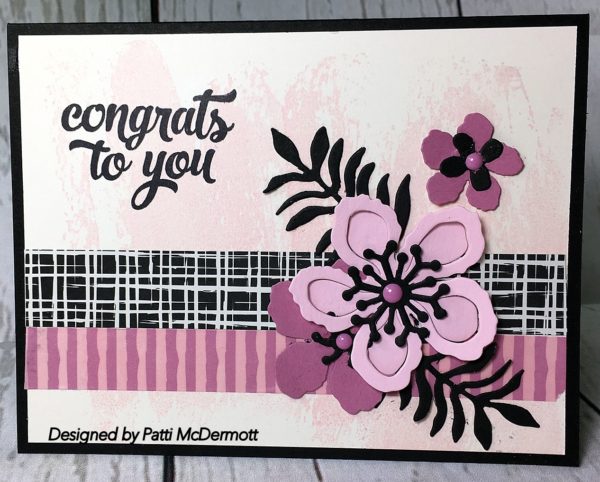
This was one of the cards we made at camp this past Saturday.  I used very vanilla card stock and stamped the background with our Watercolor wash stamp, page 124 in pink pirouette.  I used the washi tape, playful palette found on page 179.  The sentiment is from the stamp set, Tin of Cards, page 86.  I cut the flowers and leaves out in pink pirouette, Sweet Sugarplum, and basic black Card Stock with the Botanical Builder Framelits, page 194.
IMG_1130

Save

01. August 2016 · Comments Off on Thank you card · Categories: Cards · Tags: , , ,

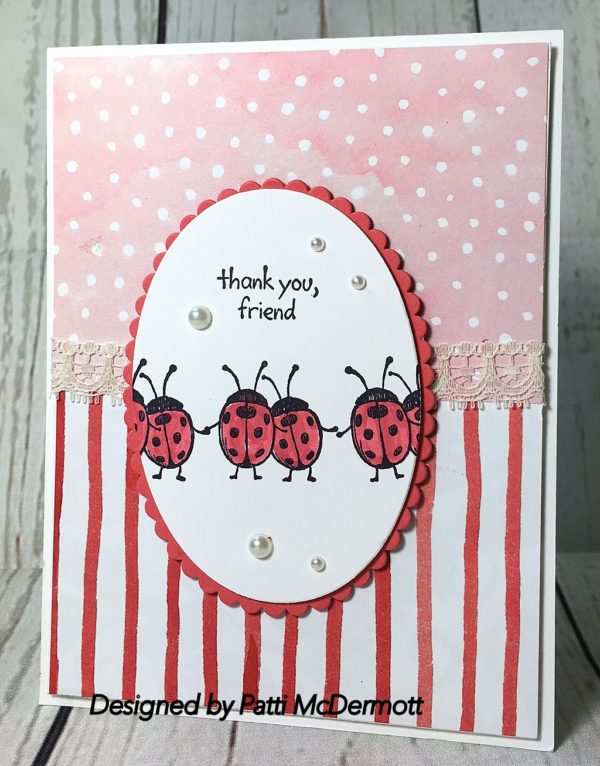
The stamp set used on this card is the hostess set, Love you lots, page 199.  The DSP is the beautiful Paper, Fruit Stand, page 173.  One of my favs in the new catalog.  I used the beautiful very vanilla lace trim, page 179 and the Pearl Basic Jewels, page 177.  I cut the ovals out with our new layered oval Framelits, page 193.  The colors I used were Watermelon Wonder and Basic Black.
IMG_1141

Save

Save

31. July 2016 · Comments Off on Foxy Friend Get Well Card · Categories: Cards · Tags: , , , , ,

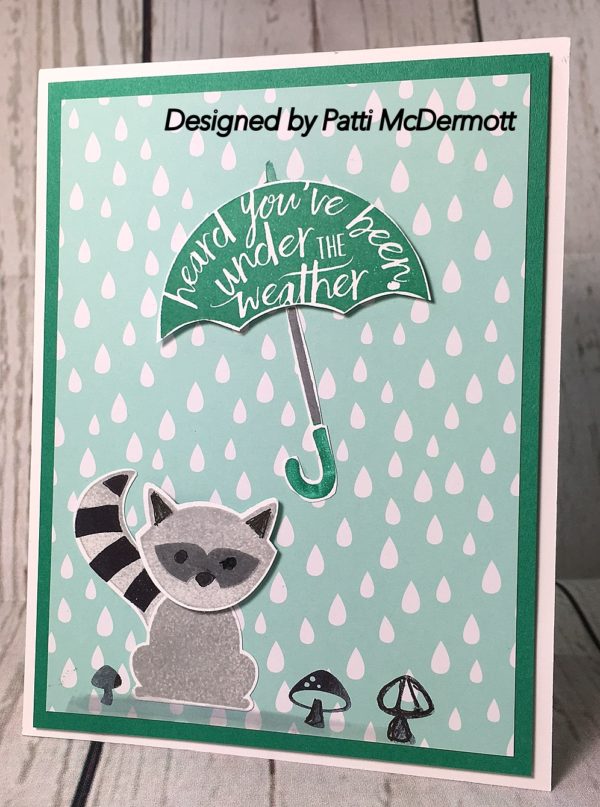
This little racoon was made with the awesome stamp set, Foxy Friends, page 57 and the matching punch, Fox Builder, page 188.  You can make all kinds of critters with this punch.  You can get both the stamp set and the punch in a bundle with a 10% discount.  A great deal.  I also used the stamp set My Hero, page 209, which is the Ronald McDonald Charities set.  SU donates a portion of sales of this set to the RMHC.  Many images in this set go with our punches and dies.  Colors I used on this card besides Basic Black are Mint Macaron and Emerald Envy.
IMG_1145

Save

Save

Save

30. July 2016 · Comments Off on Glimmer Fish · Categories: Cards · Tags: , ,

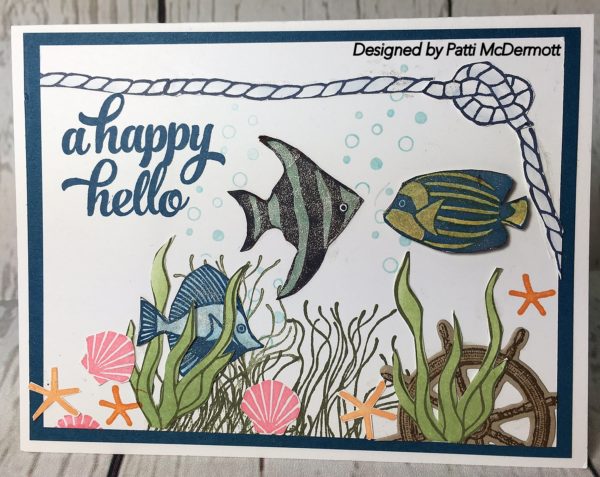
I love this set, Seaside Shore, found on page 93.  I used our Wink of Stella glimmer pen on the fish.  There are no dies with this set but the fish are really easy to cut out, which is what I did here.  I used Dapper Denim ink and card stock for the top of the base card.
IMG_1139

Save

29. July 2016 · Comments Off on SUO Challenge · Categories: Cards · Tags: , , ,

I created this card for the SUO #153 Challenge.  The challenge was to create a black and white card with a pop of color.  I used the wink of stella glimmer pen, page 181, tinted with Flirty Flamingo.

I Got this idea from France Martin.  According to France, there is always a little glimmer left in the pen so after you use up the clear glimmer, you add several drops of ink refill to the barrel of the pen and then add rubbing alcohol.  Give it a little shake and you have colored shimmer.  In addition, I used the In-Color enamel shapes, page 177.

The Stamp set I used is Best Birds, page 53.  I combined several dies, Swirly Scribbles and Flourish Thinlits on this card.  Hope you like it.
IMG_1135

Save

28. July 2016 · Comments Off on From another Design team member · Categories: Cards

Beautiful Banners

1

I love making banners, so when the new Stampin’ Up! catalog came out, I could not wait to get my hands on the Letters for You Photopolymer Bundle (item 142348) on page 137.

Another new product that had me excited was the music note paper included with Stampin’ Up!’s This Christmas Specialty Designer Series Paper (item 141628). I started with that as the base and added the gorgeous new 5/8″ Mini Striped Ribbon in Watermelon Wonder (item 141433), along with the smallest flower and leaf sprig from the Jar of Love Bundle (item 142342). The ink colors I used are Watermelon Wonder, Marina Mist, and Wild Wasabi.

2

The new Layering Ovals Framelits Dies (item 141706) really show off the large letters and the new Foam Adhesive Strips (item 141825) make adhering these beautiful letters a breeze. No more cutting up your Stampin’ Dimensionals!

When I was part-way done with the birthday side of my banner, I decided it would be fun to utilize the beautiful Christmas pattern on the back of the music note paper. I’m so glad I thought of it because now the banner can be used again!

3

The letters really sparkle in Red Glimmer Paper (item 121790) and the new Emerald Envy is the perfect shade of green for Christmas projects.

4

Stampin’ Up! makes it quick and easy for you to create projects with that “wow” factor. For beautiful banners, I always turn to the Banners Framelits Dies (item 132173) and Whisper White Thick Baker’s Twine (141688).

Whatever the occasion, Letters for You will help you create the right banner to help you celebrate!

Michelle Long
Artisan Design Team 2015–2016

Save

27. July 2016 · Comments Off on Another birthday builder · Categories: Cards · Tags: , , ,

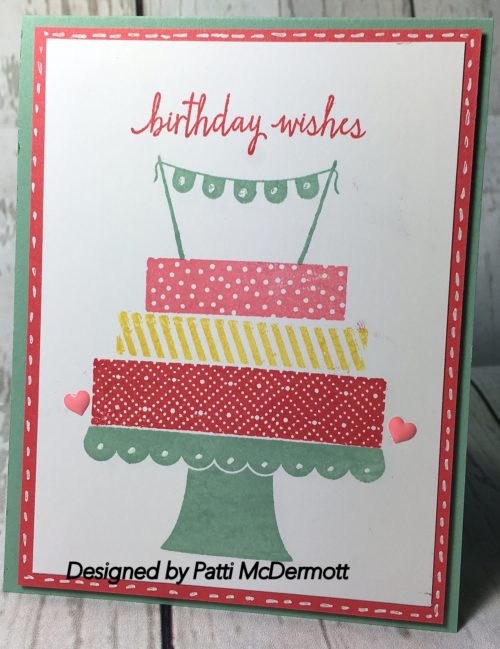
Can’t stop using the in-colors on my projects.  I really love all the in-colors this year and they go well with some of last years colors.  I designed this card with the set, Build a birthday, page 25.  I used the in-colors, Mint Macaron, Flirty Flamingo, Watermelon Wonder and Crushed curry on Whisper White card stock.  I layered it with Flirty Flamingo and Mint Macaron is the base card.  In addition, I used a white gel pen to highlight and add a border.  I finished off the card with In-color enamel Shapes, page 177.
IMG_1118

Save

Save

26. July 2016 · Comments Off on Silk Technique · Categories: Cards · Tags: , ,

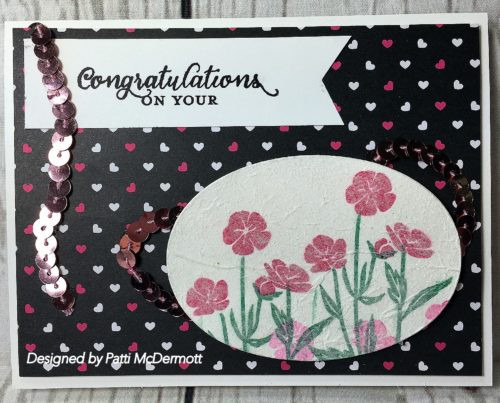
I created this card from the stamp set, Wild About Flowers, page 112.  I haven’t done this technique in so long I wanted to see if I still remembered how to do it.  I took whisper white card stock and stamped the image and then colored it with Flirty Flamingo and Emerald Envy.  I then crinkled up tissue paper into a little ball and then smoothed it out, leaving some of the crinkleness.  I then covered the stamped image with glue and layered the tissue paper on top.  I really liked how it came out.  I did find while doing this that a glue stick works much better for me than the liquid Mono Multi purpose glue, which is quite messy.  I know that SU just retired the glue sticks but next time I may try using snail adhesive to see what results they provide.  It is important to make sure the image is completely covered in glue.
The DSP used is Pop of Pink, page 172 and embellished with Blushing Bride Sequin Trim, page 178.
IMG_1123

Save

Save

25. July 2016 · Comments Off on Seaside · Categories: Cards · Tags: , , ,

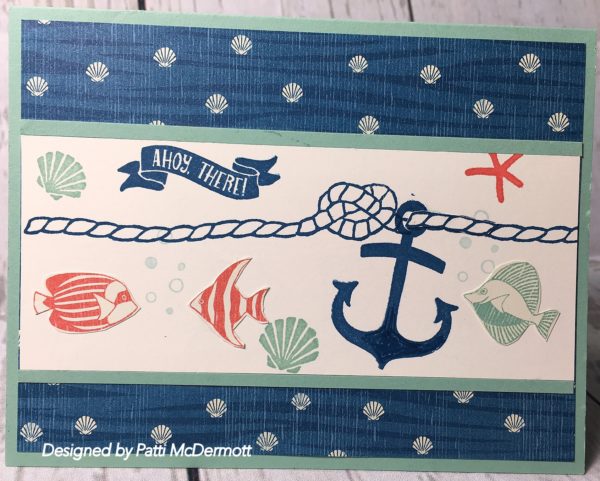
I wanted to show the gorgeous DSP, By the Shore, page 173, that is meant to partner with this set, Seaside Shore, page 93.   You know I love anything to do with the Sea, I live so close to the beach.    Again I cut out small images from the 12X12 DSP and added them to the card in addition to the stamped images.  Colors I used were Dapper Denim, Flirty Flamingo and Mint Macaron.
IMG_1125

Save

Save

24. July 2016 · Comments Off on Oh Yeah! Party! · Categories: Cards · Tags: , ,

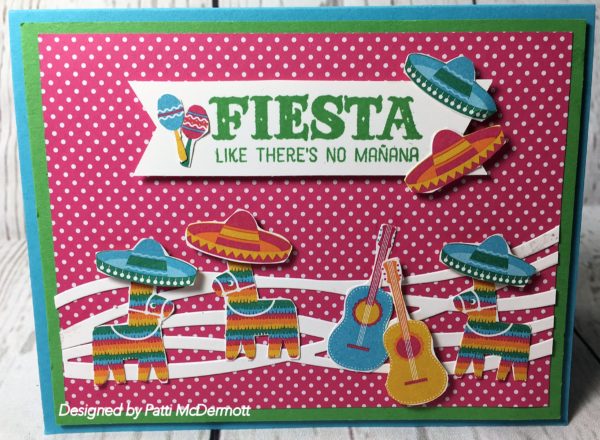
I know you can feel the happiness in this card.  I smile whenever I look at it.  It just speaks FUN! don’t you agree?  The stamp set is Birthday Fiesta, page 11 and the DSP is called Festive Birthday Designs, page 173.  Here I cut out by hand, the little images from one of the DSP sheets included in the pack.  Adding these little images to this card gives it a different dimension and adds interest.  Card stock colors are Whisper White, Emerald Envy and Tempting Turquoises.
IMG_1128

Save

Save

Save

23. July 2016 · Comments Off on Banners are better! · Categories: Cards · Tags: , , , ,

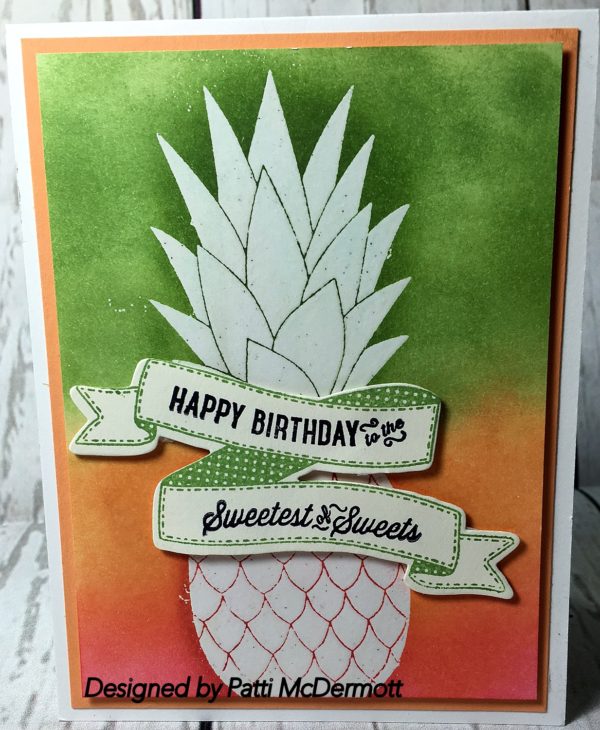
I created this card using the stamp set, Pineapple, page 124.  I embossed the image in clear embossing powder on whisper white card stock.  I then sponged the areas around the pineapple with Cucumber Crush and Peekaboo Peach creating the resist technique.  I blended the very bottom of Peekaboo Peach with Flirty Flamingo to create a little more interest.  The stamp for the banner is from the set, Birthday Banners, page 15 and so is the sentiment.  It was cut out with the Bunch of Banners framelits, page 193.
IMG_1120

Save

Save

22. July 2016 · Comments Off on This World · Categories: Cards · Tags: , , ,

This is one of my favorite sets in the new catalog.  In This World, page 145 is so awesome!  I have made several cards from this one set so I know you believe what I say.  Here I used Delightful Dijon on the Chair and Cajun Craze, Early Espresso on the door.  This set has many images that really fit into the vintage style that I am so fond of.  As if you didn’t know.  The DSP can be found on page 174 and is in the Regal paper stack.
IMG_1115

Save

Save

21. July 2016 · Comments Off on Birthday Wishes · Categories: Cards · Tags: , ,

I created this card using the stamp set, Build a Birthday, page 25 in the AC.  In addition, I used as a background the embossing folder, Elegant Dots, page 195.  The inks I used for the candles are Emerald Envy, Flirty Flamingo, and Sweet Sugarplum.  I embellished the front with the In color enamel shapes, page 177.
IMG_1117

Save

20. July 2016 · Comments Off on Birthday Blooms · Categories: Cards · Tags: , ,

This card was created using sets, Birthday Blooms, page 12 and Butterfly Basics, page 113.   I used watercolor paper and colored the flowers with an aqua painter and Crushed Curry ink.  The tiny flowers are Cajun Craze.  I used Old Olive on the leaves and Basic Black Archival ink.  I embellished this card with linen thread, page 179 and Metallic Enamel Shapes, page 177.

IMG_1113

Save

Save

19. July 2016 · Comments Off on Bonus Days · Categories: Cards

blogHeader_BonusDays_cust_July0716_ENG

Did you get everything you want from the new annual catalog yet? Since it came out only a month ago, you probably still have some items on your wish list, and we have some great news for you! For every $50 USD/$60 CAD you spend in between July 7 and July 31, you’ll get a $5 USD/$6 CAD Bonus Days coupon that you can use August 2-31. This is a great opportunity to shop from your wish list, whether you buy your favorite products now or later in August with your coupons!

Details
• Promotion period: July 7–31, 2016
• Redemption period: August 2–31, 2016
• An email address is required to participate in this promotion; Bonus Days coupon codes can only be delivered via email.
• It is strongly recommended that participants both save emails containing their Bonus Days coupon codes AND write down the coupon codes in a safe place. Codes cannot be resent if the email is lost, and lost codes cannot be recovered.
• Bonus Days coupon codes can be redeemed for any product, excluding Starter Kits and Paper Pumpkin subscriptions. New prepaid Paper Pumpkin codes can be redeemed.

Shop now! (US | CA)


Save

Save

18. July 2016 · Comments Off on Hostess Appreciation Party · Categories: Cards

Do you know how you can receive a private invitation to my annual Hostess Appreciation party?  It’s easy!
Have a workshop in your home or mine, hold a book party of at least $150, be a Paper Pumpkin Subscriber, or a member of one of my clubs.

This year’s party was a Mexican theme.  This is the invitation that I sent out.

IMG_1061
Even though I have been a Demonstrator for over 13 years, this was the 10th anniversary of holding parties for the people who are so good to me.  I really appreciate the support that I get from these great Ladies and I like to show them how much they mean to me.

The front of the invite was created with the DSP, Festive Birthday, page 173, and the colors I used were Emerald Envy, Tempting Turquoise  and Delightful Dijon.  I used the Layering Square framelits, page 193 for the gate fold.
IMG_1063
On the inside I used the same colors and cut out some of the images on the DSP for more interest.

The food was catered, Mexican of course, by my friend and downline, Amanda Brazelton. She really out did this Mexican theme.  I mean she didn’t leave anything out right down to Fried ice cream for dessert.  Everyone love it and all went home with lots of FREE product.  We played games, had make & takes, great food, libations and sooooo much fun!

I have made so many great friends through stamping, and I love them all.  Thank you so much for all your support! You guys keep me going!

Save

Save

17. July 2016 · Comments Off on All About Everything · Categories: Cards · Tags: , , , ,

Yesterday’s posting was from this same set.  You would have rec’d this FREE along with your monthly subscription to Paper Pumpkin.  Go ahead and try it.  You can quit anytime and is only $20 a month which includes shipping.  You get surprised every month with the goodies you get in your mail box.
I used Flirty Flamingo, Watermelon Wonder, Mint Macaron, and Delightful Dijon on this Card.  The embossed area was created with the new embossing folder, Floral Affection, page 195.  I added the embellishments, Metal Rimmed Pearls, page 177.  Whisper White Card stock on Heavy WW card base.
IMG_1059

Save

Save

16. July 2016 · Comments Off on Happy Place · Categories: Cards · Tags: , , , ,

I love this stamp set called All About Everything.  If you were a Paper Pumpkin subscriber you would have rec’d this set free, in addition to the regular monthly kit.   One of the perks of subscribing.  Not to mention the fun you receive every month directly to your home via mail.
The boots are from the set Country Livin’, page 131 and every thing else is from the Everything set.  The splatter is from Gorgeous Grunge, page 123.
IMG_1060

Save

Save

15. July 2016 · Comments Off on More from the Design Team · Categories: Cards

Keeping the Memories Alive

After spending two weeks in Europe this past May, I couldn’t wait to keep the memories alive using Project Life by Stampin’ Up!

I instantly fell in love with the new annual catalog’s Hello Lovely Project Life Card Collection (item 141668) so I knew what I was going to use for my album. The pocket cards from this kit will fit any theme or occasion and I loved how they fit my theme—vacation!

1

Before I started decorating the inside of the album, I started with the outside. And by the way, that’s one of my favorite things about the Espresso 6″ x 8″ Project Life Album (item 139655): you have total freedom to make the album unique and add your own creative personality!

2

The cover of the album was created using two cards from the Hello Lovely Project Life Card Collection and a few pieces from the Hello Lovely Project Life Accessory Pack (item 142687). I stamped the “Happiness” greeting using Early Espresso ink (item 126974) on one of the coordinating stickers from the accessory pack.

Once I completed the album’s front cover, I couldn’t wait to start creating layouts of the trip. I wanted to capture highlights from each country that we had visited over two weeks.  I did this by using the Variety Pack 6″ x 8″ Project Life Photo Pocket Pages (item 135297) which were perfect for snippets of our great vacation. I’ve already made great headway on completing this album and I’m excited to share a few of my favorite layouts with you.

3

For my first layout, I added a simple piece of Linen Thread (item 104199) stapled to the pocket card along with a die cut from one of the 2″ x 2″ cards in the accessory pack. I was a little giddy how the Project Life cards coordinated perfectly with my photos.

4

For the second layout, more embellishments were added including a die cut heart from the Sunshine Wishes Thinlits Dies (item 141489).

One of my favorite pocket pages included in the Variety Pack 6″ x 8″ Project Life Photo Pages is the one without pockets.  I used it as a title page for my album and for memorabilia I collected, but one of my favorite ways to use it was for a traditional scrapbooking layout as you see below.

5

This layout includes a 3″ x 4″ pocket card with a photo trimmed to fit inside the pocket card. I added the “Love” die cut by using the Sunshine Sayings Wishes Dies (item 141489) and a small strip (1″ x 6″) of the Pop of Pink Specialty Designer Series Paper (item 141648) along the edge of the pocket card. The Delicate White Doilies (item 141701) are one of my favorite accessories to use for any project and this one was no exception.

6

The last layout I want to share is my favorite.  I love how all of the elements came together to create a fun layout using one of the 4″ x 6″ pocket cards as a photo mat.  I included elements from the accessory pack, and I also incorporated the stamp set, sequins, washi tape, stickers, and the negative portion of the die cut I had previously used on another layout.

Whether you’re making a special album for a wedding or birthday or you’re preserving your travel memories, the Hello Lovely Project Life Card Collection (item 141668) and Hello Lovely Project Life Accessory Pack (item 142687) will help you create an excellent album to keep your memories alive for many years to come. From the album cover to the sweet photos inside, this Project Life collection fits many themes and will help you make your scrapbooking a simple but gratifying experience.

I hope this album inspires you to start keeping your memories alive with Project Life by Stampin’ Up! You’ll be amazed by how fun and simple the process can be!
Kimberly Van Diepen
Artisan Design Team 2015–2016

14. July 2016 · Comments Off on · Categories: Cards · Tags: , , ,

The sentiment on this card is from the all inclusive Kit, Watercolor Wishes, page 8-9.  I used the Christmas Specialty DSP, page 172, and cut out the images with the Swirly Scribbles Thinlits, page 194.  I used Mint Macaron and Peekaboo peach card stock.  I embellished with the Pearl basic jewels and the in-color enamel shapes.  I used the layering Ovals Dies, page 193 for the sentiment.
IMG_1050

Save

Save

13. July 2016 · Comments Off on Lovely! · Categories: Cards · Tags: , ,

This set, Lovely Stitching, page 98 is one of those set that has so many different images that you could go on forever creating cards with it.  This card we made at my hostess clubs this past week and everyone loved it.  Hope you do too!

I used the In-Color DSP, page 174, for the background paper and whisper white heavy card stock for the base card and regular whisper white for the top layer.  I used colors, Peekaboo Peach and Sahara Sand.  I used gorgeous grunge for the background and the In-Color enamel shaped heart, page 177.
IMG_1048

Save

Save

Save

12. July 2016 · Comments Off on Bunch of Blossoms · Categories: Cards · Tags: , , , ,

I love this set, Bunch of Blossoms, page 69.  You can buy this with the matching punch, page 188 for a discount on the bundle.  The stamp set is a two step stamp and has wonderful sentiments included with beautiful images.

Here I used the DSP, A Little Foxy Paper Stack, page 174, along with the Thinlits, Swirly Scribbles, page 194.  In addition, I used the Leaves from the Flourish Thinlits, same page.  Colors I used where Sweet Sugarplum, Whisper White and Always Artichoke.
IMG_1043

Save

11. July 2016 · Comments Off on Gate Card · Categories: Cards · Tags: , , ,

This is another card we made at club classes this past week.  I used the DSP, This Christmas Specialty, page 172 and the back ground base is Mint Macaron.  I used the new Layering Square framelits, page 193 for my image and the sentiment.  The image was cut out with the Flourish Thinlits, page 194 and the sentiment is from Flourishing Phrases, page 49.  Ink is Archival Black and Basic black card stock was used to create the scalloped background.
IMG_1045
The black images on the inside of the card were also cut from the Flourish thinlits and the flower, along with the stamped images are from the Flourishing Phrases set.

Really great items to use, when you are cutting very intricate dies, like this, are the precision plate, and the Die Brush/ foam mat, both on page 190.  Makes fast work of little chards that normally stick to the cutouts.  I love what fellow demo, Brenda Quintana calls it, Shrapnel. LOL

IMG_1046


Save

Save

Save

Save

Save

10. July 2016 · Comments Off on SUO Challenge – Delight in Nature · Categories: Cards · Tags: , , ,

This card I created for the SUO #152 Challenge.  I was to share a project that features something delightful about nature that you can create with Stampin’ Up! products.  So this is what I came up with.  I love anything to do with the Ocean, especially since I live on the coast.
On this card I used a water wash, on Shimmery card stock, for the background of Tempting Turquoise and Island Indigo.  The Stamp sets I used are Seaside Shore, page 93, From Land to Sea, page 98, and Bear Hugs, page 107.  I stamped the images on watercolor paper, page 175, and used an aqua Painter, page 180 to color them. I finished off with a white gel pen (retired) to embellish.  Hope you like it!
IMG_1058

Save