28. April 2017 · Comments Off on Dragonfly · Categories: Cards · Tags: , , ,

This was created with the stamp set Dragofly Dreams, page 26 in the OC.  I used black embossing powder and tempting turouoise ink.  I used the Metalic enamel shapes, page 177 of the AC.  One really great set because of the fantastic sentiments and will be very versatile because of it.  In addition, it has its own diecuts, Detailed Dragonfly Thinlits on the same page and can be purchased as a bundle with a 10% discount.  This set will be held over, along with the thinlits to the new annual catalog.  However, the bundled discount will not be available after May 31st.

Save

Save

27. April 2017 · Comments Off on Happy Birthday to my baby! · Categories: Cards · Tags: , , , ,

My youngest, Maureen Erin (Mo), will be 29 today and I am so blessed to have such a thoughtful and loving daughter.  She is also a Demonstrator and so much fun to be around.  My oldest daughter, Amy,  also a blessing, is a Demonstrator but she lives in TN and I do not get to see her as much.  However, we all try to plan SU conventions and on stage locals together.  We all love Stampin’up! © and look forward to doing all things that bring us closer together.  This is just one of the ways and it is so rewarding.

If you want to join our team, just go to my website and click on Join Now:

http://www.pattispad.stampinup.net

Save

Save

Save

Save

Save

21. April 2017 · Comments Off on From our Co-Founder Shelli · Categories: Cards

Building Things

Jon celebrated his birthday recently, and this is what my artist created for his packaging. Handy with all kinds of tools, he just finished a bathroom in their home, but what he’s really good at building is cool industrial furniture! Jon’s also excellent at building relationships—one of the reasons we love him and are so glad he’s part of our family!

Save

20. April 2017 · Comments Off on Artisan Design Team project · Categories: Cards

All-Occasion Card Set

Hello there! Do you have a favorite item that you like to give? For me, it’s a set of all-occasion handmade greeting cards. For many, cards are a way to celebrate specific occasions or a way to express emotions. But no matter the reason for sending a card, one thing is for sure—they’re always sure to brighten someone’s day!

1

This beautiful set consists of four different cards/envelopes and an adorable little window box to hold them. To create this set I used the Love Sparkles Stamp Set (item #143183), Whisper White Note Cards & Envelopes (item # 131527), and silver Designer Series Paper from the Neutrals Designer Series Paper Stack (item # 138435). Various other elements such as Silver Metallic Thread (item # 138402), Rhinestone Basic Jewels (item #119246), 5/8″ Silver Satin Ribbon (item # 134548), and Silver Sequin Trim (item # 138399) were used to embellish the cards.

The first is a thank you card. The flower was created using the Big Shot (item # 143263) and Succulent Framelits Dies (item # 142757). Not only are these dies used to create succulents but they also make pretty flowers! This Daffodil Delight Cardstock (item #119683) flower is the perfect addition to this card. It adds a subtle yet pretty touch to this soft color scheme.

2

Next up is a gorgeous love note. This sweet card features the Falling Petals Textured Impressions Embossing Folder (item # 142761) and a Real Red Cardstock (item # 102482) heart cut from the Sunshine Wishes Thinlits Dies (item #141489). The Love banner was created by stamping the Love sentiment in Real Red ink (item # 126949) on a Pink Pirouette Cardstock (item # 111351) banner. A tiny little white bow from the Sending Love Ribbon Combo Pack (item # 142737) adorns the right side of the heart.

3

The last two cards are pretty much dual purpose. Since they don’t specifically refer to any occasion they can either be for a birthday, congratulations, or just because. The first one features an adorable balloon bouquet created with the Balloon Bouquet Punch (item #140609) and the silver Designer Series Paper from the Neutrals Designer Series Paper Stack (item #138435). A simple Pool Party Cardstock (item # 122924) banner stamped with Island Indigo ink (item #126986) adds the perfect finishing touch!

4

Last but not least, this card says “It’s your day to sparkle” (another dual purpose card). My favorite element on this card is the little banner created using the Confetti Stars Punch (item # 135861). So fun!

5

This picture shows how the completed set looks all boxed up and ready to go.

6

Thanks for joining me! I hope you have enjoyed my project and are inspired to create a set of all-occasion cards for yourself or to gift!

Dani Dziama
2017 Artisan Design Team

17. April 2017 · Comments Off on Easter from Artisan Design member · Categories: Cards

Beautiful, Giftable Easter Baskets

Easter is the perfect opportunity for giving small, hand-crafted presents.

1

These small baskets are a great Easter gift, and can be easily made with the Basket Builder Framelits Dies (item 143228).

2

Instructions

You need 2 strips of cardstock for the baskets, sized 13.5 x 5.5 cm.

Score them at 4 cm and 9.5 cm.

3

The grass is die cut with the Framelits, but the cuts don’t go all the way through to the end of the cardstock. For this, let the bottom edge of the Framelits hang just over the edge of the cutting plate of the Big Shot Die Cutting Machine (item 143263).

4

Once you’ve die cut both strips, the baskets can be assembled.

5

The blades of grass can be carefully intertwined . . .

6

. . . so that you don’t necessarily have to glue the basket together at the sides.

Unless you want to put in lots of chocolate. 😉

7

Now you can decorate the baskets, for example with small eggs (Basket Builder Framelits Dies; item 143228), butterflies (Timeless Tags Thinlits Dies; item 142755), ribbons (3/8″ [1 cm] Ruched Ribbon in Flirty Flamingo, item 141426; Peekaboo Peach, item 141427; Sweet Sugarplum, item 141428),

and a sentiment (Time of Year Stamp Set, item 141790, and Bunch of Banners Framelits Dies, item 141488).

And you can fill them, too. A few chocolate eggs and a little lamb found their way into my baskets.

8

Wishing you lots of fun with this project!

Sylwia Schreck
2017 Artisan Design Team

15. April 2017 · Comments Off on See What’s retiring! · Categories: Cards

Go here to see Lists:

www.pattispad.stampinup.net


Save

Save

Save

Save

Save

Save

Save

Save

Save

Save

11. April 2017 · Comments Off on Need boxes? · Categories: Cards

30. March 2017 · Comments Off on More from the Artisan Design team. · Categories: Cards

Time for Easter Crafting

I’m really excited that Easter is in April this year. Why? Because it means more time for Easter crafting!

I don’t know why, but I absolutely love Easter (even more than Christmas)! Maybe it’s because my birthday is in the spring, or it could be the craftiness of egg painting—or it might even be the challenge of finding every last hidden egg. I don’t know. But either way, it’s fun, colorful, and makes me happy.

Before Valentine’s Day was even over, I had a ton of ideas for the Basket Bunch Photopolymer Bundle (item 144731). The Basket Bunch Stamp Set (item 143186) is absolutely adorable and it just screams “Design a scene with me!” It really does! So I couldn’t resist and decided to make little Easter egg dioramas.

1

Now, before you get too excited, I have to say: I used fake eggs. They don’t break (they actually bounce, if you really want to know), you can cut into them with scissors, and oh yeah, there is no messy center to deal with. So it was the obvious choice. They’re called DIY Easter Eggs and you can find them pretty much anywhere Easter stuff is being sold.

To begin, I drew a “window opening” on my egg, poked a hole with my Paper Piercing Tool (item 126189), and cut it out using my Paper Snips (item 103579). To color my egg shells, I simply used the ink pad of choice and a Sponge Dauber (item 133773) to rub it on the outside. I let them dry overnight.

Now, you’re probably thinking that designing inside an egg is pretty tedious and if I had to guess, I would agree. You see, I didn’t design or assemble my little scenes inside the egg. I designed everything on a cardstock circle, punched using the 1-1/4″ Circle Punch (item 119861). Once my design was complete, I placed the scenery (bottom first) into the egg and turned it.

2

3

I love all the different images in the Basket Bunch Stamp Set and the coordinating Basket Builder Framelits Dies (item 143228)—which make it quick and easy to cut them out. The possibilities are endless with this bundle. You can have a bunny in his carrot garden, a basket of flowers, or even little chickadees hanging out at the farm.

4

5

6

7

To finish off my little egg dioramas I added the Whisper White Mini Pompom Trim (item 141486) to the opening. This trim is absolutely perfect to complete the look.

Thank you for joining me today and Happy Easter crafting!

Martha Inchley
2017 Artisan Design Team

29. March 2017 · Comments Off on Pop-up Balloons! · Categories: Cards · Tags: , , ,

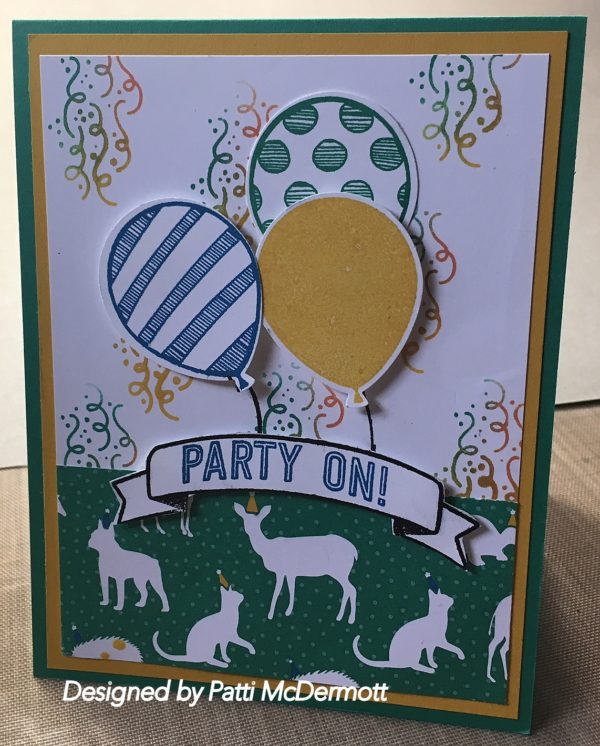
This card was so much fun to create.  It is not hard to do at all if you have the right tools.  Right now you can get these Balloon pop-up Thinlits Dies, Page 5 of the OC to make this card.  I used the Party Animal DSP on same page.  I used the embossing Folder, Celebrations Duo found on page 40 in the OC and the sentiment inside from DragonFly Dreams, page 26.

Save

Save

25. March 2017 · Comments Off on March Paper Pumpkin Bunny Buddies · Categories: Cards

Part of the planning process for each kit includes the Paper Pumpkin team gathering together to assemble the kit once we receive a final sample. It’s one of our favorite things! When we sat down to create this kit, we couldn’t help but love it! The best part was personalizing the bunnies. The mix-and-match stamping works beautifully on the cards and bags. It’s also worth mentioning that our second- favorite part was adding the pompom bunny tails—too cute! We hope you enjoy the kit as much as we do.

Each Bunny Buddies Kit comes with supplies for nine bunny cards and bags. You might recognize the patterns and colors. They are from the Playful Palette Suite, found on p. 118 of the 2016-2017 annual catalog. The jewel-toned color scheme is soft and fun for springtime while the patterns offer a modern twist. And after all, “playful” is the perfect way to describe little bunnies, right? Be sure to check out the full product suite online or in the catalog.

March_PP1

We always like to share more ideas with you and this month is no “egg”ception. Here are three ideas we think you’ll find simply “ear”resistible! (Much in the same way that we can’t resist a good bunny pun.)

March_PP2

First up, it’s easy to transform the bunny bags into little baskets. Just tie up the ears and add a tag. Everything you need is already in the kit—including three different colors of baker’s twine!

March_PP3

Next up is another treat bag, but for a slightly larger treat—like maybe a giant chocolate Easter egg or a solid chocolate bunny. (Okay, it doesn’t have to be chocolate!) Decorate a Petite Café Gift Bag with accessories from the kit. This adorable pompom trim looks like it’s straight out of the Playful Palette Suite, but it’s actually a custom creation. Use a needle and Whisper White Solid Baker’s Twine to thread some of the pompom bunny tails together. Pretty brilliant, right? We think so.

March_PP4

Finally, don’t forget about the other images in the Bunny Buddies Stamp Set. Send an eggs-pression of love to some“bunny” you love with this cheerful card. Stamp the eggs with a bright palette and then add some texture with the Brick Wall Textured Impressions Embossing Folder.

March_PP5

Be sure to grab some Bunny Buddies Refills to use at all your Easter egg hunts!

PP_SAB (1)

And, don’t forget, you can skip to the Sale-A-Bration with Paper Pumpkin. Get a 3-month subscription for just $55 USD/$74 CAD and instantly qualify for a FREE Sale-A-Bration item.  Don’t miss it. Sale-A-Bation ends on March 31! Learn more here and check out the free items you can earn here (US/CAN).

24. March 2017 · Comments Off on Oh Yeah! · Categories: Cards · Tags: , , , ,

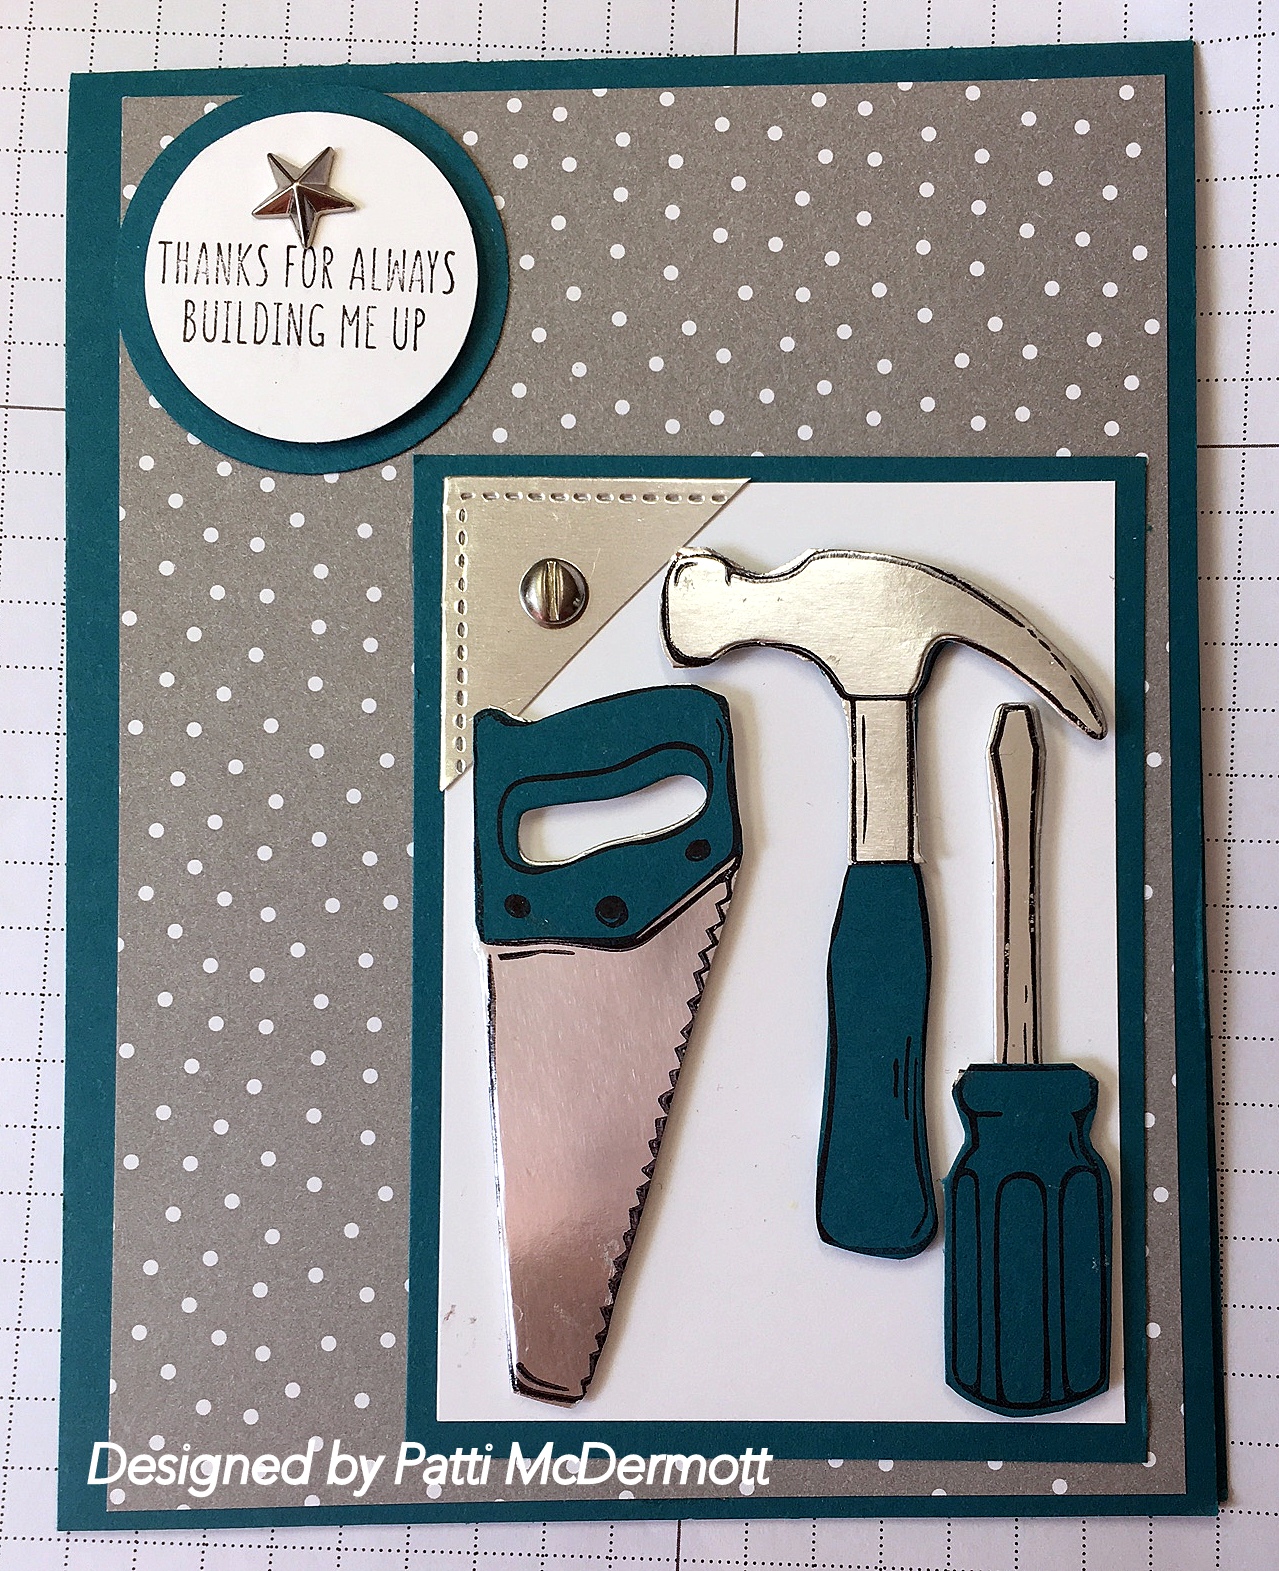
Ok, I am obsessed with this stamp set, Nailed it, page 48, oc.  I love the fact that there are die cuts that go with these stamps and I think I have made at least 5 or 6 different cards with them so far.  The possibilities are endless.  What I love about this set are all the embellishments, washi tape and DSP that you can use with it.  These are all listed on page 47 along with the lovely embossing folder, Hexagons Dynamic Textured impressions.  In addition, another stamp set in this same catalog, Urban District can also be combined to make dozens of masculine cards for Dad or the men in your life.  Save 10% by buying the bundle.

Save

Save

22. March 2017 · Comments Off on Pretty Packaging to Share Sweet Treats · Categories: Cards

One of my favorite things to do (other than stamping, of course) is baking sweet treats and sharing the goodies with my family and friends. Stampin’ Up! makes the “giving” part even more enjoyable by providing various food-safe products and lots of sweet sentiments to go along with those baked goods. For these treats I focused on two main products—the Dragonfly Dreams Bundle (item 144728) and Succulent Garden Designer Series Paper (item 142778).

1

Of course, I usually make a card to go along with the treat. Here I created a simple card using the Dragonfly Dreams Stamp Set (item 142924) stamped with Mint Macaron (item 138326) and Tip Top Taupe ink (item 138325) on a layer of Whisper White Cardstock (item 100730). The square was die cut with the Big Shot (item 143263) and the Stitched Shapes Framelits Dies (item 145372). For the sentiment banner, I took Sweet Sugarplum ink (item 141395), added the dotted background on Sweet Sugarplum Cardstock (item 141418), and finished with the sentiment stamped in Rich Razzleberry ink (item 126950). The background is from the Succulent Garden Designer Series Paper (item 142778) finished off with Mint Macaron 3/8″ Sheer Linen Ribbon (item 141656).

2

3

For one of the banana breads that I made, I wanted to use one of the 6″ x 17″ Gusseted Cellophane Bags (item 142001). These bags are amazing and have come in handy for many homemade breads and treats over the last few months. The Tip Top Taupe tag was made with the Window Box Thinlits Dies (item 142762) with a piece of Whisper White Cardstock. I added a little extra hand-cut tag with the “thanks” sentiment tied with Whisper White Solid Baker’s Twine (item 124262). I added some Sweet Sugarplum ribbon from the Succulent Garden 3/8″ Ribbon Combo Pack (item 142781) to finish it off.

4

For the other loaf of banana bread, I wrapped the bread in the Sending Love Glassine Sheets (item 142734) and the same paper from the Succulent Garden Designer Series Paper pack.

5

The decorative tag was made with the same Mint Macaron ribbon and the (amazing and reversible) Lace Doilies (item 142793). The doily is showing the white side. I added a Sweet Sugarplum circle cut with the Stitched Shapes Framelits Dies and stamped with Sweet Sugarplum ink. The dragonfly is stamped with Soft Suede (item 126978) and Sweet Sugarplum ink. I cut an additional dragonfly out of Vellum Cardstock (item 101856) with the Detailed Dragonfly Thinlits Dies (item 142749). I also added Clear Wink of Stella (item 141897) to the dragonfly base.

6

Lastly, I stamped the sentiment with the VersaMark Pad (item 102283) and heat embossed the sentiment with White Stampin’ Emboss Powder (item 109132) and the Heat Tool (item 129053).

7

I hope that this post inspires you to bake something yummy for a friend and make your packaging look extra-special!

Blessings,

Holly Stene
2017 Artisan Design Team

21. March 2017 · Comments Off on Day at the Beach · Categories: Cards · Tags: , ,

I just rec’d this set and I really hesitated if I should order it or not.  So glad that I decided to get it.  It is very versatile and the images are really great.  You can find this on page 34 of the OC.  When you live on the coast this set can be very useful.  The DSP that I used in the background is from By the Shore, page 173 of the AC.  I used the sentiment and the birds from the set, High Tide, page 25 in the OC.

Save

19. March 2017 · Comments Off on In case you haven’t thought of this before: · Categories: Cards

17. March 2017 · Comments Off on And this is from Shelli our co-founder! · Categories: Cards

Rainbows

St. Patrick’s Day isn’t a holiday I decorate for, but occasionally we’ll do a little something fun for our family. The gold coins are a novelty for the younger kids, and the peanut butter cups taste much better for the older ones, but what I love is the rainbow of color stamped on watercolor paper, using images from the Over the Rainbow stamp set. It’s like magic when you spritz with water and watch the colors blend together…super easy! And it makes a great background for the sentiment and for all the gold elements of this shaker tag!

Cooper and I made a simpler version of this tag for friends, which turned out really cute too. (I had extra chocolates and didn’t want them sitting around tempting me!) We decided to use the sentiment (from the same set) God gives us rainbows to remind us of hope. I love the simplicity of this saying…and the gift from God!

Save

16. March 2017 · Comments Off on And from the Artisan team · Categories: Cards

Spring Is in the Air

Hello there! With the first day of spring only a few days away I thought I would create a couple of simple, cute projects using the adorable Basket Bunch Stamp Set (item 143186) along with the coordinating Basket Builder Framelits Dies (item 143228). This set is perfect for Easter but I wanted to show you that it’s great for other occasions, too. I love a stamp set that you can adapt, since that makes it an even better value for the money!

For my first card, “Happiest birthday,” I turned the Easter eggs into balloons!

1

To create the balloons, I placed the eggs the wrong-side up on my block, then inked and stamped them to get a solid color; the colors I used are So Saffron (item 126957), Soft Sky (item 131181), Pink Pirouette (item 126956), and Crumb Cake (item 126975). I then turned the stamp the correct way around and inked with Tuxedo Black ink (item 132708) to stamp the egg outline and detail.

I colored the bunny and the bow with a Blender Pen (item 102845) and the same inks I used for the balloons. (The Blender Pens are one of my favorite tools and are a great way for you to get the most out of your ink pads!)

The sentiment I used for this card is from the Cool Treats Stamp Set (item 142982). I love mixed font sentiments and “Happiest birthday” was a perfect fit for this card.

Here is a close-up. Even though this card is simple, there’s lots of dimension!

2

I created my second card, For Somebunny Sweet, using sticky notes as a mask so I could overlap the bunnies.

3

First I stamped the bunny in the center on my Whisper White Cardstock (item 100730) mat.

I then stamped the same bunny on a sticky note, making sure that part of the bunny was stamped where the adhesive strip would be on the reverse; then I fussy cut the image. I placed the “sticky note bunny” over the top of the first bunny to create a mask so that when I stamped the bunny again on either side, no ink would touch the bunny in the center. I colored them in using the Blender Pens and Crumb Cake, Pink Pirouette, and So Saffron ink.

For the sentiment I used another trick with a sticky note. I only wanted to use part of the sentiment so my card would be suitable for a birthday, thank you note, or a simple “Hello.” You can see below how I achieved this.

4

The tiny hearts are from another favorite stamp set of mine, Made with Love (138662). I also used them to create a subtle background on the Crumb Cake mat along with the tiny dots from this set.

My final project, “Thanks a bunch,” is a little envelope that I made using the Envelope Punch Board (item 133774)—another one of my favorite, must-have tools. Not only is it easy for making lots of different-sized envelopes, but it’s handy for making boxes, too!

5

Once I had created the envelope using Crumb Cake Cardstock (item 120953) I randomly stamped the little carrot all over the front of the envelope using Crumb Cake ink. Afterward I wrapped a strip of Designer Series Paper from the Brights Designer Series Paper Stack (item 138434) in Daffodil Delight around the envelope, then adhered a thinner piece of Crumb Cake Cardstock over the top. This creates a belly band which will keep the envelope closed.

I stamped the sentiment “Thanks a bunch” to the right and placed the stamped and die cut carrots to the left. I colored the carrots in with a Blender Pen using Peekaboo Peach (item 141398) and Pear Pizzazz (item 131180) ink. To finish, I die cut the grass using Pear Pizzazz Cardstock (item 131201).

Inside is a little packet of carrot seeds.

6

Both my aunty and I are growing our own vegetables for the first time this year; she has an allotment and I have a small plot in my garden. I wish I had a green thumb like her! I have a tendency to kill plants with kindness, so I think I will need lots of help and advice from her over the coming months—and this envelope of carrot seeds will be a perfect way of saying thank you!

Katy Harrison
2017 Artisan Design Team

Save

12. March 2017 · Comments Off on Happy Easter · Categories: Cards · Tags: , ,

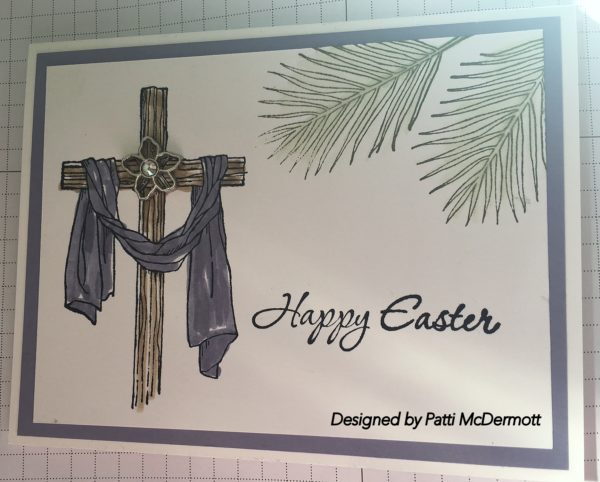
This is a little different take on the set, Easter Message, page 19 OC.  I used Always Artichoke, Wisteria Wonder, and crumb cake inks.  Card stock is Whisper White, Wisteria Wonder and base card is Thick Whisper White.
If you have not tried our heavy Whisper White card stock, you are missing a wonderful card base.  It is the best! Sold on page 175 of the AC

Save

Save

10. March 2017 · Comments Off on Avant Garden · Categories: Cards · Tags: , , , ,

This card was created using the SAB set, Avant Garden, page 5 of the SAB catalog.  I cased this card from Sandi McIver and thank you Sandi for the inspiration.  This technique is called “Black Magic” and I really love it.  You first stamp the images in craft white ink.  Once it is dry I added our White watercolor pencil and then added Melon Mambo, Dafodil Delight, and Old Olive pencils, page 24, OC.  I outlined each image with a white gel pen.

Save

Save

Save

08. March 2017 · Comments Off on Paper Pumpkin Many Happy Birthdays · Categories: Cards

Let’s kick things off this month with a little laugh.

Question: Why did the candle fall in love?

Answer: Because it found the perfect match! (Ba-dum-tshh!) We did warn you that it would only be a little laugh.

But, you know what else is a perfect match? You and the Many Happy Birthdays Kit! This kit will help you effortlessly plan the perfect birthday surprise for someone you love. Whether you’re sending wishes their way in a card, creating party invitations, or giving a gift card, the pull tab candle cards will help you pull it off with flare!

144332G

And since the kit name is Many Happy Birthdays, here are some more ideas to keep the flame of creativity burning bright. First, using just the kit components, you could turn the many happy birthdays cards into mini happy birthday cards by making a set of tiny cards.

February_PP_alt1

Next, transform the pull-tab pocket card into a literal pocket card. Just assemble the card base, trim the bottom, snip the end corners at an angle, and add some adhesive at the bottom to seal it shut.

February_PP_alt_2

As always, hang onto that stamp set so you can use it on future projects—like this card. The geometric line images create simple background in any color scheme.

February_PP_alt3

This kit is on fire! Don’t let the fun burn out—order many more refills today, while supplies last.

PP_Birthday

The Many Happy Birthdays Kit is just in time to celebrate our fourth birthday in March! We’ve come a long way and look FOUR-ward to many happy birthdays with our Paper Pumpkin peeps. We’re so grateful FOUR you! Party with us by sharing your favorite projects online. #PaperPumpkinBirthday

PP_SAB

Don’t forget, right now you can skip to the Sale-A-Bration with Paper Pumpkin! Get a 3-month subscription for just $55 USD/$74 CAD and instantly qualify for a FREE Sale-A-Bration item!

Save

07. March 2017 · Comments Off on Originator unknown · Categories: Cards · Tags: , , , , ,

I cased this card from a You Tube video a while back and now I cannot find the name of the person who created it.  If any of you out there know who I owe this inspiration to, please let me know so I can give her credit.
Both the dies and stamp set can be purchased together to save a 10% discount.  I used silver foil, Island Indigo, and Whisper White Card stock.  In addition, I used A little Foxy DSP, page 174 in the AC.  The embellishments, Urban Underground, page 47, are from the OC.  This is the coolest bundle, I love everything that goes with it.  No problem making masculine cards with this set.

Save

05. March 2017 · Comments Off on Easter Card · Categories: Cards · Tags: , , ,

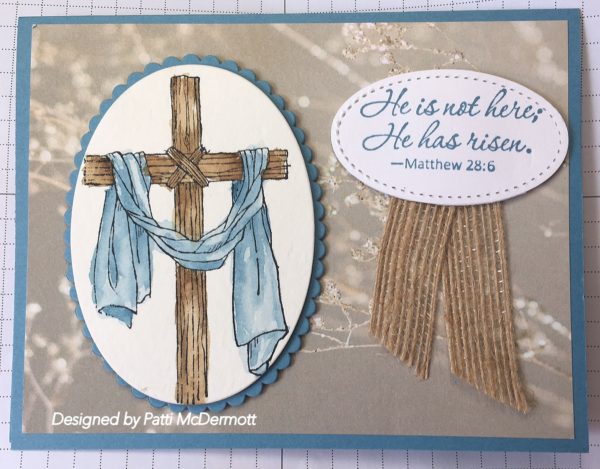
I love the background DSP, Falling in Love, page 51 in the OC.  This is my favorite DSP from the OC.  I used Marina Mist, Crumb Cake, and Whisper White Card stock and inks.  In addition, I used 5/8″ burlap ribbon, page 178 of the AC.  The oval was created using the Stitched Shapes Framelits #145372.

Save

04. March 2017 · Comments Off on Vertical Garden Gift Boxes · Categories: Cards

More Artisan Design Team

Hello, stampers! With succulents being so “hot” right now, I wanted to create something special for you all that had something to do with them. There was just one problem. I don’t as yet have the Oh So Succulent Bundle (item 145184). Gasp, I know, but I do have the Vertical Garden Project Kit (item 143635) and the Vertical Garden Stamp Set (item 142996) so I’m here today using some of the items out of the Vertical Garden kit and stamp set for some gorgeous gift boxes. I’ve also pulled out a trusty old tool that has a million-and-one uses, the Envelope Punch Board (item 133774). So I’m mixing up some of the old with the new.

1

The Envelope Punch Board (item 133774) is not only fabulous for making your own envelopes, but you can also make your own boxes with them, too. What’s better than not only making a special handmade card for your special friends but also making the gift box, as well?

2

I’ve created three different-sized boxes for you with three different looks. I’m loving the mix of the Basic Black Solid Baker’s Twine (item 141682) with the soft Sahara Sand Cardstock (item 121043) to give the gift boxes a bit of a grungy, modern feel.

3

For the first box I marked and scored all my fold lines and then I measured approximately how wide the swirl stamp image was from the Vertical Garden Stamp Set (item 142996). I wanted to make sure that I could mark even spacing across the top of the box to stamp and then heat emboss White Stampin’ Emboss Powder (item 109132). Once the lid was embossed and the embossing powder was set I could put the box and lid together using Tear & Tape Adhesive (item 138995). Tear & Tape is a strong adhesive and is fabulous for boxes and 3D items. I just wrapped the Basic Black Solid Baker’s Twine (item 141682) a few times and then decorated with the succulents from the Vertical Garden Project Kit (item 143635).

To give the succulents a bit more depth and color I sponged each petal using the Stamping Sponges (item 141337). Then I finished off the boxes with 5/8″ Burlap Ribbon (item 141487) and Gold Sequin Trim (item 132983)—just for some added elements and texture.

How fabulous is that “Hello” from the Vertical Garden Stamp Set? I love the font and it looks so gorgeous stamped and heat embossed with White Stampin’ Emboss Powder (item 109132) on Vellum Cardstock (item 101856). I trimmed down the vellum to a 2″ strip using the Stampin’ Trimmer (item 126889), then turned it into a gorgeous tag using the Scalloped Tag Topper Punch (item 133324). That punch makes tag-making oh, so easy!

4

The second box is again made with the Envelope Punch Board and embellished in a way that is similar to the first one. I just changed up the stamped images and the size of the box.

5

The last box is again made with the Envelope Punch Board, but instead of making it in Sahara Sand Cardstock, this one is made using the Thick Whisper White Cardstock (item 140272). This cardstock is not only fabulous for card bases but for smaller, 3D constructions, as well.

As I did with the first two boxes, I punched and scored the cardstock to prepare for making the box, but before I put it together, I first stamped the swirly image on the lid of the box using VersaMark ink (item 102283) and embossed it using Gold Stampin’ Emboss Powder (item 109129) and the Heat Tool (item 129053). The splatters over the top are flicks of Gold Wink of Stella (item 141898). The Wink of Stella adds another touch and element to your creation and really looks fabulous splattered over . . . well, everything!

To flick Wink of Stella, give the barrel chamber a bit of a squeeze so the brush tip is quite wet. Then press the brush tip just in the top edge of the lid and push and flick the brush tip out of the lid away from you so that it splatters over your creation. Give the Wink of Stella a minute or two to dry or give it a quick blast with the Heat Tool. (If you don’t let your splatters dry, they will smudge and then not look so pretty.)

The little box is then finished off with some of the same ribbons and trims as the first two boxes as well as some Gold Metallic Thread (item 138401) tied around it for some more added prettiness.

Thank you so much for joining me today. I do hope that I’ve inspired you to dress up your gift boxes and to create a pretty package for your gifts.

Rochelle Blok
2017 Artisan Design Team

03. March 2017 · Comments Off on Mini Album, Maxi Result · Categories: Cards

Artisan Design Team

Hello!

Are you ready to be inspired? Great, let’s get started! You can make this cute mini album in one of two ways (beginner or expert), depending on your level of experience and the supplies you have on hand. All you have to do is follow the instructions and have fun!

1

  1. Building the box—beginner version To build the box, you will need two sheets of paper from the Cupcakes & Carousels Designer Series Paper Stack (item 142744). I used two different designs to add contrast.

    To create the bottom, use one sheet of 6″ x 6″ paper; score at 1″ on each of the four sides; cut corners as seen on the photo and adhere. For the top of the box, use one sheet cut at 5-3/8″ x 5-3/8″; score at 3/8″ on all four sides.

    2

  2. Build the top of the box—beginner version

Decorate the top of your box with two hot air balloons stamped in Early Espresso ink (item 126974) on a piece of Cupcakes & Carousels Designer Series Paper. To make the tag, I used a piece of Gold Baker’s Twine and a few sequins from the Cupcakes & Carousels Embellishment Kit (item 142767), then adhered it using Stampin’ Dimensionals. It’s simple to make but oh-so-elegant—don’t you think?

3) Build a shaker top for the box—advanced version

I made the top of the box a bit more fun for those who want to do the stepped-up version.

Before assembling the top, I cut out a window using the Stitched Shapes Framelit Dies (item 145372). Next, I cut and adhered a 3-3/4″ x 3-3/4″ Window Sheet (item 142314) to the back and assembled the top. Next, I cut a 3-3/4″ x 3-3/4″ piece of Cupcakes & Carousels Designer Series Paper and this time, I used the hot air balloons that were cut out using the Up & Away Thinlits Dies (item 142748).

3

To finish the project, I applied Foam Adhesive Strips (item 141825) to the edge of the Designer Series Paper, slipped in a few sequins and Sprinkles Embellishments (item 142741) on the Window Sheet, and adhered my paper on the bottom of my cover. I love shaking the box to see the beads and sequins dance around!

4) On the inside

I used two 8-1/2″ x 11″ sheets of Bermuda Bay Cardstock (item 131197) for the first mini and Calypso Coral Cardstock (item 122925) for the second. First, I cut three strips measuring 3-1/2″ by 11″, scored at 3-1/2″, 7″, and 10-1/2″. Next, I cut a strip of 31/2″ x 7″ and folded at 3-1/2″. All that was left was to fold the accordion as illustrated.

4

If you can, round all angles and corners as I did using the Project Life Corner Punch (item 135346). This will make it easier to handle and give the project a nice finishing touch. (I adhered the first and last flaps to the top and bottom of the box.)

5) Decorate your album

I created the mini in the spirit of a country fair and its fabulous treats. (I make these recipes on a regular basis when I have guests.) For a simple version, you can play around with the designs on the Cupcakes & Carousels Designer Series Paper Stack; I used the horse on this one.

5

I stamped a few clouds in Early Espresso ink on a design and fussy cut them. That’s right, when you don’t have Framelits Dies or the Big Shot, you can still use these assorted stamps. I adhered the horse using Stampin’ Dimensionals (item 104430).

6

To keep the spirit of a shaker card in the second version, I used some sequins from the Cupcakes & Carousels Embellishment Kit and created a little shaker pocket. The second flap is decorated with yummy cupcakes ready to be tasted.

I hope you enjoy this project!

7

Aurélie Fabre
2017 Artisan Design Team

26. February 2017 · Comments Off on From Shelli · Categories: Cards

Lots of Love

My stamping is limited these days, so my friend and awesome artist created (and duplicated!) these projects for our family for Valentine’s Day. As I individualized each gift and card, it gave me the opportunity to pause and think about the love I have for my beautiful family and for all the wonderful peope in my life. I feel so blessed!

Now for the projects… 

A little extravagant, these paper mache heart ornaments will last a lifetime for our sweet daughters…

Individual (and very cool!) cards for our sons-in-law…

Adorable monsters filled with chocolate hugs and kisses and monies (as the twins would say) for the grandkids…

And last, but certainly not least, for my sweetheart…

25. February 2017 · Comments Off on The Perfect Surprise: A Card in a Box · Categories: Cards

This kraft packaging may look plain and simple on the outside, but when you open it, you’re in for a very special surprise! It’s not just an ordinary package but a card that is also a pretty box!

Today, I’ll show you how you to make this extraordinary eye-catcher yourself. It’s easy to do—so let’s get started!

Artisan-1

To make the packaging (including the card), you’ll need the following supplies: Kraft Cardstock (item 133674), Whisper White 8-1/2” x 11” Thick Cardstock (item140272), the Stampin’ Trimmer (item 126889), a Bone Folder (102300), Tear & Tape Adhesive (item 138995), and Multipurpose Liquid Glue (item 110755). To make this project I also used the Good Vibes Project Life Card Collection (item 141666) and the Good Vibes Project Life Accessory Pack (item 142684).

Artisan-2

The first step is to cut the Kraft Cardstock for the box, then fold and adhere it. The measurements for the box are 4-1/4″ x 4-1/4″ x 1-5/8″ (approx. 11 x 11 x 4 cm). And of course, it can only be a surprise if the package has a lid! The steps to create the lid are similar; its measurements are 4-7/16” x 4-7/16″ x 9/16″ (approx. 11.3 x 11.3 x 1.5 cm).

Artisan-3

After completing the packaging, it’s time to make the interior. Start by cutting Whisper White Cardstock to 8-1/4″ x 4-1/8″ (approx. 21 x 10.5 cm). Fold this piece of cardstock in half at 4-1/8″ (approx.10.5 cm). Repeat this step for three pieces of paper. Then adhere each piece of cardstock to the other to create an accordion fold.

Artisan-4

The next step is to embellish the packaging and the accordion piece. As mentioned above, I used the Good Vibes Project Life Card Collection to decorate my project. The square cards fit perfectly on the accordion panels. In addition to the cards, I also used sequins, paper clips, and alphabet stickers from the accessory pack as well as Night of Navy (item 141684) and Whisper White Solid Baker’s Twine (item 124262). The alphabet stickers are copper and therefore a perfect eye-catching embellishment!

Artisan-5

Once you’ve decorated the project, all that’s left is to adhere the accordion element inside the finished box. Simply adhere the top panel to the lid and the bottom panel to the bottom of the packaging. Tear & Tape Adhesive works best to do this. Now you just need to give your project away and wait for the surprised look on the face of the recipient!

Artisan-6

The box and its contents can easily be adapted to any kind of occasion or theme. For example, you could swap out the Project Life cards for Designer Series Paper or stamped images.

This kind of packaging would also work well as an invitation. You could use the different panels to accommodate all the details, pictures, and a map with directions. So get creative and see where your imagination takes you! Have fun and enjoy making this project!

Maike Ulbrich
2017 Artisan Design Team

24. February 2017 · Comments Off on From our Artisan Design Team · Categories: Cards

Vertical Garden Gift Boxes

Hello, stampers! With succulents being so “hot” right now, I wanted to create something special for you all that had something to do with them. There was just one problem. I don’t as yet have the Oh So Succulent Bundle (item 145184). Gasp, I know, but I do have the Vertical Garden Project Kit (item 143635) and the Vertical Garden Stamp Set (item 142996) so I’m here today using some of the items out of the Vertical Garden kit and stamp set for some gorgeous gift boxes. I’ve also pulled out a trusty old tool that has a million-and-one uses, the Envelope Punch Board (item 133774). So I’m mixing up some of the old with the new.

1

The Envelope Punch Board (item 133774) is not only fabulous for making your own envelopes, but you can also make your own boxes with them, too. What’s better than not only making a special handmade card for your special friends but also making the gift box, as well?

2

I’ve created three different-sized boxes for you with three different looks. I’m loving the mix of the Basic Black Solid Baker’s Twine (item 141682) with the soft Sahara Sand Cardstock (item 121043) to give the gift boxes a bit of a grungy, modern feel.

3

For the first box I marked and scored all my fold lines and then I measured approximately how wide the swirl stamp image was from the Vertical Garden Stamp Set (item 142996). I wanted to make sure that I could mark even spacing across the top of the box to stamp and then heat emboss White Stampin’ Emboss Powder (item 109132). Once the lid was embossed and the embossing powder was set I could put the box and lid together using Tear & Tape Adhesive (item 138995). Tear & Tape is a strong adhesive and is fabulous for boxes and 3D items. I just wrapped the Basic Black Solid Baker’s Twine (item 141682) a few times and then decorated with the succulents from the Vertical Garden Project Kit (item 143635).

To give the succulents a bit more depth and color I sponged each petal using the Stamping Sponges (item 141337). Then I finished off the boxes with 5/8″ Burlap Ribbon (item 141487) and Gold Sequin Trim (item 132983)—just for some added elements and texture.

How fabulous is that “Hello” from the Vertical Garden Stamp Set? I love the font and it looks so gorgeous stamped and heat embossed with White Stampin’ Emboss Powder (item 109132) on Vellum Cardstock (item 101856). I trimmed down the vellum to a 2″ strip using the Stampin’ Trimmer (item 126889), then turned it into a gorgeous tag using the Scalloped Tag Topper Punch (item 133324). That punch makes tag-making oh, so easy!

4

The second box is again made with the Envelope Punch Board and embellished in a way that is similar to the first one. I just changed up the stamped images and the size of the box.

5

The last box is again made with the Envelope Punch Board, but instead of making it in Sahara Sand Cardstock, this one is made using the Thick Whisper White Cardstock (item 140272). This cardstock is not only fabulous for card bases but for smaller, 3D constructions, as well.

As I did with the first two boxes, I punched and scored the cardstock to prepare for making the box, but before I put it together, I first stamped the swirly image on the lid of the box using VersaMark ink (item 102283) and embossed it using Gold Stampin’ Emboss Powder (item 109129) and the Heat Tool (item 129053). The splatters over the top are flicks of Gold Wink of Stella (item 141898). The Wink of Stella adds another touch and element to your creation and really looks fabulous splattered over . . . well, everything!

To flick Wink of Stella, give the barrel chamber a bit of a squeeze so the brush tip is quite wet. Then press the brush tip just in the top edge of the lid and push and flick the brush tip out of the lid away from you so that it splatters over your creation. Give the Wink of Stella a minute or two to dry or give it a quick blast with the Heat Tool. (If you don’t let your splatters dry, they will smudge and then not look so pretty.)

The little box is then finished off with some of the same ribbons and trims as the first two boxes as well as some Gold Metallic Thread (item 138401) tied around it for some more added prettiness.

Thank you so much for joining me today. I do hope that I’ve inspired you to dress up your gift boxes and to create a pretty package for your gifts.

Rochelle Blok
2017 Artisan Design Team

23. February 2017 · Comments Off on February Paper Pumpkin Many Happy Birthdays · Categories: Cards

Let’s kick things off this month with a little laugh.

Question: Why did the candle fall in love?

Answer: Because it found the perfect match! (Ba-dum-tshh!) We did warn you that it would only be a little laugh.

But, you know what else is a perfect match? You and the Many Happy Birthdays Kit! This kit will help you effortlessly plan the perfect birthday surprise for someone you love. Whether you’re sending wishes their way in a card, creating party invitations, or giving a gift card, the pull tab candle cards will help you pull it off with flare!

Feb_PP_Main (1)

And since the kit name is Many Happy Birthdays, here are some more ideas to keep the flame of creativity burning bright. First, using just the kit components, you could turn the many happy birthdays cards into mini happy birthday cards by making a set of tiny cards.

February_PP_alt1

Next, transform the pull-tab pocket card into a literal pocket card. Just assemble the card base, trim the bottom, snip the end corners at an angle, and add some adhesive at the bottom to seal it shut.

February_PP_alt_2

As always, hang onto that stamp set so you can use it on future projects—like this card. The geometric line images create simple background in any color scheme.

February_PP_alt3

This kit is on fire! Don’t let the fun burn out—order many more refills today, while supplies last.

PP_Birthday

The Many Happy Birthdays Kit is just in time to celebrate our fourth birthday in March! We’ve come a long way and look FOUR-ward to many happy birthdays with our Paper Pumpkin peeps. We’re so grateful FOUR you! Party with us by sharing your favorite projects online. #PaperPumpkinBirthday

PP_SAB

Don’t forget, right now you can skip to the Sale-A-Bration with Paper Pumpkin! Get a 3-month subscription for just $55 USD/$74 CAD and instantly qualify for a FREE Sale-A-Bration item! Learn more here.

19. February 2017 · Comments Off on Projects by Artisan Design Team Member · Categories: Cards

One Cute Little Monster

1

Hi Everyone!

Just popping in to show you some of the projects I made with the Yummy in My Tummy Stamp Set (item 142922). I love anything that I can color so it’s no surprise that this was a must-have item for me from the new 2017 occasions catalog.

Usually when I start to play with a stamp set, I stamp multiple images at once. Since I intended to watercolor using my Many Marvelous Markers (item 131264) and my trusty Aqua Painters (item 103954), I heat embossed several monsters on Watercolor Paper (item 122959). In order to do this, I had to ink my stamp with the VersaMark Pad (item 102283) and then ink with the Basic Black Archival Stampin’ Pad (item 140931) before stamping on the paper. Quickly, I covered the image with Clear Stampin’ Emboss Powder (item 109130) and applied heat with the Heat Tool (item 129053). This gives it a nice raised and glossy look.

#adttipandtricks: By using the clear embossing powder, you avoid the mess of those pesky black “specks” when you heat emboss.

2

This cute monster image was designed with shaker cards in mind so I put it to the test. The Sprinkles Embellishments (item 142741) are the perfect thing to use!

3

#adttipandtricks: When you find yourself unable to know exactly where to punch, place a mark in the center of your image before taking the plunge. This takes the “cross your fingers and hope for the best” out of punching.

4

No cute card is done without an equally cute envelope! The Home Sweet Home Thinlits Dies (item 140279) created the perfect “teeth.”

There are lots of options with this stamp set. You could punch out its belly and replace it with so many things including lollipops, mini containers of colored modeling clay, lip gloss, and chocolate eggs. The possibilities are endless and I can’t wait to see what you come up with!

5

No project is complete without a Delicate White Doily (item 141701). This doily gave the impression that this project was a flower.

6

Until next time . . . “party on”!

Cathy Caines
2017 Artisan Design Team

Save

18. February 2017 · Comments Off on Tuscan Vineyard · Categories: Cards

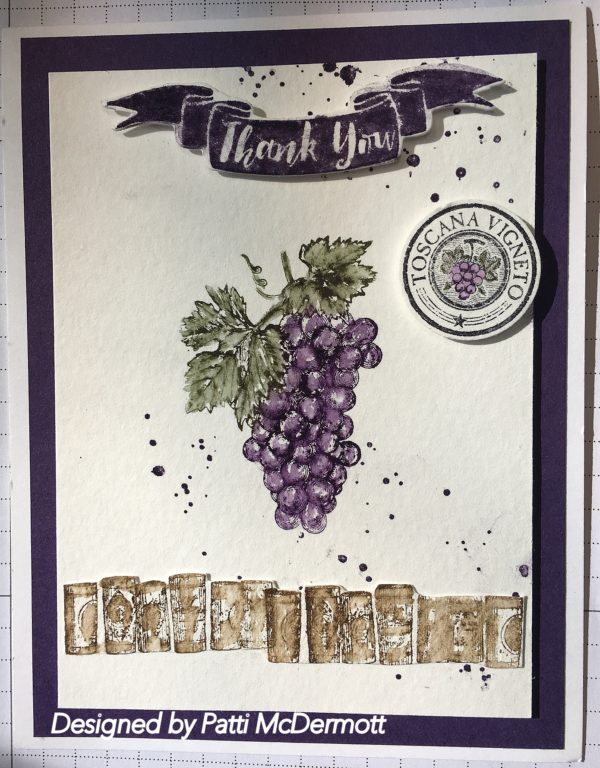
Now this is one of my favorites in the AC, page 95.  Whenever we are traveling with the family, we love to stop at all the different Vineyards and do the wine tastings.  They are so much fun.  The last time we did this was when my niece got married in Virginia and we all traveled together and found these lovely places in the Blue Ridge Mountains, and of course,  lot of stops because there are many.  AND, they are so beautiful and very Picturesque set on all the gorgeous rolling hills.
Anyway, I stamped this with Archival Basic Black ink, on Watercolor paper, with eggplant Envy, Crumb Cake and always Artichoke inks.  Hope you like it!

Save

16. February 2017 · Comments Off on Beautiful You! · Categories: Cards · Tags: , ,

I used this set, found on page 24 of the OC, with the new DSP, Falling in Love, page 51 of the OC.  The colors in this DSP are so awesome!  It is def my favorite of all the DSP in both the OC and the SAB.
I combined the colors, Crumb cake with Watermelon Wonder.  This set contains beautiful sentiments and images that you can use for many different occasions.

Save

15. February 2017 · Comments Off on Chinese New Year · Categories: Cards

This Artisan Design Team member is so talented.  This is Allison Okamitsu’s 3rd year being selected as a member of this team.  Not hard to tell why…..
I love celebrations! Birthdays, anniversaries, Christmas, and New Year’s are all fabulous celebrations that I treasure. And although Chinese New Year isn’t a holiday my family traditionally celebrates, I had a fabulous time putting together some fun and creative ideas to help you decorate and celebrate. This year the Chinese New Year celebration begins on January 27 (Chinese New Year’s Eve) and ends on February 2, so you still have time to whip up some festive décor and gifts for your friends and family.

1

One Chinese New Year’s tradition is to gather for a family reunion dinner. I absolutely love this idea and I think that a celebration that brings family together is just perfection. I’ve created these beautiful paper lanterns to use as a centerpiece at this dinner celebration.

2

For the lanterns I’ve used five of the long and thick pieces punched in Real Red Cardstock (item 102482) from the Bow Builder Punch (item 137414). I then added lots of gold touches, including the largest image from the Moroccan Nights Stamp Set (item 141715) embossed with Gold Stampin’ Emboss Powder (item 109129) and embellished with Gold Foil Sheets (item 132622) and Gold Sequin Trim (item 132983). The tassels from the Cupcakes & Carousels Embellishment Kit (item 142767) are the perfect finishing touch.

Another Chinese New Year tradition is to gift red packets containing money. The significance of these red packets is to wish others a safe and peaceful coming year.

3

I’ve created my red packet with the Gift Card Envelope & Trims Thinlits (item 135854) and Real Red Cardstock (item 102482). Before I assembled the packet, I embossed it with a stamp from the Celebrate Today Stamp Set (item 137138) and Gold Stampin’ Emboss Powder (item 109129). Don’t you think it looks like a string of fireworks?! I then used the Moroccan Nights Stamp Set (item 141715) and Any Occasion Stamp Set* (item 143348) to create a focal point for the belly band, which is constructed of Gold Foil Sheets (item 132622) and the gold ribbon from the 3/8″ Metallic Ribbon Combo Pack* (item 143601). I think anyone would be thrilled to receive one of these stunning red money packets.

Last but not least, I created an adorable little takeout box using the Cutie Pie Thinlits Dies (item 138273). I simply adjusted the box to make it look more like a takeout container than a piece of pie.

4

Keeping with my theme of gold and red, I added some gold embossing to the takeout container using the Delicate Details Stamp Set* (item 143314). Each year in the twelve-year Chinese zodiac cycle is represented by an animal and element. This year marks the year of the fire (or red) rooster. The Hey, Chick Stamp Set* (item 143328)—free with purchase during Sale-A-Bration—was perfect for adding in the iconic rooster image.

I hope you’ve enjoyed my project today—and a little lesson on Chinese New Year (if you weren’t familiar with it already). I apologize if I’ve made any errors in my research about this celebration and welcome you to leave a comment to fill me in on the facts and how you celebrate!

Allison Okamitsu
2017 Artisan Design Team

Save

Save

14. February 2017 · Comments Off on Happy Valentine’s Day! · Categories: Cards · Tags: , , , ,

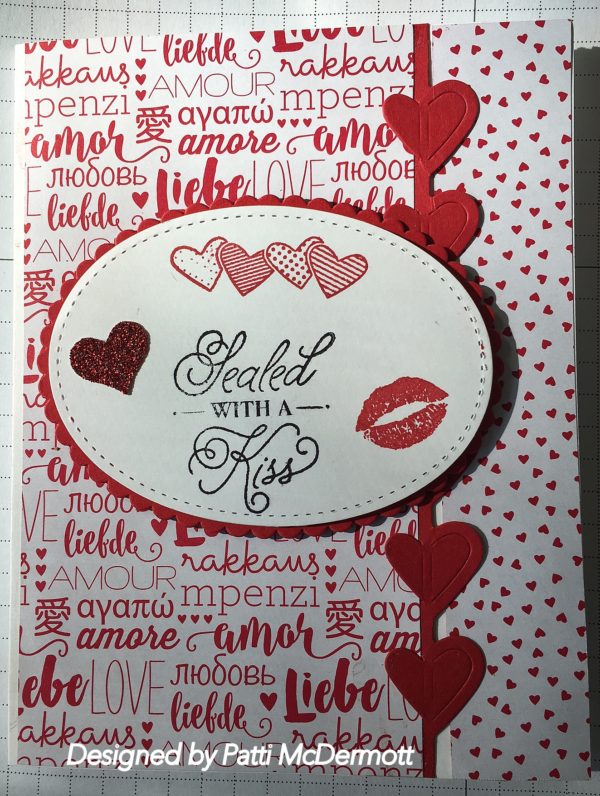
This card was created using the set Sealed with Love, and matching dies, Love Notes, page 14 & 15 of the OC.  Colors are real red and whisper white.  I used the Stitched layering oval dies and the Red Glimmer paper, page 175 of the AC.  The background DSP is Sending Love Paper Stack, also found on page 15 of the OC.  This set is so versatile and again the possibilities are endless.

Save

13. February 2017 · Comments Off on Blushing Bride Beauty · Categories: Cards · Tags: , , ,

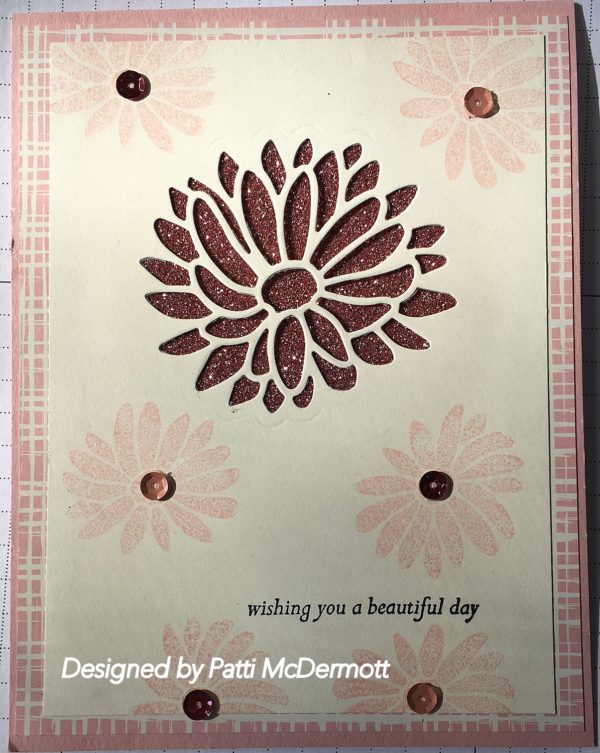
This card was created using the stamp set, Special Reason, page 42 of the OC with the matching dies, Sytlish Stems, same page.  You can buy this bundle and save 10% when buying them together. There are so many possibilites for this bundle.  IMHO, it is the BEST bundle in the entire OC.  I used Blushing Bride glimmer paper and the DSP is from the Playful Palette Paper stack, page 174 in the AC.

Save

Save

12. February 2017 · Comments Off on Hey Chick · Categories: Cards · Tags: , , ,

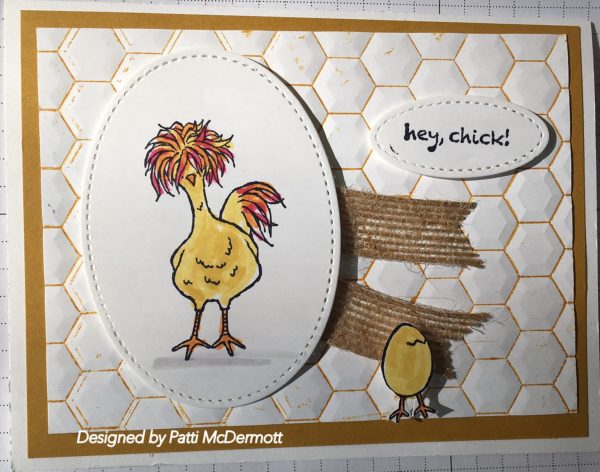
This has got to be one of my favs in the Sale-A-Bration Catalog.  I used the Hexagons Dynamic Embossing folder found on page 47 of the OC for the background by brayering the inside of the EF in Delightful Dijon ink.  I used the Stitched layering oval dies for the images and sentiment.  Whisper white CS and Delightful Dijon finished off the card.

Save

06. February 2017 · Comments Off on Carousel Fun! · Categories: Cards · Tags: , , ,

This card was created with the set Carousel Birthday, found on page 9 of the OC.   The DSP is from the Cupcakes & Carousels paper stack same page.  The cupcakes were cut out with the dies, Up & Away, page 10.  I used Peekaboo peach card stock and Calypso Coral Ink for the cupcake toppings.  This is a fun set with sentiments for both front and inside.  The sentiment I used on this card was from the set Lift me Up, page 10.

Save

Save

Save