30. August 2017 · Comments Off on · Categories: Cards

Texture and Ombre: A Perfect Combination

Are you loving the 2017–2018 Stampin’ Up! annual catalog as much as I am? I have been asked to choose my top five picks time and again, and to be honest, it changes every time as I discover new things I didn’t notice the first time around!

1

I decided to focus on two items that perhaps YOU may have missed when skipping through the catalog in your excitement! All three of my projects feature the same technique, texture and ombre, and the same stamp set, You’re Priceless (143760)—along with the coordinating Eclectic Layers Thinlits Dies (143774)—but I have changed them all slightly for different looks.

I can’t say enough about Sponge Brayers (141714). They make adding color to projects so quick and easy and they’re a lot more forgiving than a rubber brayer. They can also be cleaned just by rinsing under cold water. I urge you to try these great color applicators! I have also used two of the new 3D Dynamic Textured Impressions Embossing Folders on these cards. These new embossing folders create deep impressions on your card giving a more dimensional look than traditional embossing folders.

2

Using original Whisper White Cardstock (100730) and the Sponge Brayer, I sponged color on my card across the diagonal in Peekaboo Peach (141398), Powder Pink (144084) and Berry Burst (144083) ink. (Tip: Always start with your lightest color first. I only needed to use one sponge roller by moving from light to dark.)

I then ran this through my Big Shot Die Cutting Machine (143263) using the Ruffled Dynamic Textured Impressions Embossing Folder (143699) to add those gorgeous pleats over the card. Before I adhered this to my card, I spritzed the card with Clear Wink of Stella Glitter  (141897) and rubbing alcohol, which I mixed together in a Stampin Spritzer (126185). This made the whole card front so sparkly!

I then used the Heat Tool (129053) to heat emboss a sentiment using VersaMark ink (102283) and White Stampin’ Emboss Powder (109132) on Vellum Cardstock (101856). Die cut three diamond shapes from Whisper White Cardstock and adhere them to the card front –with some Iridescent Sequin Assortment (144212) sequins—using a Fine-Tip Glue Pen (138309).

3

I made my second card much the same way except for a few minor changes. The ink colors I used were Lemon Lime Twist (144086), Pool Party (126982), Bermuda Bay (131171), and Island Indigo (126986). I brayered these starting at the bottom of my card with the lightest ink and transitioning to darker inks as I moved toward the top. This time I ran my card through the Big Shot using the Hexagons Dynamic Textured Impressions Embossing Folder (143231) and die cut the diamond shapes from Dazzling Diamonds Glimmer Paper (135315), adding even more sparkle.

4

My last card was inspired by a gemstone called hematite, which is normally grey/black in color. I brayered along the length of the card front in Smoky Slate (131179), Basic Gray (140932), and Basic Black Archival (140931) ink. Instead of using die cuts on my card front, I stamped gem images from the You’re Priceless Stamp Set, first in Whisper White Craft ink (145406) on the dark side of the card and then in Smoky Slate ink on the white side of the card. I then ran this through my Big Shot again using the Hexagons Dynamic Textured Impressions Embossing Folder. I finished this card with the Metallics Sequin Assortment (144214) and a little Fine-Tip Glue.

I wish you could see the sparkle of these cards in person; it was tough to capture this in a photograph!

Paula Dobson
Artisan Design Team 2017

29. August 2017 · Comments Off on · Categories: Cards

The Icing on the Cake

When I was a little girl, my mom decorated cakes and had her own little business at home. I can remember trays of icing flowers ready for the next big wedding cake; I can remember her piping cake borders, quickly and seamlessly; and I can even remember her taking the time to teach me how to decorate, even though I was just a kid.

When I saw the Icing on the Cake Stamp Set (item 143664), it was like a childhood flashback. For the first time, I had to have a stamp set, and not because it was cute or stylish, but because it made my heart smile. It reminded me of happy moments.

I never did perfect those decorating skills and I definitely never became as good as my mom, but I learned enough along the way to bring a smile to my kids’ faces.

As soon as I got my stamp set in hand, I knew I wanted to make a 3D “cake”—a cake that could be kept, enjoyed, and even be calorie-free! So I decided to make a “slab cake” card package—the perfect gift for the person who has everything.

1

I made my “cake” with a Half Wide Stamp Case (item 127552). The “top” of the cake is stamped cardstock which I slid underneath the plastic sleeve on the outside. I used the Hand Lettered Alphabet Stamp Set (item 143744) for the “For you” greeting as It reminded me of chocolate and I thought it would coordinate perfectly. I added a little bit of extra dimension to the outside of the sleeve using the Pearl Basic Jewels (item 144219).

2

I made white paper trays for the body of the cake; the trays also conceal the cards and envelopes inside. Before permanently placing them, I made sure to stamp the cake’s piping all along the bottom edge.

The nice thing about this cake (besides being calorie-free), is that you don’t have to worry about what flavor the recipient likes! Inside are beautiful cake cards with coordinating envelopes. The cards are 3-1/2″ x 4″, allowing the coordinating envelopes, created with the Envelope Punch Board (item 133774), to fit in the case.

3

4

To add a variety of different themed cards to my card package, I flipped through the catalog in search of “script” handwritten greetings and I was amazed at how many would work perfectly! One example is the Milestone Moments Stamp Set (item 142954). I love that I was able to pair it up with the Icing on the Cake Stamp Set greetings.

5

Even though these cards are “cakes,” I couldn’t leave them without a little bling. So I added some “candy” to my cakes with the 2016–2018 In Color Glitter Acrylic Shapes (item 144218) and Pearl Basic Jewels.

6

7

8

I hope you enjoyed this calorie-free Icing on the Cake idea! And now, if you’ll excuse me, I need to go find a cupcake or something. All this cake talk is making me hungry!

Happy Creating!
Martha Inchley
2017 Artisan Design Team

Save

28. August 2017 · Comments Off on · Categories: Cards

Magical Unicorn Card and Treat Box

Hi, stampers! Mindy, here, and I’m bringing you a magical project today. I may be a “boy mom” but there’s no denying that unicorns are super popular right now. I do a lot of browsing on Pinterest and Instagram and they are everywhere! I was particularly inspired for this project by (of all things) . . . a picture of ice cream bars that looked like unicorns! Inspiration is everywhere!

I got to work on what I could use for a unicorn and did some image searches. I came across a lot of unicorn cakes and I had it! I knew I had to pull out the Celebration Thinlits Dies (143703)—my favorites from the catalog! I haven’t seen them used much, so I hope I can inspire you to give them a second look if you haven’t already. There are a lot of little steps to making this card and treat box, but it really was easy and totally worth it!

1

I happened to glance down, saw these markers next to each other, and I knew they would be perfect for this project. I used Emerald Envy and Sweet Sugarplum from the 2016-2018 In Color Stampin’ Write Markers (141393) and Powder Pink and Berry Burst from the 2017-2019 In Color Stampin’ Write Markers (144033). I splattered each one on some Watercolor Paper (122959) then lightly spritzed it with a Stampin’ Spritzer (126185). I love the effect! Don’t be afraid to splatter with your markers. I’m super picky about keeping my supplies in tip top shape and so far they are holding up well. All you need to do is gently flick the brush tip inside the cap over your paper.

2

I cut my cake from Whisper White Cardstock (100730) and trimmed off the top two layers as shown below. You’ll want to save the top layer to use for the ears. I cut a second cake from Powder Pink Cardstock (144244) for the cake stand. (Save the little pieces you usually pop out of the topper for the ears.) I trimmed both cake toppers so that the middle loop was gone and then I was able to use just a tiny bit of glue from the Fine Tip Glue Pen (138309) around the edges—where the pieces pop out on the pink cake—to keep them in place. You’ll want to layer the white piece over the pink one with a little more glue. After it dries, snip it in half and then you’ll be able to place your ears where you like them around your horn and flowers.

3

I used my Basic Black Stampin’ Write Marker (100082) to draw the eyes and eyelashes. You may want to practice on some scratch paper first. I added little blushing cheeks with the Powder Pink Classic Stampin’ Pad (144084) and a Blender Pen (102845). For the unicorn horn, a little bit of our Gold Foil Sheets (132622) cut into a small triangle fit the bill. I glued that to the back of my cake and moved on to cutting my flowers out. The flowers are actually meant to be the top or pom pom of the birthday hat in the Thinlit set but they make great flowers! I also cut some greenery out of the Lovely Laurel Thinlits Dies (143731) from Emerald Envy Cardstock (141415) and just snipped off a few leaves. I arranged the flowers and leaves to my liking and then adhered them. To add some glam, I placed a sequin from the Iridescent Sequin Assortment (144212) or Metallic Sequin Assortment (144214) in the center and then topped those with a Pearl Basic Jewel (144219).

4

I added my little unicorn to a tag cut from the celebration Framelits and simply tied a bow at the top with some Black Solid Baker’s Twine (141682). Looping a little Gold Metallic Thread (138401) behind the tag ties in the gold from the unicorn horn. A couple of more randomly placed sequins really pick up the fun colors. I added those with just a touch of our Fine Tip Glue.

I heat embossed the “have a” and “birthday” sentiments from the Thoughtful Banners Stamp Set (141614) using White Stampin’ Emboss Powder (109132), then cut them out. I stamped “magical” using  the Labeler Alphabet Stamp Set (141936) and Basic Black Stampin’ Archival Ink (140931) on Whisper White Cardstock and cut it out as well. I added them to my card with my very favorite product, our Mini Stampin’ Dimensionals (144108). They are fantastic for those little jobs and I’m happy I don’t have to try to cut regular Stampin’ Dimensionals (104430) in little pieces now! If you haven’t picked up a pack, I highly recommend you do!

5

I decided my unicorn needed a friend so I made a quick and cute treat box from our Clear Tiny Treat Boxes (141699). I cut a 2″ x 8″ liner from Whisper White and scored it at 2″, 4″, and 6″. I trimmed just a hair off each end to make it easier to slip in the box after I made my unicorn face in the same manner as the card. I also made my flowers in the same way and I used Mini Glue Dots (103683) to adhere them right to the box.

6

The two differences here are the horn and the ears. For the horn, I cut out the party hat from the Celebration Thinlits using our Gold Glimmer Paper (133719).

7

It’s a bit thicker and I seem to need to run it back and forth a few times to get it to cut through in my Big Shot Die Cutting Machine (143263). I only ran it though once on purpose so that the cutout parts would actually stay together. Just make sure to lift it very gently from the die so it stays together. For the ears, I simply cut them out. I also used my Blender Pen to put some Powder Pink ink on the insides. I adhered both the horn and the ears to the little flap that goes down inside the box and very carefully closed it.

8

I hope you enjoyed my magical project! And I hope that you’ll try to make your own unicorn! I’d love to see it if you do!

Mindy Bingamon
2017 Artisan Design Team

13. August 2017 · Comments Off on Artisan Team project · Categories: Cards

Layer It Up!

Hello, stampers! Today I want to share with you a card I made using the SUPER cute This Little Piggy Stamp Set (143922) and the Happy Birthday Thinlits Die (143700).

I’m a sucker for anything cute and the Little Piggy set jumped off the page of the new annual catalog and quickly had a big heart scribbled next to it.

1

I wanted to make a bigger impact with the Happy Birthday Thinlit, so I decided to die cut it six times from Basic Black Cardstock (121045), then layer and glue it using Multipurpose Liquid Glue (110755), one on top of the other, to create a much thicker sentiment.

2

It really does add dimension and makes a bigger statement. Try it for yourself! They look great on scrapbook pages too!

3

Next I stamped the little piggy holding the flower on Watercolor Paper (122959). I added the color using an Aqua Painter (103954) and Blushing Bride (131172), Melon Mambo (126948), and Old Olive ink (126953), then fussy cut the stamped image. I stamped, fussy cut, and colored the little flower that the piggy is holding twice.

I took another piece of Watercolor Paper, cut it to 4″ x 5″, and created a wash using the Aqua Painter and Pool Party ink (126982) for my background.

I adhered the Happy Birthday die cut using Multipurpose Liquid Glue, tucked the little piggy under the top right corner, and added the little flowers for a tiny splash of color. I stamped the Hip Hip Hooray sentiment from the Happy Birthday Gorgeous Stamp Set (143662) underneath the die cut embellishment using Tuxedo Black Memento ink (132708). Next I mounted this to a piece of Basic Black Cardstock before attaching it to my card base. It’s a simple but bold (cute!) card!

Katy Harrison
2017 Artisan Design Team

12. August 2017 · Comments Off on Ok! This is the last Christmas card for a while. · Categories: Cards · Tags: , , , ,

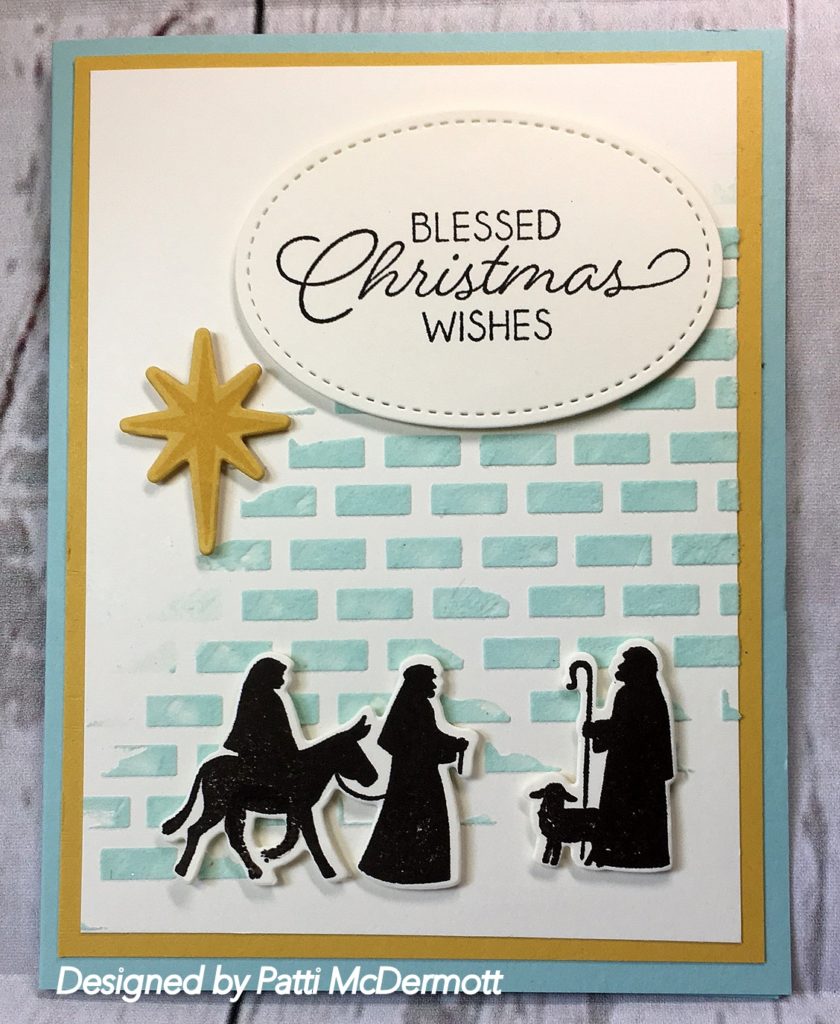
I love our new embossing paste and I wanted to show you another card used with it.  This set is also from the Holiday catalog, promise this is the last one for a while. It is called “Night in Bethlehem.”  This is a dynamic set and cannot wait to use it with different foils.  I also used the stitched shaped framelits for the sentiment.

Save

11. August 2017 · Comments Off on More of a sneak peek · Categories: Cards · Tags: , ,

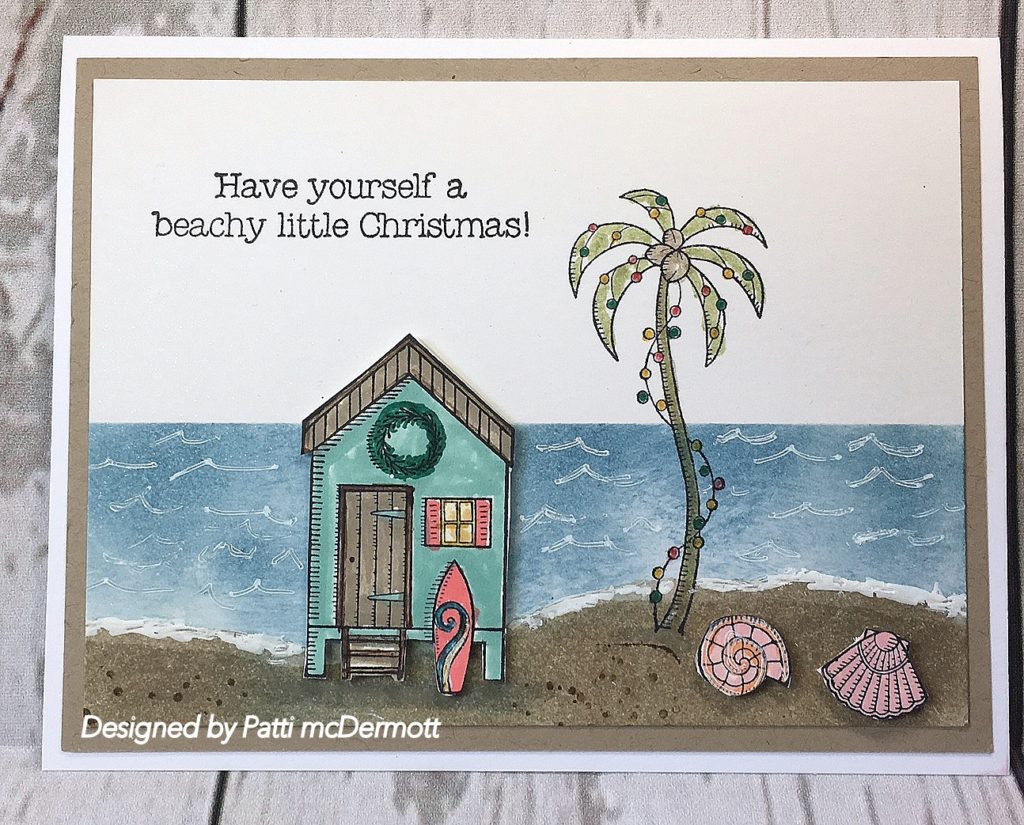
I know, it is only August, but the sets are so awesome, I can’t wait to start using them.  Isn’t this a great card if you live here near the coast?  This is another set from the Holiday catalog, called “Beachy Little Christmas!”  I love it and I will be using this a lot this year.

Save

10. August 2017 · Comments Off on Sneak peek · Categories: Cards · Tags: , , , ,

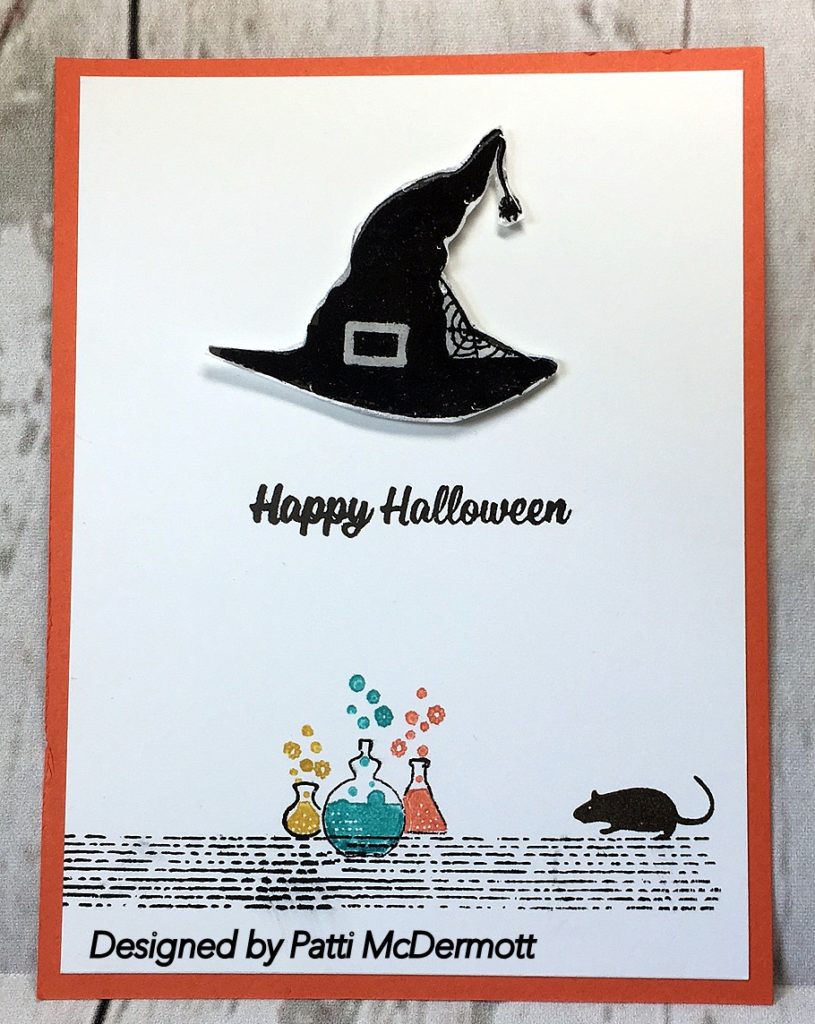
I had to add this Halloween card to because it was so much fun to make.  You are going to love using the new spooky stamps from the Holiday Catalog (HC) soon to be released in September.  The name of this set is Spooky Cat.  Oh!, and it comes with the cutest cat and matching punch if you bundle.  Love it!

Save

Save

09. August 2017 · Comments Off on Embossing paste card · Categories: Cards · Tags: , , ,

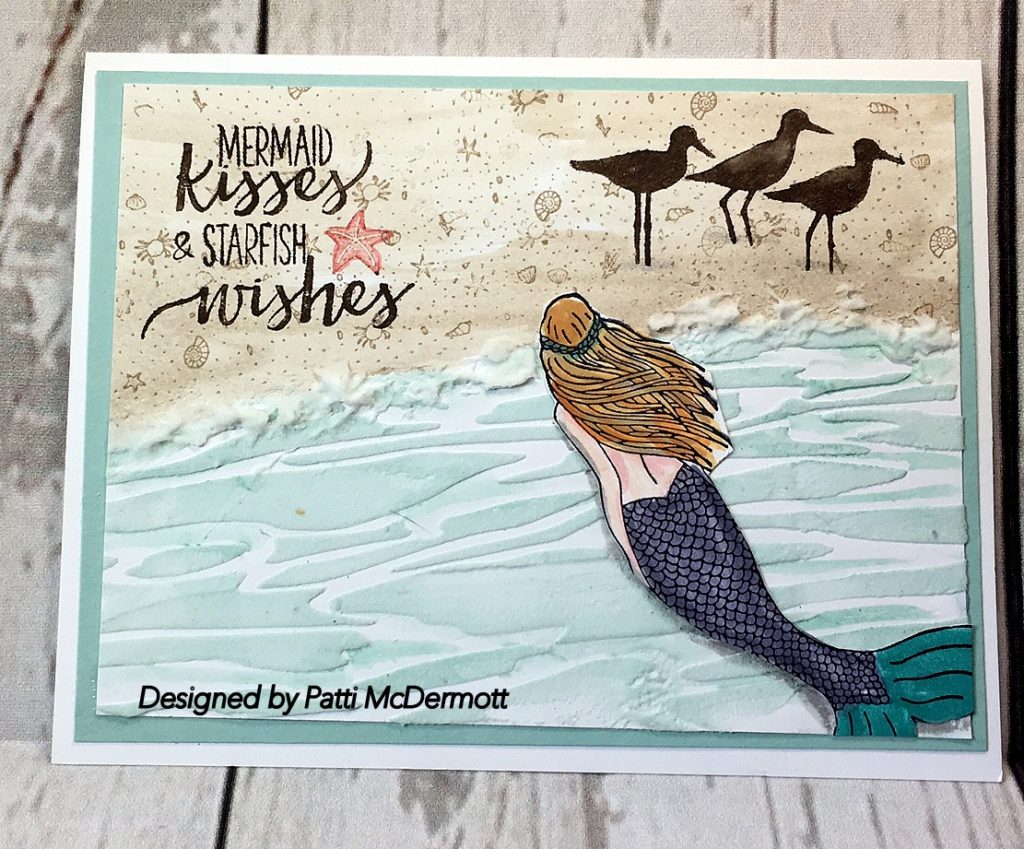
ON this card I used our new embossing paste.  I dyed it with soft sky reinker and used an old water stencil from my journaling supplies.  The stamp set I used is, Magical Mermaid, page 172, from the AC.  I love this set.  In addition, I used the birds from the stamp set, High Tide, page 140.  I love this paste because it dries so quickly.  Sand is done with crumb cake and layered on Soft Sky card stock.

Save

Save