31. August 2016 · Comments Off on Trick or Treat · Categories: 3D Items · Tags: , , , , , ,

From the HC, this 3D item is what we made at Camp on Saturday.  The DSP is Halloween Night Specialty paper and I cut the bag out with our Mini Treat Bag Thinlits, page 191 in the AC.  I used the Scalloped Tag Topper punch, page 186 to make the tag and decorated it with the stamps from Sweet Home.  The Bow is made from the new Halloween Night Baker’s Twine and fastened with the Gold Binder clips, page 177.  Imagine how cool this would be filled with candy for that special little Trick or Treater.
IMG_1241

Save

Save

Save

Save

30. August 2016 · Comments Off on My first Video · Categories: Cards

I was so nervous about this.  It like took me 8 days and 2 trips to the Apple store on King st to finish it.  Mo helped me upload it to you tube this evening.

30. August 2016 · Comments Off on Punch Bundle · Categories: Cards · Tags: , , , ,

These little guys are so darn cute.  They are from the stamp set, Cookie Cutter Christmas in the HC and so is the sentiment.  The DSP is Candy Lane Christmas and Dazzling Diamonds Glimmer paper.  I cut these guys out with the matching Punch, Cookie Cutter Builder, also in the HC.  You can buy both the stamp set and the punch as a bundle and get a 10% discount.  Great deal!
IMG_1240

Save

Save

29. August 2016 · Comments Off on Spooky · Categories: Cards · Tags: , , ,

The stamps I used to create this card are from the HC, Ghoulish Grunge and Jar of Haunts.  I used Clear embossing powder with Cherry Cobbler Ink on the jar.  In addition, I used the new DSP, Halloween Night Specialty paper.  The bats are from Sweet Home stamp set, also in the HC.
IMG_1232

Save

Save

28. August 2016 · Comments Off on Mix and Match · Categories: Cards · Tags: , , , ,

This card was created from both the annual catalog and the Holiday catalog.  The set Joyful Navity can be found in the AC on page 35 and the Copper Tree was made with the Merry Tags Framelits in the HC.  I used the copper foil paper and the Dazzling Diamonds Glimmer paper.  The DSP is from the collection, This is Christmas Specialty paper, page 172 and the card base is Kraft Cardstock, page 175.
FullSizeRender

Save

Save

Save

27. August 2016 · Comments Off on More Texture · Categories: Cards · Tags: , ,

I love this set, Touches of Texture, page 141, in the AC.  I used Pacific Point and emeral Envy for my colors.  I love that this set has so many different textures that you can add to your card.

When I created this card I did not realize that the sentiment had retired but I really do like the way it came out.  I used matching washi tape and ruched ribbon for embellishments.IMG_1238

Save

26. August 2016 · Comments Off on Home is where you park it! · Categories: Cards · Tags: , , ,

This is a card created with the set, Glamper Greetings from the HC.  The DSP is also from the HC and is called Candy Cane Lane.  I used a mask on the camper to create the water and sand.  The card base is our Kraft Cardstock from the AC, page 175.  What I like about this set is all the sentiments that come with it.  Lots of versatility.
IMG_1246

Save

Save

Save

25. August 2016 · Comments Off on Artisan Design Team Member · Categories: Cards

Watercolor Stamping Technique

Personally I’m a huge fan of watercolor techniques, and luckily there are many different techniques to choose from. Today I’m going to use the “watercolor stamping technique.” This is an easy technique which you can use for big background stamps like the one I’m going to use today, the Diagonal Stripe Stamp Set (item 141917).

Chantal de Kaste (1)

I started out with three different colors per card. For the blue one I picked Night of Navy (item 126970), Island Indigo (item 126986), and Pool Party (item 126982). For the pink/red one I used Real Red (item 126949), Watermelon Wonder (item 138323), and Blushing Bride (item 131172). The colors were selected because they range from dark to bright. When coloring the stamp, make sure that you do this with the stamp showing upwards so that you can see what you’re doing. Take the darkest ink pad and start inking the first stripe. Then do the same with the middle color but cover the next stripe first with a piece of paper to avoid contact with this color. Use the brightest color for the last stripe.

Chantal de Kaste (2)

Once the whole stamp is inked, use a Stampin’ Spritzer (item 126185) filled with water and spray it over the surface of the entire stamp. Then take a piece of Watercolor Paper (item 122959) cut to size, which you press onto the stamp using a Bone Folder (item 102300) so that it absorbs the ink. This is how you create a watercolor background using a stamp.

Now it’s time to add some text and embellishments to the background. I started off using the embossing tool technique with a stamp from the Swirly Bird Stamp Set (item 141749) and Versamark ink (item 102283). On one card I used White Stampin’ Emboss Powder (item 109132) and on the other Copper Stampin’ Emboss Powder (item 141636). I used the Heat Tool (item 129053) to melt the powder.

Chantal de Kaste (3)

The Sunshine Wishes Thinlits (item 141489) and the Swirly Scribbles Thinlits (item 141497) are used here with Whisper White Cardstock (item 100730) to decorate the card. Also, the sentiments from the aforementioned set are used with Blushing Bride Glimmer Paper (item 140550) and Silver Glimmer Paper (item 135314). The Silver Glimmer Paper is colored with Island Indigo marker (item 131262) to match the background.

Chantal de Kaste (4)

For the finishing touches I used the Handheld Stapler (item 139083), Basic Jewels Rhinestones (item 119246), and Silver Metallic Thread (item 138402).

Have fun with this technique!
Chantal de Kaste
Artisan Design Team 2015–2016

*Chantal de Kaste, one of our talented Artisan Design team members, is from the Netherlands.

24. August 2016 · Comments Off on More to do with Paper Pumpkin · Categories: Cards

August Paper Pumpkin: Bold Botanicals

We couldn’t wait for our subscribers to see this kit! We were so excited that we decided to reveal part of it at the beginning of the month. We don’t always do sneak peeks because we don’t want to spoil the surprise, but it’s fun to do a little teaser sometimes.

We let our Facebook fans decide what part of the kit to reveal—and their response was clear—the stamp set! What a great choice because this stamp set is simply amazing!  It features innovative designs for beautiful backgrounds and fun phrases for a variety of occasions.

PP_Aug_2016_Sneak_Peek

The rest of the kit is quite remarkable too! It’s full of embellishments like woodcut leaves and flowers, twine, burlap trim, mini clothespins, die-cut cardstock pieces, and watercolored backgrounds.

ppaugust_components_spot

There are three cards each of three different designs for a total of nine beautiful cards.

PP_august_main

And just to prove the versatility of this kit, here’s another card design that you could try using the components for the kit. With a stamp set like this and a variety of embellishments, there’s no stopping your creativity!

ppaugust_alt2

Add the pocket card to a Petit Café Gift Bag with a Gold Binder Clip and you’ll have a gift ready to for a special occasion.

ppaugust_alt3

You’re going to love using this stamp set over and over again. The bold floral background can be used in so many ways. Simply stamp and rotate it to create a gorgeous background and a simply elegant design. The style lends itself well to water coloring as featured on this card.

ppaugust_alt1

We can’t wait to see what you create with your Bold Botanicals kit. The refill kit is now available so you can keep on creating.

PP_BOGO_customer-blog-post-header

And, be sure to tell your friends about the Paper Pumpkin BOGO offer going on right now. First-time subscribers can buy their first month at regular price and get their second month FREE! Use promo code BOGO at PaperPumpkin.com by October 10.


Save

22. August 2016 · Comments Off on Father Christmas · Categories: Cards · Tags: , , ,

Okay this is my kinda stamp set.  I love it because it is so Vintage looking with the old time Santa Claus.  The images in this set are wonderful and so versatile.  Many ideas you can get from using this set.

Here I used Archival Black ink for the background and the Santa.  I then tinted it with our inks and blender pens.  What I like about the blender pens is that you do not have to put the ink on full strength, like you do with a marker.  Just start a little palette in the top of the ink pad container and use that.  You can make it as dark or light as you wish, which is what I did with this card.
IMG_1215

Save

Save

21. August 2016 · Comments Off on From Artisan Designed team member Jessica Williams · Categories: Cards

Gel Pocket Cards and More

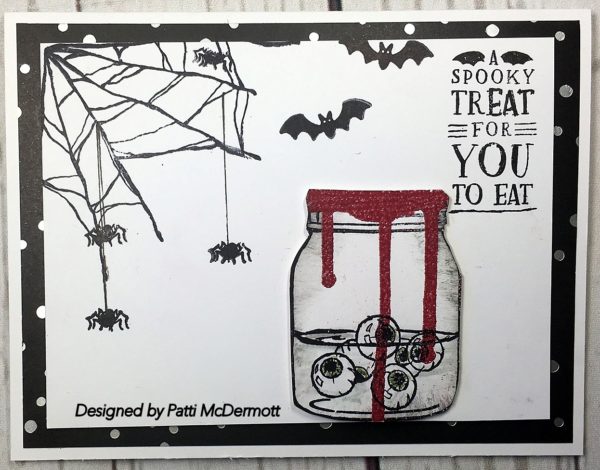
When I first laid eyes on the Jar of Love Stamp Set (item 141587), I knew there was a certain type of card I just had to make. I was just itching to get out the hair gel and some Classic Stampin’ Ink Refill and make a gel pocket card. You may have seen this technique before.

I found that the 2″x 8″ Cellophane Bags (item 141703) are the perfect size to use with the Everyday Jars Framelits Dies (item 141490). The width of the bag is just a little bigger than the jar opening, making it easy to create the gel pocket. Simply mix a spoonful of hair gel with whatever Classic Stampin’ Ink Refill color you’d like. I used Island Indigo and found that just one drop went a long way. Drop about a teaspoon-worth of colored gel into the cellophane bag and seal well with Tear & Tape Adhesive (item 138995).

Next, stamp your jar on cardstock and use the “inside jar” Framelit to cut out the center. Decorate the rest of the card as you wish and then adhere the gel pocket to the back of the cardstock. Adhere the card front to your card base using Stampin’ Dimensionals (item 104430) and you’re finished! I used this method to create the “Best fishes” card below.

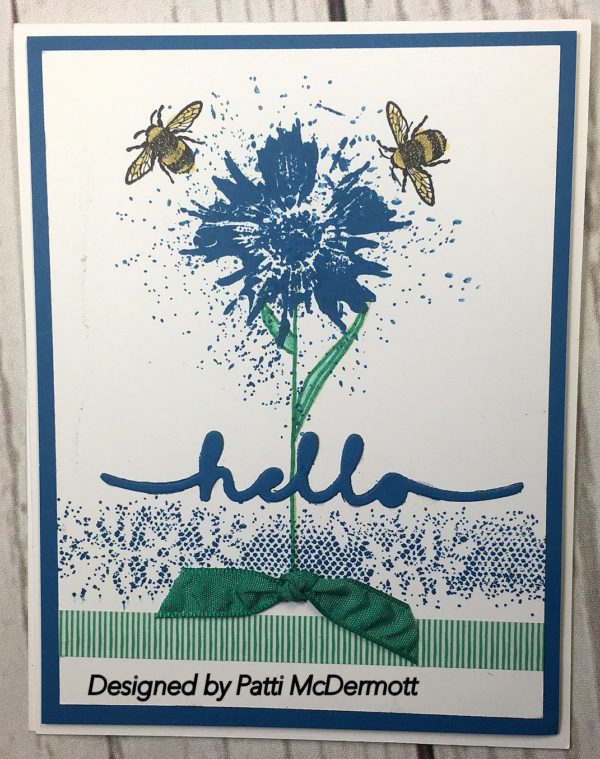
The flower card was created in a similar way but involved adhering the gel pocket only to the jar frame (which was a little trickier).

Creating these cards had me thinking about different things to do with the stamps and Framelits. My next idea was very similar to the gel pocket but instead of using hair gel, I used jam (that might be jelly to you). Yep, I took a spoonful of raspberry jam and popped it into my cello bag. I sealed it up well and created a card with it using the steps above. I did add an extra acetate Window Sheet (item 142314) which I added quilting to using my Bone Folder (item 102300). I couldn’t help but use another pun sentiment to finish it off.

By the time I had made this card, I was well and truly thinking about other pantry items to use (as well as other puns). I have quite a few dry goods stored in preserving jars and the first of those to be made into a card was crushed nuts. Instead of making a gel card, I switched over to shaker cards.

To make my nutty shaker card, I stamped and cut out a jar, then cut out the inside. You can cut out the center of the two smaller jars by being a little tricky with your Big Shot (item 143263) and positioning your cutting pads only where you want to cut. By doing the top of the jar first and then the bottom (or vice versa), you can cut a hole smaller than the Framelit itself.

Once you have your jar frame, cut two additional jars from the Window Sheet. Adhere one of the Window Sheet jars to the back of your cardstock frame. Then, using Foam Adhesive Strips (item 141825), create a wall around the edge of the frame. Add the crushed nuts, remove the adhesive strip backing, and adhere the second Window Sheet jar. You should now have a cute little jar shaker. Create your desired card design and adhere the shaker.

I followed these steps to create two more fun “dry goods” shaker cards.

Aren’t they fun? I bet you can think of some more fun ingredients and puns to create shaker cards with!

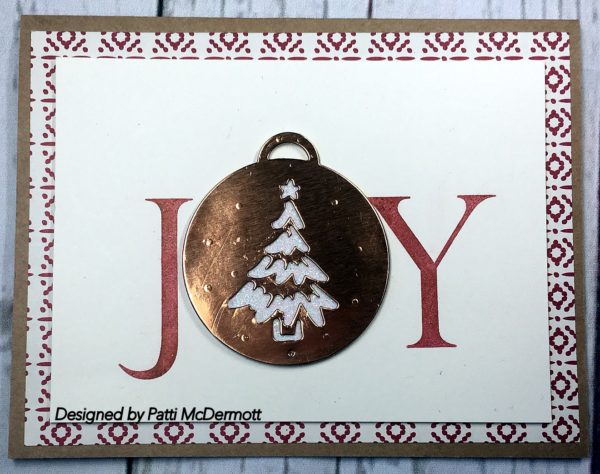
My final project to show is another shaker jar, but this time I created a tag instead of a card. I think the Jar of Love Stamp Set and coordinating Everyday Jars Framelits Dies are perfect for creating tags for all those gifts we like to give in preserving jars, especially during the holiday season. To create your tag, simply follow the steps for the shaker card above. For my wintery Christmas tag, I stamped and fussy cut an evergreen from the Lovely as a Tree Stamp Set (item 127793) and glued that to my second Window Sheet jar before adhering. The snow is Dazzling Diamonds Stampin’ Glitter (item 133751).

I hope you’ve been inspired to use your Jar of Love Stamp Set in fun and unique ways. I truly think the possibilities are endless with this set—as endless as the inspiration you’ll find by searching for preserving jar ideas on Pinterest!

Jessica Williams
Artisan Design Team 2015–2016

Save

20. August 2016 · Comments Off on Another sneak peek · Categories: Cards · Tags: , , ,

Here I used our DSP, Playful Palette, page 174 and the sentiment, Reason for the Season, page 34.
The pine cones and the pine branches are created with a set of Thinlits call Pretty Pines from the HC. I used Vary Vanilla Lace trim, page 179 and Sweet Sugarplum Ruched ribbon to embellish, along with a Mini Copper Pine cone attached.  The sequins are the new Pool Party and Sweet Sugarplum.  You are going to love the new embellishments in the new HC.
IMG_1160

Save

Save

Save

19. August 2016 · Comments Off on SUO Challenge 155 · Categories: Cards · Tags: , , ,

Another sneak peek.  This is the card I created for the Cute & Cuddly challenge for SUO.  I used the stamp sets Merry Mice and Father Christmas.  I just love using our inks to watercolor.  Here I used watercolor paper and stamped with our archival black ink.  The inks I used are Perfect Plum, Watermelon Wonder, Soft Suede, Pink Pirouette and Delightful Dijon.  Both of these sets are in the new Holiday catalog and will be available for sale on the 1st of September.  In addition, I used the gorgeous perfect plum Halloween Night Enamel Dots.  I am so happy with this new catalog.  It is, IMO, the best ever Holiday catty we have ever come out with.

For the background, I used, This is Christmas Specialty DSP and the Irresistibly Floral Specialty DSP, both found on page 172 in the annual catalog.
IMG_1213

Save

Save

18. August 2016 · Comments Off on It’s Snowing! · Categories: Cards · Tags: , , ,

I splattered this card with White Craft ink to make the snow.  The card was created with items from the new Holiday catalog.  The little houses were fussy cut from the beautiful DSP Candy Cane Lane.  The sentiment is from the set, Merry Mouse (how interesting is that)? The fence is cut with the Halloween Scenes Edgelits on Dazzling Diamonds Glimmer paper.
The tree is from last years set Peaceful Pines, page 28 and the matching dies, Perfect Pines, page 192.
IMG_1167

Save

17. August 2016 · Comments Off on Mixed it up from both catalogs · Categories: Cards · Tags: , , ,

Here I did use a stamp from the HC (brick wall), from the set Ghoulish Grunge, which I hope stays on as a great texture stamp set.  It has wonderful images great for using on cards other than Holiday related.
I used the stamp set, Flower Shop, page 105, and the sentiment from the set, Suite Sayings, page 104 where I used the Tags & Labels Framelits, page 193. In addition,
I used the Copper metallic Thread, page 178 and the Very Vanilla Lace trim, page 179.  The Inks used were Sahara Sand, Crumb Cake and Perfect Plum.
The flowers are embellished with the enamel Halloween dots and Copper Foil (HC), and Flourish Thinlits, page 194.

IMG_1209

Save

Save

Save

Save

16. August 2016 · Comments Off on Halloween Peek · Categories: Cards · Tags: , , , ,

This card is created with the Edgelits, Halloween Scenes, from the new HC.  The sentiment is actually from the set, Glamper Greetings, and with a Thinlit dies from Home Sweet Home.  The DSP is new also and that is called Halloween Night Specialty.  Note the house on the bottom is fussy cut from same DSP.  So versatile.
IMG_1211

Save

15. August 2016 · Comments Off on Fun with Swirly Birds · Categories: Cards

14. August 2016 · Comments Off on Sneak Peek of Christmas package · Categories: 3D Items · Tags: , , ,

This is a stamp from the new Holiday Catalog (HC).  Y’all are going to love this new catty.  It is better than ever.  If you thought that nothing could be better than the last one, think again.  You should be getting yours by September.  I will be posting samples of new sets until it comes out on September 1st.  That way you will have a good idea of what interests you.  Now, you know, I am not going to have all the sets and embellishments but enough to keep you going.  This little moose is from the set is Cookie Cutter Christmas.  The DSP is from the AC, This is Christmas Specialty on page 172.
IMG_1204

Save

Save

13. August 2016 · Comments Off on Fancy Flowers · Categories: Cards · Tags: , , ,

I created this card using the images from the set, Flower Shop, page 105 with the matching Pansy punch, page 187.  I was really in a punch type mood all this week.  Maybe it was because I rec’d my new goodies last week that included new punches and decided that I haven’t used my old ones in awhile.
The leaves are cut out with the Framelits, Botanical Builder found on page 194 and stamped with the set Botanical Blooms, page 142.  I added Enamel Shapes, page 177, to the center of the flowers.Colors used were Burmuda Bay, Pumpkin Pie, Crushed Curry, Old Olive and Basic Black Achrival Ink.
The background paper is from Pop of Pink Specialty DSP, page 172.  In addition, I added the new Black Metallic thread, page 178, behind the sentiment, found on page 86 with the Tin of Stamps set.
IMG_1158

Save

Save

12. August 2016 · Comments Off on My own Foxy Friends Cased · Categories: Cards · Tags: , , ,

Last week I featured this same card a little differently.  I used a different pattern of the DSP, A Little Foxy Paper Stack, page 174.  Here I used the colors Watermelon Wonder, Basic Gray and Smokey Slate.  In addition, I added our beautiful Rhinestone Basic Jewels.  The circle was cut with our new Layered Circle Famelits, page 193, and I replaced the ribbon with paper.
IMG_1155

Save

Save

Save

11. August 2016 · Comments Off on Semi-cased Congrats Card · Categories: Cards · Tags: , , ,

I got the idea for this card from the gallery in Stampin’ Connection.  I had saved this to my favorites on my Mac, but I cannot remember who the demo was.  If you know, please let me know so I can give her credit.  I have changed most of the stamps used, and the sentiment, except for Butterfly Basics, page 113, and Flower Shop, page 105, and colors have been cased.  Grateful for the inspiration.
IMG_1151

Save

Save

10. August 2016 · Comments Off on Birds and Blooms Thinlits (SUO Challenge) · Categories: Cards · Tags: , , ,

Yes, I love these Thinlits also, found on page 194.  Of course, the first time I saw this stamp set, Best Birds, page 53, I knew I HAD TO HAVE IT!  There is so much you can do with this set and the matching Thinlits.
I watercolored the bird with Early Espresso, Crumb cake and Tangerine Tango.  Other colors used were Bermuda Bay and Old Olive.
You can get a 10% discount on both the set and Thinlets if you buy them as a bundle.  Can’t beat that for this very versatile bundle.
IMG_1150

Save

Save

Save

09. August 2016 · Comments Off on Classic Birthday! · Categories: Cards · Tags: , , , ,

Lovely As a Tree, page 130, is such a great stamp set and I hope Shelli keeps her word and NEVER retires this set.  I used it here in the background.  I masked the truck to add the trees.  Stamp set used is Country Livin’ page 131.  Colors used are Marina Mist, Crumb Cake, Soft Suede, Early Espresso and Old Olive.  The banner is from the stamp set, Birthday Banners, page 15 and the Guy Greetings, page 114.  This is great masculine card. You can find the Framelits, Bunch of Banners on page 193.
IMG_1154

Save

Save

08. August 2016 · Comments Off on Design Team Member, Marisa Gunn · Categories: Cards

Mixing Texture Stamps and Watercolor Stamping

Have you seen the new Touches of Texture Stamp Set (item 143251)? It’s filled with several beautiful line art stamps as well as different filler and texture stamps. I thought it would be fun to use a watercolor stamping technique and some simple layering to make a set of note cards and a coordinating gift bag to share with you today.

1

I started with the Whisper White Note Cards & Envelopes (item 131527). I stamped the splatter texture stamp in Crushed Curry ink (item 131173). Then I added the striped tape from the Affectionately Yours Designer Washi Tape (Item 141635). I also added a piece of Crushed Curry Cardstock (item 131199) that I cut with the washi tape die shape from the Mini Treat Bag Thinlits Dies (item 137547) and adhered it above the tape. Next, I added a few wrapped rounds of the Basic Black Metallic Thread (item 141695).

4

For the watercolor stamping technique, follow the pictured steps below.

  1. Stamp the outline image in Basic Black Archival ink (item 140931) on Watercolor Paper (item 122959). Punch out using the 2″ Circle Punch (item 133782).
  2. Spray the image with water using a Stampin’ Spritzer (item 126185).
  3. Ink the flower filler image in Crushed Curry ink, then roll the edges in Watermelon Wonder ink (item 138323).
  4. Stamp on the wet watercolor paper and let the ink bleed naturally. The watercolored images look terrific with all of the other textures from the stamp set!

Adhere the watercolor piece to the card using Stampin’ Dimensionals (item 104430).

6

All of the greetings from the cards are images from the Love & Affection Stamp Set (item 141545) stamped in Tuxedo Black Memento ink (item 132708). I used Flirty Flamingo ink (item 141397) for the linen texture stamp, Flirty Flamingo Cardstock (item 141416) for the die cut, and the floral tape from the Affectionately Yours Designer Washi Tape. The ink colors I used here to stamp on the watercolor piece were Flirty Flamingo ink and Cucumber Crush ink (item 138324).

5

I also decided to make some custom envelopes for these cards using the new 2015–2017 In Color Envelope Paper (item 141697) and the Envelope Punch Board (item 133774). You can also see below a close-up of the card front and how all the textures work together to add interest to a simple card.

7

The last card uses Dapper Denim ink (item 141394) and Cucumber Crush ink which were stamped with two of the watercolor texture stamps over the dragonfly stamp. The die cut tape piece is cut from Cucumber Crush Cardstock (item 138335).

3

This card set would make a great gift for someone, so I created a gift bag to hold the cards and envelopes for that purpose. I started with the Glassine Gift Bags (item 141700). I cut a piece of Whisper White Thick Cardstock (item 140272) to 2″ wide using the Stampin’ Trimmer (item 126889) and then punched it using the Banner Triple Punch (item 138292). I stamped it with the lacy image using Flirty Flamingo ink, then added the striped tape, another die cut taped piece of Crushed Curry Cardstock, and more Basic Black Metallic Thread.

2

The colors for the watercolor piece are Flirty Flamingo, Watermelon Wonder, and Crushed Curry ink. The small greeting is from the Thoughtful Banners Stamp Set (item 141614). I clipped the tag to the bag with Gold Binder Clips (item 141673).

10

Well, I hope you enjoyed these samples and that you give the “watercolor stamping” technique a try. It’s perfect to add texture, color, and interest to your next stamping project!

Marisa Gunn
Artisan Design Team 2015–2016


Save

06. August 2016 · Comments Off on Cute Baby Cards from SU · Categories: Cards

It’s been a busy week, but as I look back, there’s not a whole lot worth blogging about, so I’ll share a couple of cute cards that I’m sending to congratulate parents of new babies. Enjoy!

Save

Save

06. August 2016 · Comments Off on Coming up for air! · Categories: Cards · Tags: , ,

I created this card with the sets, Seaside Shore, page 93 and You’re Sublime, page 80.  In addition,  I used the light house found in the set From Land to Sea, page 98.  Colors I used are Marina Mist, Soft Sky, Crumb Cake, Smoky Slate, Basic Gray and Pink Pirouette.
The sentiment is from the set, Endless Birthday Wishes, Page 22.  I used Vellum card stock, Marina Mist and Heavy Whisper White card stock.
IMG_1148

Save

Save

04. August 2016 · Comments Off on Another Fox Card · Categories: Cards · Tags: , , ,

We made this at our camp on Saturday and everyone loved it.  How can you not love a little critter like this?  Colors I used are Calypso Coral and Pool party.  The images are stamped from the set, Foxy Friends, page 57.  I cut the window out with our new layered circle framelits, page 193.  The paper is from A Little Foxy DSP 6″ X 6″ paper stack, page 174.  I finished it off with the new 5/8″ burlap ribbon, page 178.
IMG_1144

Save

03. August 2016 · Comments Off on Seaside Shore · Categories: Cards · Tags: , , , ,

The sentiment from this set can be found on page 93.  I decided to create this card using the beautiful DSP, By the Shore, page 173.  I used Calypso Coral card stock and Mint Macaron 3/8″ sheer linen ribbon, page 178.  This is one of those cards that I consider a CAS (clean and simple).
IMG_1138

Save

02. August 2016 · Comments Off on Stamp Camp Card · Categories: Cards · Tags: , , ,

This was one of the cards we made at camp this past Saturday.  I used very vanilla card stock and stamped the background with our Watercolor wash stamp, page 124 in pink pirouette.  I used the washi tape, playful palette found on page 179.  The sentiment is from the stamp set, Tin of Cards, page 86.  I cut the flowers and leaves out in pink pirouette, Sweet Sugarplum, and basic black Card Stock with the Botanical Builder Framelits, page 194.
IMG_1130

Save

01. August 2016 · Comments Off on Thank you card · Categories: Cards · Tags: , , ,

The stamp set used on this card is the hostess set, Love you lots, page 199.  The DSP is the beautiful Paper, Fruit Stand, page 173.  One of my favs in the new catalog.  I used the beautiful very vanilla lace trim, page 179 and the Pearl Basic Jewels, page 177.  I cut the ovals out with our new layered oval Framelits, page 193.  The colors I used were Watermelon Wonder and Basic Black.
IMG_1141

Save

Save